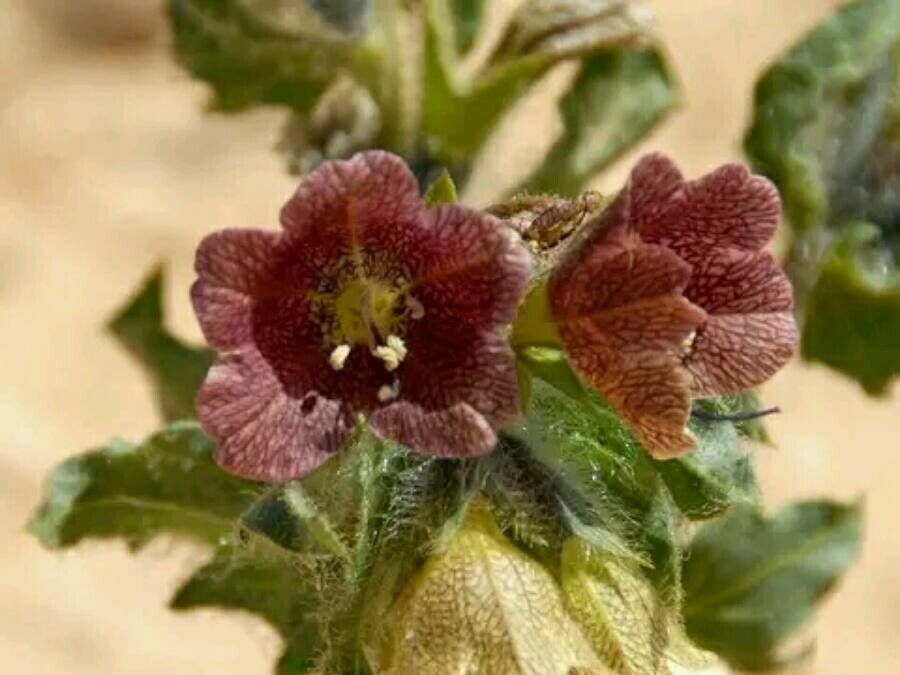
Hello, fellow plant lovers! Today, we’re diving into the wonderful world of Hyoscyamus reticulatus, also known as Netleaf Henbane. If you’re drawn to the intriguing beauty of unusual foliage and want a plant that sparks conversation in the garden, this is one you’ll adore. Its intricate, net-like leaves and unique, trumpet-shaped flowers are truly captivating. Propagating this gem might seem a little daunting at first glance, but I promise, with a little guidance, it’s a very rewarding journey. For beginners, I’d call it moderately challenging – not impossible, but it does appreciate a little extra attention.
The Best Time to Start
When it comes to Hyoscyamus reticulatus, the sweet spot for propagation is late spring to early summer. This is when the plant is actively growing and has plenty of energy to dedicate to developing new roots. Starting too early, when growth is still a bit sluggish, can make for a slower start. Waiting until mid-summer, when things can get quite hot and dry, can also be tricky. Aim for that period when days are getting longer and temperatures are consistently warm but not scorching.
Supplies You’ll Need
Before we get our hands dirty, let’s gather our tools:
- Sharp Pruning Shears or a Clean Knife: For making clean cuts.
- Rooting Hormone (Optional but Recommended): A powder or gel to encourage root development.
- Well-Draining Potting Mix: I like a blend of equal parts peat moss, perlite, and a touch of compost. Sieving it ensures no large chunks hinder delicate roots.
- Small Pots or Seed Trays: Clean pots are crucial to prevent disease.
- Clear Plastic Bags or a Propagator Lid: To maintain humidity.
- Watering Can with a Fine Rose: For gentle watering.
- Labels: To keep track of your new plants and when you started them!
Propagation Methods
While Hyoscyamus reticulatus can be grown from seed, I find stem cuttings to be the most reliable and satisfying method for most gardeners.
Stem Cuttings
-
Take your cuttings: In late spring or early summer, select a healthy, non-flowering shoot from your mature plant. Using your sharp shears or knife, make a clean cut just below a leaf node (where a leaf attaches to the stem). Aim for cuttings about 4-6 inches long. Remove the lower leaves, leaving only the top 2-3 to reduce water loss and prevent rot.
-
Prepare the cuttings: If you’re using rooting hormone, dip the cut end of each stem into the powder or gel. Tap off any excess.
-
Plant your cuttings: Fill your small pots with your well-draining potting mix. Make a small hole in the center with a pencil or your finger. Gently insert the cut end of the stem into the hole, ensuring at least one leaf node is buried beneath the surface. Firm the soil gently around the stem.
-
Create a humid environment: Water the soil thoroughly but gently. Then, cover the pots with a clear plastic bag (supported so it doesn’t touch the leaves) or a propagator lid. This traps moisture and creates the humid environment cuttings need to root.
-
Provide the right conditions: Place the pots in a warm spot with bright, indirect light. Avoid direct sun, which can scorch the delicate cuttings and dry out the soil too quickly.
The “Secret Sauce” (Pro Tips)
Here are a couple of tricks I’ve learned over the years that really make a difference with Hyoscyamus reticulatus:
- The “Bottom Heat” Trick: While not an absolute necessity, placing your pots on a heating mat designed for propagation can significantly speed up root development. It mimics the warmth of spring soil and encourages those roots to start reaching out. Be sure to check the moisture regularly if you’re using one, as they can dry out the soil faster.
- Don’t Overwater, but Don’t Let Them Dry Out: This is a fine balance. The goal is consistently moist soil, not soggy. Check the soil moisture daily by gently poking your finger in. If the top inch feels dry, give it a gentle watering. If it feels too wet, ensure good drainage and perhaps air out the propagator a bit more.
Aftercare & Troubleshooting
Once you see new growth appearing – tiny leaves unfurling or a gentle tug on the cutting meeting resistance – rejoice! This means roots are forming.
- Acclimatize: Gradually remove the plastic bag or propagator lid over a few days to help your new plants adjust to normal humidity.
- Potting Up: Once the cuttings have a decent root system (you might see roots peeking from the drainage holes), you can carefully transplant them into slightly larger pots with fresh potting mix.
- Watering: Continue to water consistently, allowing the soil to dry slightly between waterings.
- Light: Gradually introduce them to more light, eventually full sun if that’s where your mature plant thrives.
The main thing to watch out for is rot. If your cuttings turn black and mushy at the base, or if the leaves yellow and wilt despite consistent watering, that’s usually a sign of too much moisture and poor air circulation. If this happens, remove the affected cuttings immediately to prevent it from spreading. Sometimes, it’s a matter of adjusting your watering routine or ensuring better air flow around your propagation setup.
A Little Patience Goes a Long Way
Propagating plants is an act of hope and patience. Don’t be discouraged if not every cutting takes. Each attempt is a learning experience. Enjoy the process of nurturing these new little lives, and soon you’ll have a garden bursting with the unique charm of Hyoscyamus reticulatus. Happy gardening!
Resource:
https://identify.plantnet.org/k-world-flora/species/Hyoscyamus%20reticulatus%20L./data