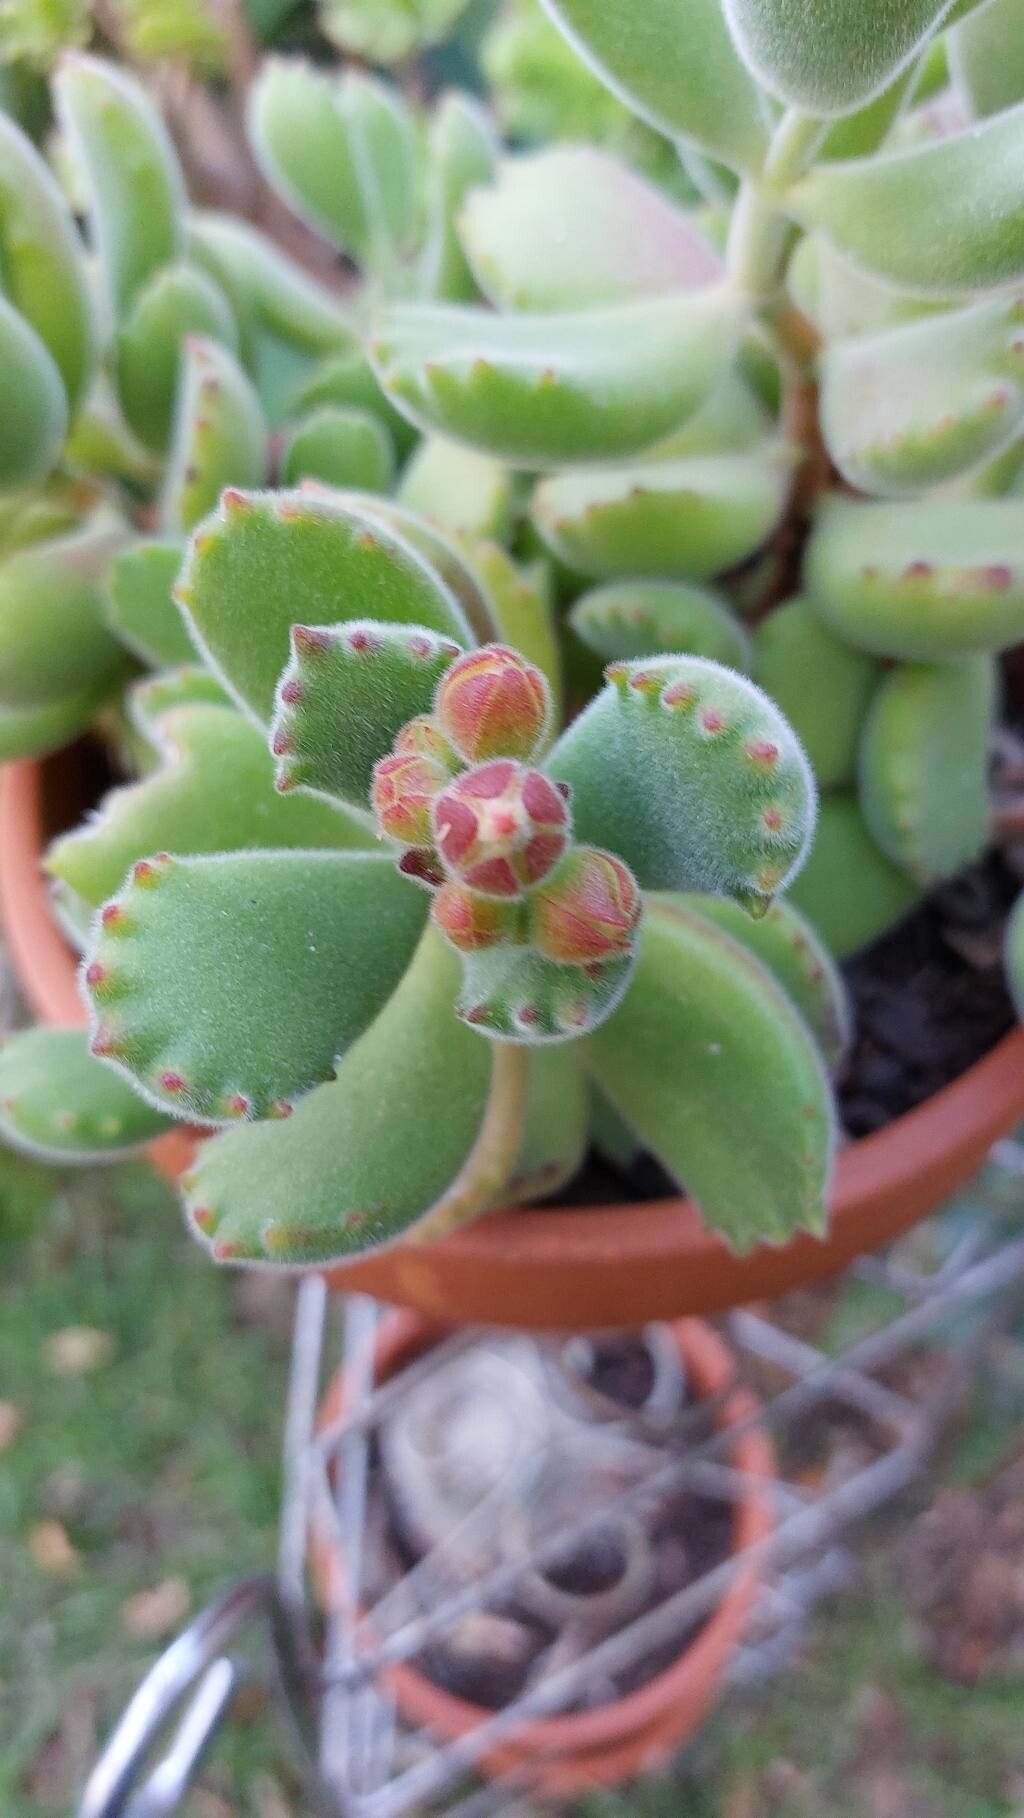
Oh, hello there, fellow plant lover! It’s so good to have you here. Today, I want to talk about a plant that’s stolen a little piece of my heart over the years: the Cotyledon tomentosa, or as many affectionately call it, the “Bear’s Paws.” You know, those fuzzy, chubby leaves that look like little bear toes reaching out? They’re just darling, aren’t they?
Propagating these velvety beauties is a journey I find incredibly rewarding. You get to watch new life spring forth from just a tiny piece of the parent plant. And for those of you just starting out with succulents, I’d say Bear’s Paws are a pretty friendly choice. They’re not typically fussy, which makes them a great one to try your hand at propagation with.
The Best Time to Start
For the best chance of success with your Bear’s Paws cuttings, aim for the active growing season. This usually means late spring through summer. The plant is full of vigor then, and whatever you propagate will have plenty of energy to put into developing roots. You can also have some luck in early autumn, but the hotter months are generally ideal.
Supplies You’ll Need
Gathering your tools beforehand makes the whole process smooth sailing. Here’s what I always have on hand:
- Sharp, clean pruning shears or a sharp knife: For making clean cuts that heal well.
- Rooting hormone (optional, but helpful): Especially good for encouraging faster root development.
- Well-draining potting mix: I like a commercial succulent or cactus mix, or I make my own with equal parts potting soil, perlite, and coarse sand.
- Small pots or propagation trays: Terra cotta pots are great as they breathe and help prevent overwatering.
- A spray bottle: For lightly misting.
- Newspaper or a tray: To catch any excess soil.
Propagation Methods
There are a couple of really effective ways to create more Bear’s Paws. I usually gravitate towards stem cuttings, as they give you a good head start.
Stem Cuttings
This is my go-to method. It’s straightforward and usually yields great results.
- Select a healthy stem: Look for a mature stem on your Cotyledon tomentosa that has at least a few sets of leaves.
- Make the cut: Using your clean pruners or knife, cut the stem just below a leaf node. A node is where leaves emerge from the stem. Aim for a cutting that’s at least 3-4 inches long.
- Remove lower leaves: Gently pull off the bottom 1-2 sets of leaves. This exposes the node where roots will form. Don’t be afraid to get a little firm here; the leaves should pop off fairly easily.
- Let it callus: This is a crucial step! Place the cuttings in a dry, well-ventilated spot away from direct sunlight for 3-7 days. You want the cut end to dry out and form a protective callus. This prevents rot when you plant it.
- Apply rooting hormone (optional): Once callused, dip the cut end into rooting hormone, tapping off any excess.
- Plant the cuttings: Fill your small pots with your well-draining mix. Make a small hole in the center with your finger or a pencil and insert the callused end of the cutting about an inch deep. Firm the soil gently around it.
- Water lightly: Give the soil a very light watering. You don’t want to drench it.
Water Propagation (A Less Common, but Fun Method)
While I prefer soil for Bear’s Paws, some folks enjoy watching roots grow in water.
- Prepare your cutting: Follow steps 1-3 above for selecting and preparing your stem cutting.
- Place in water: Put the cutting in a glass or jar of clean, room-temperature water. Make absolutely sure that no leaves are submerged in the water. Only the cut end should be in contact with the water.
- Location: Place the container in bright, indirect light.
- Change water regularly: Change the water every few days to keep it fresh and prevent bacterial growth.
- Watch for roots: You should start to see tiny roots emerge from the cut end. Once the roots are about an inch long, you can plant it in soil following step 6 from the stem cutting method.
The “Secret Sauce” (Pro Tips)
Here are a couple of little tricks I’ve learned that can really make a difference:
- Don’t rush the callus: I know it’s tempting to plant your cuttings right away, but that callus is your best defense against rot. Seriously, give it time!
- Bottom heat is your friend: If you can, place your pots on a seedling heat mat. This gentle warmth from below encourages faster root development and is especially helpful if your house is a bit on the cooler side.
Aftercare & Troubleshooting
Once you see signs of new growth or feel a bit of resistance when gently tugging on the cutting (that’s a sign of roots!), you’ve succeeded!
- Watering: Treat your new propagation just like a mature Bear’s Paws. Water only when the soil is completely dry. Overwatering is the quickest way to kill a new succulent.
- Light: Keep it in bright, indirect sunlight. Direct sun can scorch tender new growth. As it establishes, you can gradually introduce it to more light.
- Signs of trouble: The most common culprit is rot, which looks like mushy, black stems or leaves. This is almost always due to overwatering or a lack of that crucial callus. If you see rot, you might have to trim off the rotted portion and let the healthy part callus before trying again. Sometimes, cuttings just don’t take, and that’s okay too!
A Little Encouragement to Close
So there you have it! Propagating your Cotyledon tomentosa is a wonderful way to expand your collection or share these delightful plants with friends. Be patient, enjoy the small victories, and don’t get discouraged if every single cutting doesn’t make it. Gardening is a continuous learning process, and I promise, the satisfaction of nurturing new life is absolutely worth it. Happy propagating!
Resource:
https://identify.plantnet.org/k-world-flora/species/Cotyledon%20tomentosa%20Harv./data