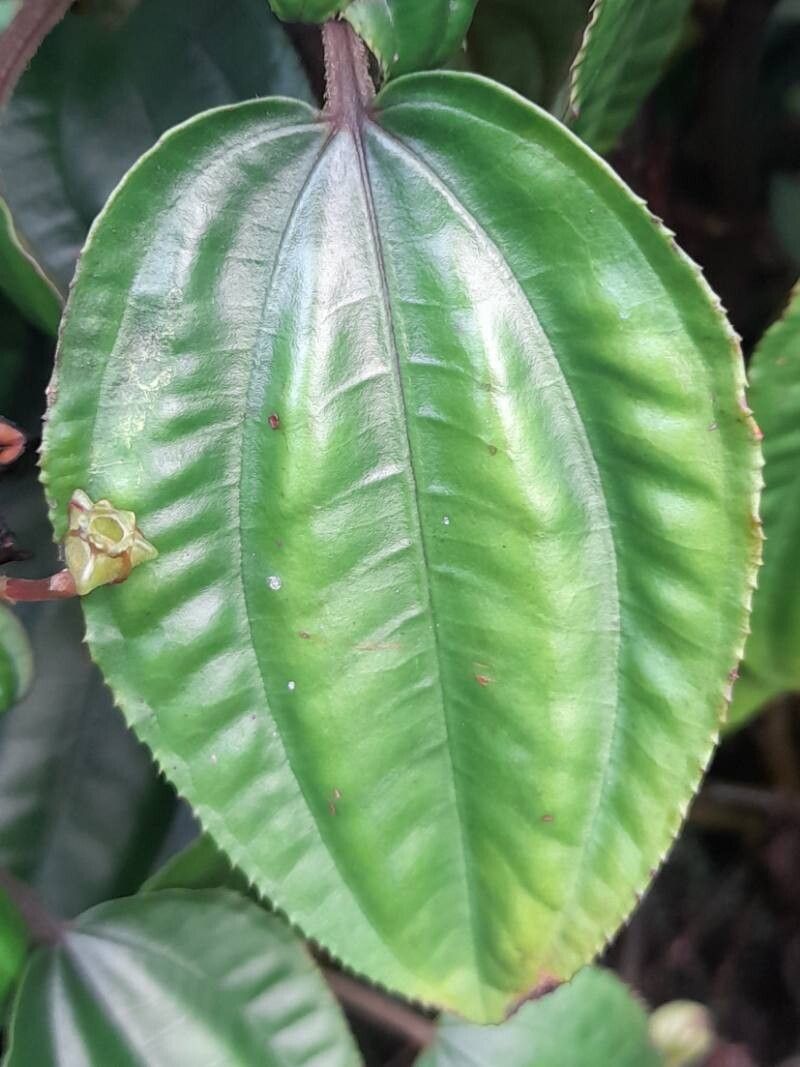
Oh, hello there! Pull up a chair. I’m so glad you’re interested in Bertolonia mosenii. It’s such a wonderfully rewarding plant to grow, and I can’t tell you how much joy I get from sharing them with friends – or just having more of these beauties for myself! Their velvety leaves, often with intricate patterns, are just mesmerizing. If you’re looking for a plant that adds a touch of the exotic to your indoor jungle without being overly fussy, Bertolonia mosenii is a fantastic choice.
Now, about propagating it. For beginners, I’d say Bertolonia mosenii is moderately easy. It’s not an “stick a twig in dirt and watch it go” kind of plant, but with a little attention to detail, you’ll be successful. The reward of seeing a tiny sprig transform into a flourishing plant is truly special, giving you a deeper connection with your greenery.
The Best Time to Start
The absolute best time to propagate Bertolonia mosenii is during its active growing season, which is typically from spring through early fall. This is when the plant has the most energy stored up for new growth, making it more receptive to rooting. You’ll want to take cuttings from healthy, vigorous stems that are actively producing new leaves. Trying to propagate when the plant is dormant in winter will likely lead to disappointment.
Supplies You’ll Need
Here’s what I usually have on hand for a propagation session:
- Sharp, clean pruning shears or a craft knife: For making clean cuts. A dull tool can crush the stem, making it harder to root.
- A rooting hormone powder or gel (optional but recommended): This really gives your cuttings a leg up, encouraging faster and stronger root development.
- Well-draining potting mix: I like to use a mix of equal parts peat moss or coco coir, perlite, and vermiculite. This keeps things airy and prevents soggy soil, which is a death sentence for many cuttings.
- Small pots or trays: Clean propagation pots or even small nursery pots work perfectly.
- Plastic bag or a clear plastic dome: To create a humid environment for your cuttings.
- Watering can with a fine rose or a spray bottle: For gentle watering.
- A small label and a marker: To keep track of what you’ve propagated and when.
Propagation Methods
Bertolonia mosenii is wonderfully suited to stem cuttings, and it’s my go-to method. It’s straightforward and generally yields great results.
Stem Cuttings:
- Select a healthy stem: Look for a stem that is at least 4-6 inches long and has several sets of leaves. Avoid stems that are too thin or woody.
- Make the cut: Using your sharp pruning shears or knife, make a clean cut just below a leaf node. A leaf node is that little bump where a leaf attaches to the stem. This is where new roots will emerge.
- Prepare the cutting: Gently remove the lower leaves from the stem, leaving only 2-3 sets of leaves at the top. If any of the remaining leaves are very large, I like to cut them in half. This reduces water loss through transpiration. You can also trim off any flowers or buds.
- Apply rooting hormone (optional): Dip the cut end of the stem into your rooting hormone powder or gel, tapping off any excess.
- Plant the cutting: Fill your small pot with your well-draining potting mix. Make a hole in the center with your finger or a pencil. Insert the cut end of the stem into the hole, ensuring the leaf nodes are buried in the soil. Gently firm the soil around the stem.
- Water gently: Water the soil thoroughly but gently until it’s evenly moist. Don’t let it get waterlogged.
- Create humidity: Place a plastic bag over the pot, or cover it with a clear plastic dome. Make sure the plastic doesn’t touch the leaves too much. This traps moisture around the cutting, which is crucial for rooting. You can secure the bag with a rubber band or tape.
- Place in bright, indirect light: Find a warm spot for your cutting that receives bright, indirect light. Avoid direct sunlight, as this can scorch the fragile cutting.
The “Secret Sauce” (Pro Tips)
Here are a couple of things I’ve learned over the years that really help boost success with Bertolonia mosenii:
- Don’t Let Leaves Touch the Water (in water propagation if you choose that route): While I primarily recommend soil propagation for Bertolonia, if you do try rooting in water, make sure absolutely none of the leaves are submerged. Any submerged leaf will rot quickly and can take the whole cutting down with it. Always keep the leaves above the water line.
- Bottom Heat is Your Friend: If you have a heat mat designed for seedlings, place your pots on it. Bertolonia mosenii loves a bit of warmth to get those roots going. It mimics the cozy environment they’d find in their natural habitat, and it makes a noticeable difference in rooting speed.
Aftercare & Troubleshooting
Once you start seeing new leaf growth appearing from the top of your cutting, or if you gently tug on the cutting and feel resistance – a sign of roots – it’s time to transition.
Aftercare:
- Acclimatize: Gradually remove the plastic covering over a few days to allow the new plant to adjust to the ambient humidity.
- Watering: Continue to keep the soil consistently moist but not soggy. Water when the top inch of soil feels dry to the touch.
- Light: Maintain bright, indirect light.
- Transplanting: Once the plant is well-established and has a decent root system (you’ll see roots coming out of the drainage holes), you can transplant it into a slightly larger pot with fresh, good-quality potting mix.
Troubleshooting:
- Stem goes soft and mushy: This is a classic sign of rot, usually caused by overwatering or a lack of air circulation. If this happens, unfortunately, the cutting is likely lost. Make sure your soil drains well and don’t water too frequently.
- Leaves turn yellow and drop: This can be due to too much direct sunlight, or sometimes the plant is just adjusting. If it’s consistently getting too much light, move it to a shadier spot. If the stem looks healthy, give it time.
- No signs of rooting after several weeks: Don’t panic! Some cuttings can take their sweet time. Ensure it’s in a warm location with adequate humidity and bright, indirect light. If the stem is still firm and green, keep the faith.
A Little Patience Goes a Long Way
Propagating plants is a journey, and like any good journey, it requires a bit of patience. Don’t be discouraged if your first attempt isn’t perfect. Each cutting you take is an opportunity to learn and grow alongside your plants. Enjoy the process, the anticipation, and the sheer thrill of seeing new life emerge. Happy propagating!
Resource:
https://identify.plantnet.org/k-world-flora/species/Bertolonia%20mosenii%20Cogn./data