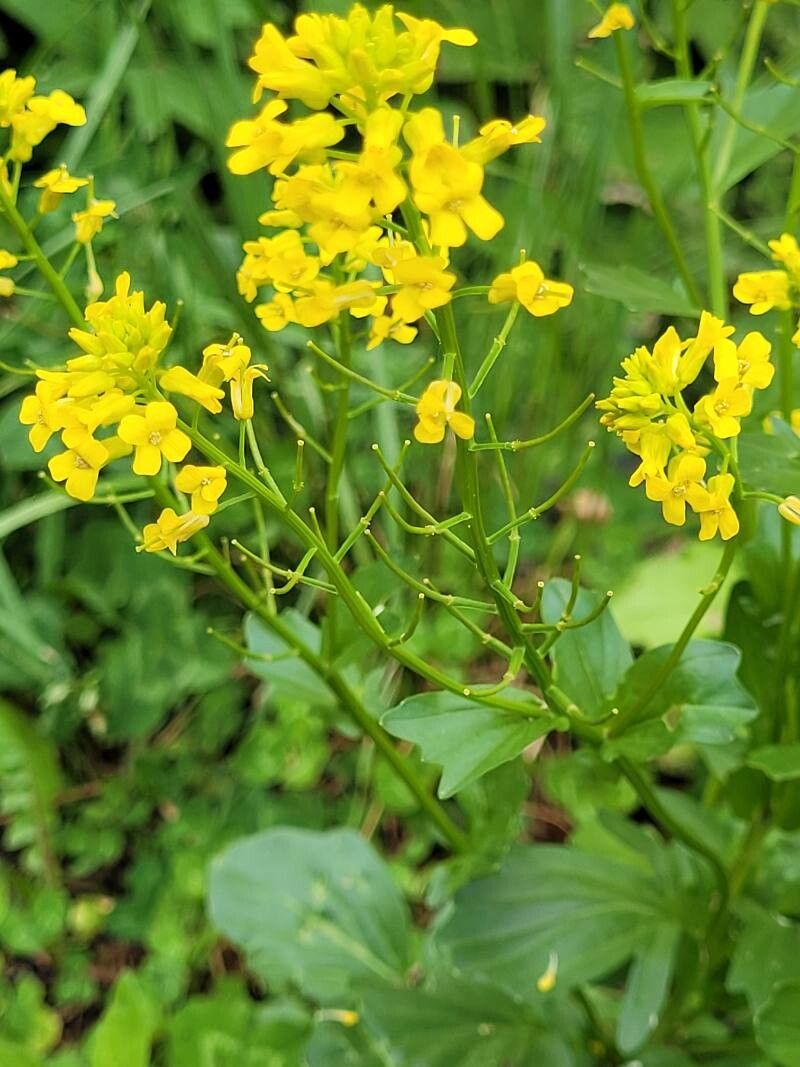
Hello, fellow plant enthusiasts! I’m so excited to share a gardening gem with you today: Barbarea orthoceras. You might know it better as American Winter Cress, or perhaps you’ve admired its cheerful yellow blooms peeking out in early spring. This hardy little perennial is a fantastic addition to any garden, offering edible greens early in the season and lovely, bright flowers that pollinators adore. Best of all, propagating it is a very rewarding endeavor, and I find it to be quite manageable even for those new to the plant world!
The Best Time to Start
For the highest success rate with Barbarea orthoceras, I’ve found the sweet spot is late spring to early summer. This is when the plant is actively growing and has plenty of energy to put into forming new roots. You’re looking for healthy, non-flowering stems. Avoid taking cuttings when the plant is stressed, perhaps from extreme heat or drought.
Supplies You’ll Need
Here’s what you’ll want to have on hand:
- Sharp pruning shears or a clean knife: For making precise cuts. This prevents crushing the stems.
- Rooting hormone (optional but helpful): A powder or gel that encourages root development.
- Propagation pots or trays: Small containers with drainage holes.
- Well-draining potting mix: A good blend of peat moss, perlite, and a touch of compost works wonderfully. You can also buy specialized seedling mixes.
- Large clear plastic bag or a small greenhouse: To create a humid environment.
- Watering can with a fine rose: For gentle watering.
- Labels: To keep track of what you’ve propagated!
Propagation Methods
I usually rely on two main methods for Barbarea orthoceras, and both are quite effective:
Stem Cuttings
- Select your cuttings: Look for healthy, vigorous shoots that are about 4-6 inches long. Gently remove the lower leaves, leaving only the top few.
- Make the cut: Using your sharp shears or knife, cut the stem just below a leaf node (where a leaf attaches to the stem). This is where the magic of root formation often happens.
- Apply rooting hormone: If you’re using it, lightly dip the cut end into the rooting hormone powder or gel. Tap off any excess.
- Plant the cuttings: Insert the prepared cuttings into your moist potting mix, making sure at least one leaf node is below the soil surface. Gently firm the soil around the stem.
- Create humidity: Water the mix gently and then cover the pot or tray with a clear plastic bag or place it in your small greenhouse. This traps moisture.
- Find a good spot: Place your cuttings in a bright location that receives indirect sunlight.
Division
This is often the easiest method for Barbarea orthoceras if you already have a mature plant.
- Dig up the plant: In late spring or early summer, carefully dig up your existing plant, trying to disturb the roots as little as possible.
- Inspect the root ball: Gently shake off excess soil. You’ll likely see clumps of stems emerging from a central root mass.
- Separate the divisions: Using your hands or a clean trowel, gently pull apart the plant. You’re looking for sections that have both roots and healthy shoots. If some roots break, don’t worry too much; the plant is usually quite resilient.
- Replant immediately: Plant the divisions as you would a normal nursery plant, making sure the roots are well-covered with soil. Water them in thoroughly.
The “Secret Sauce” (Pro Tips)
Here are a couple of things I’ve learned over the years that really boost my success rates:
- Don’t let the leaves touch the water (for water propagation): While Barbarea orthoceras can be propagated in water, I find leaf rot to be a common issue. If you go this route, make sure only the stem is submerged, not any leaves. Change the water every few days.
- Bottom heat is your friend: If you find your cuttings are taking their sweet time, placing the propagation tray on a gentle heating mat can significantly speed up root development. It mimics the warmth of spring soil nicely.
Aftercare & Troubleshooting
Once your cuttings have developed a good root system (you can gently tug on a stem; if there’s resistance, roots are forming!), it’s time to transition them.
- Acclimatize them: Gradually remove the plastic bag or open the greenhouse vents over a few days to let the new plants get used to normal humidity.
- Pot them up: Once they’re looking robust, you can transplant them into individual pots using a good quality potting mix.
- Water carefully: Continue to keep the soil consistently moist but not waterlogged.
- Watch for rot: The most common problem is rot, which often appears as mushy, dark stems at the soil line. This is usually a sign of too much moisture and poor air circulation. If you see this, remove the affected cutting immediately and check your watering habits. If the leaves turn yellow and limp without any signs of rot, it might be underwatering or lack of light.
And there you have it! Propagating Barbarea orthoceras is a wonderfully accessible way to multiply your garden treasures. Be patient with yourself and your new plants. Sometimes it takes a little trial and error, but the joy of watching a tiny cutting grow into a thriving plant is truly special. Happy gardening!
Resource:
https://identify.plantnet.org/k-world-flora/species/Barbarea%20orthoceras%20Ledeb./data