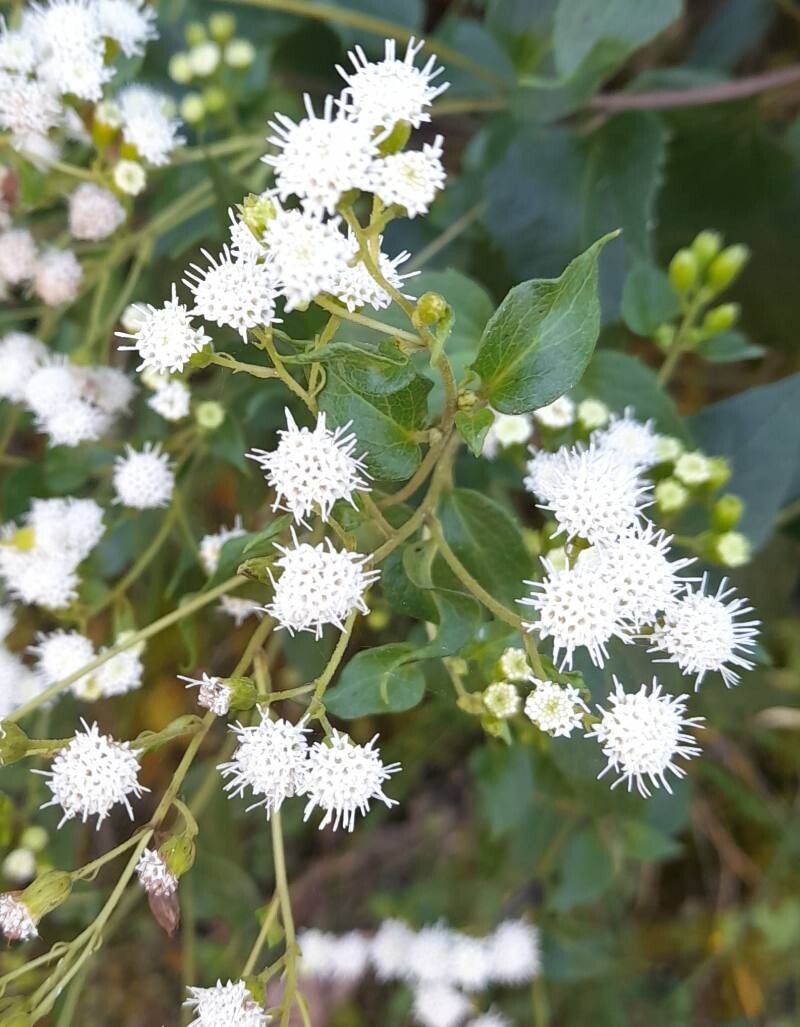
Hello, fellow plant lovers! I’ve been digging in the dirt for about two decades now, and I’ve picked up a few tricks along the way. Today, I want to chat about a plant that truly brightens up any garden: Ageratina lorentzii. You might know it by its common names, like Mexican Bush or sometimes even Eupatorium. It’s that wonderful, airy shrub that bursts with frothy white blooms, often from late summer right into fall. It’s a magnet for pollinators, a lovely filler in mixed borders, and frankly, just a joy to have around.
What I love most about propagating Ageratina lorentzii is how incredibly generous it is. You can easily multiply your plants, share them with friends, or fill in those bare spots that have been bothering you. And the best part? It’s honestly a super beginner-friendly plant to get started with. If you’ve ever felt a little intimidated by propagation, this is a great one to cut your teeth on.
The Best Time to Start
For the absolute highest success rate, I always recommend propagating Ageratina lorentzii in late spring or early summer. This is when the plant is actively growing and has plenty of young, yet firm, shoot tips available. They tend to root faster and more readily when the days are longer and warmer. You can sometimes get away with it in early fall, but the cuttings might take longer to establish before winter sets in.
Supplies You’ll Need
Before we get our hands dirty, let’s gather our tools. Here’s a quick rundown of what you’ll want:
- Sharp Pruning Shears or a Craft Knife: To make clean cuts.
- Rooting Hormone (Optional but Recommended): A powder or gel to encourage faster root development.
- Well-Draining Potting Mix: A mix of equal parts peat moss, perlite, and a touch of compost works beautifully. Or, a good quality seed-starting mix is also excellent.
- Small Pots or Seed Trays: Clean ones, of course!
- Plastic Bag or a Clear Dome: To create a humid environment.
- Watering Can or Mister: For gentle watering.
Propagation Methods
Now, let’s get down to business. Ageratina lorentzii is a champion of stem cuttings, which is my go-to method for this plant.
Stem Cuttings:
- First, find a healthy, actively growing stem. You want to select a piece that’s about 4-6 inches long. Look for a stem that’s not too woody but also not floppy and brand new. It should be firm.
- Using your clean shears or knife, make a clean cut just below a leaf node. A leaf node is that little bump where a leaf attaches to the stem – that’s where the magic happens for root formation.
- Remove the leaves from the bottom half of your cutting. You can even pinch off a couple of the remaining leaves at the top if they’re quite large, to reduce water loss.
- Optional step: Dip the cut end of the stem into your rooting hormone, tapping off any excess.
- Fill your pots or trays with your prepared potting mix. Moisten it slightly with water, so it’s damp but not soggy.
- Make a hole in the soil with a pencil or your finger, just deep enough to insert the cutting.
- Gently insert the cutting into the hole, ensuring the nodes where you removed leaves are below the soil surface. Firm the soil around the stem.
- Water gently to settle the soil around the cutting.
- Cover the pot with a clear plastic bag or a humidity dome. This creates a mini greenhouse effect, which is crucial for cuttings. Make sure the leaves aren’t touching the sides of the bag if possible.
The “Secret Sauce” (Pro Tips)
Here are a few little insights I’ve learned over the years that can make a big difference:
- Don’t let the leaves touch the water (if using water propagation): While Ageratina lorentzii can sometimes root in water, I often find it leads to rot if the leaves are submerged. If you do opt for water, only let the stem end sit in the water, and change it every few days. I still prefer soil for these!
- Bottom heat is your friend: If you can, place your pots on a heated propagator mat. This gentle warmth from below encourages faster root development. It’s not essential, but it certainly speeds things up!
- Mist, don’t drown: While you want to maintain humidity, overwatering the cuttings themselves can lead to fungal issues. Lightly mist the leaves every day or two, especially if the humidity dome seems dry.
Aftercare & Troubleshooting
Once you’ve potted up your cuttings, the waiting game begins! Keep them in a bright spot, but out of direct, harsh sunlight. The humidity is key for the first few weeks.
You’ll know they’re rooting when you see new leaf growth starting to emerge. You might even feel a gentle tug when you give the cutting a tiny, careful wiggle. Once they’ve established a good root system and are showing healthy growth, you can gradually remove the plastic cover over a few days to acclimatize them to drier air. Then, treat them like any other young plant – regular watering and a bit of feed once they’re a bit bigger.
The most common sign of failure is rotting stems. If your cutting turns black and mushy, it’s usually due to too much moisture and not enough air circulation. This is why good drainage and not overwatering are so important. Another sign is wilting that doesn’t perk up – this can mean the cutting is simply not rooting and drying out. Don’t be discouraged if a few don’t make it!
A Encouraging Closing
Propagating plants is one of the most rewarding aspects of gardening. It’s a chance to multiply the beauty around you and to connect with nature on a deeper level. Be patient with your Ageratina lorentzii cuttings. Every gardener has had plants that seemed a bit slow to get going. Keep them in good conditions, and with a little care, you’ll soon be rewarded with a whole new collection of these delightful blooms. Happy propagating!
Resource: