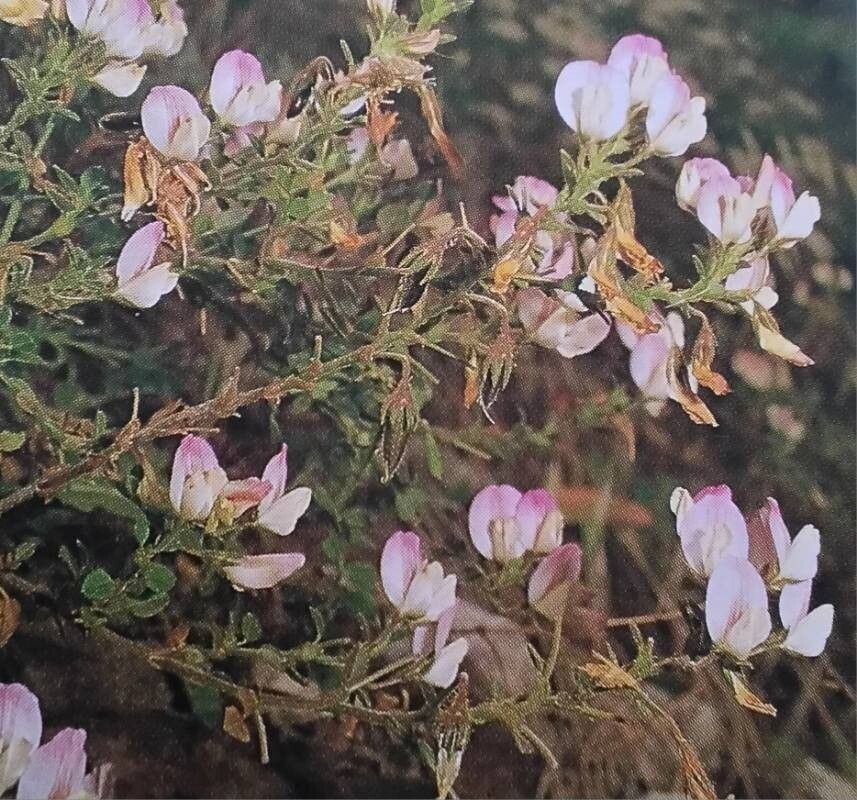
Well hello there, fellow plant lovers! I’m absolutely delighted to dive into the wonderful world of propagating Ononis laxiflora with you today. Honestly, this little gem is such a joy in the garden. Its delicate, pea-like flowers in shades of pink and purple are just so charming, and the way it sprawls, creating a lovely groundcover, is divine.
There’s a special kind of magic in creating new life from an existing plant. It’s incredibly rewarding to watch those tiny roots emerge, knowing you’ve nurtured a whole new plant from a simple cutting or division. Now, I’ll be honest, Ononis laxiflora isn’t the absolute easiest plant for a complete novice to propagate, but with a little patience and these tips, I’m confident you’ll have blooming success!
The Best Time to Start
For the highest chance of success with Ononis laxiflora, I always recommend taking stem cuttings in late spring or early summer. This is when the plant is actively growing, and the new shoots are still somewhat soft but have started to mature a little. They have that perfect balance of flexibility and resilience. Aim for stems that are roughly pencil-thick.
Supplies You’ll Need
Here’s a little toolkit to get you started:
- Sharp pruning shears or a clean knife: A clean cut is crucial to prevent disease.
- Rooting hormone powder or gel: While not strictly essential for all plants, it can give your Ononis cuttings a helpful boost.
- A well-draining potting mix: I like to use a blend of equal parts peat moss or coco coir, perlite, and a bit of coarse sand.
- Small pots or trays: Make sure they have drainage holes!
- A spray bottle: For keeping things moist without waterlogging.
- A plastic bag or propagator lid: To create a humid environment.
- Optional: A heat mat: This can really speed up rooting.
Propagation Methods
Let’s get our hands dirty!
Stem Cuttings
This is my go-to method for Ononis laxiflora.
- Take your cuttings: Early in the morning is best, when the plant is fully hydrated. Select healthy, non-flowering stems. Using your sharp shears, take cuttings about 4-6 inches long. Make your cut just below a leaf node (where the leaf attaches to the stem).
- Prepare the cuttings: Gently remove the lower leaves from the cutting, leaving just a few at the top. If the leaves are quite large, you can even snip them in half to reduce water loss.
- Dip in rooting hormone: Dip the cut end of the stem into your rooting hormone powder or gel. Tap off any excess.
- Plant the cuttings: Fill your small pots with your prepared potting mix. Use a pencil or your finger to make a small hole, then gently insert the cutting into the hole, ensuring the leaf nodes are buried. Firm the soil around the base.
- Water and cover: Water the soil gently until it’s moist but not soggy. Pop the pots into clear plastic bags, sealing them loosely with a twist tie, or place them under a propagator lid.
Division (for established plants)
If you have a larger, established clump of Ononis laxiflora, division is another excellent way to propagate.
- Prepare to dig: Gently water the plant a day or two before you plan to divide it.
- Excavate the plant: Carefully dig up the entire plant with a spade or fork, trying to disturb the roots as little as possible.
- Separate the clumps: Gently tease apart the root ball into smaller sections. Each section should have some healthy roots and at least one or two shoots. If the roots are very tangled, you can use a clean, sharp knife or spade to make divisions.
- Replant immediately: Replant the divisions in their new locations or in pots filled with fresh potting mix, watering them in well.
The “Secret Sauce” (Pro Tips)
Here are a few tricks I’ve learned over the years:
- Bottom heat is a game-changer: If you have a propagator, placing it on a heat mat set to around 70-75°F (21-24°C) significantly speeds up rooting. It mimics the warmth of the soil that the plant loves.
- Don’t let those leaves touch the water (if you try mist propagation): While I prefer stem cuttings in soil for Ononis, if you’re experimenting with water propagation, ensure the leaves are well above the water line. Any submerged leaves will just rot and create problems.
- Sterilize everything: Always make sure your tools and pots are clean. Even a tiny bit of old soil can introduce disease that will wipe out your precious cuttings. A quick wash with hot, soapy water is usually enough.
Aftercare & Troubleshooting
Once your cuttings are planted, keep them in a bright spot out of direct sunlight. Mist the leaves regularly to maintain humidity within the bag or propagator. Check the soil moisture every day or two, watering lightly if the surface feels dry.
You should start to see signs of rooting within 3-6 weeks. You’ll know they’re ready to be transplanted when you see new leaf growth and feel a gentle resistance when you lightly tug on the cutting. At this point, gradually acclimate them to drier air by opening the plastic bag or propagator lid a little more each day over a week.
The most common problem you’ll encounter is rot. If your cuttings start to look mushy or black, it’s usually a sign of overwatering or poor air circulation. Unfortunately, once rot sets in, it’s very difficult to save them. Ensure good drainage and don’t be tempted to overwater! Yellowing leaves can sometimes mean they’re not getting enough light, or the soil is too wet.
A Encouraging Closing
Propagating Ononis laxiflora is a truly rewarding endeavor. It might take a couple of tries for you to get the hang of it, and that’s perfectly okay! Gardens are all about experimentation and learning. Be patient with yourself and your little plant babies. Enjoy the process, savor the moments of discovery, and soon you’ll be surrounded by even more of these delightful, blooming beauties. Happy propagating!
Resource:
https://identify.plantnet.org/k-world-flora/species/Ononis%20laxiflora%20Desf./data