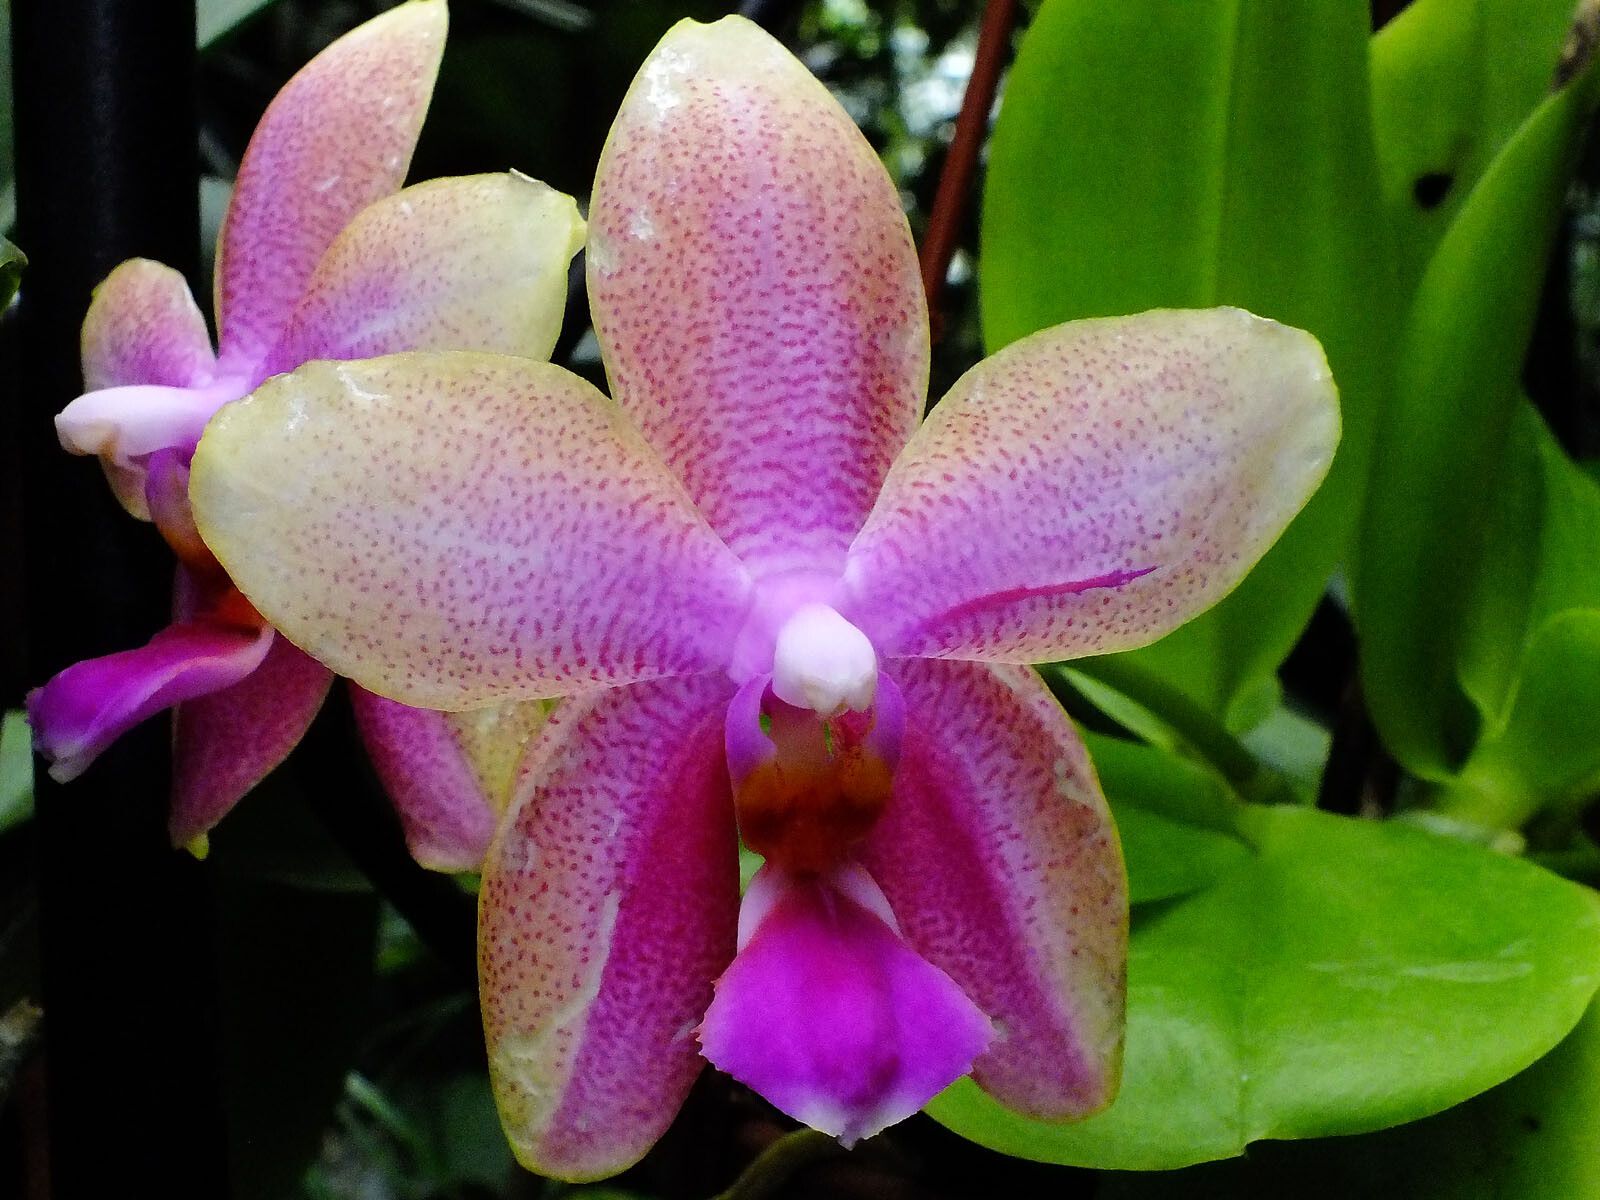
Oh, Phalaenopsis violacea! That’s a special one, isn’t it? The fragrance alone is a good enough reason to want more of them. Known for its stunning, often intensely colored flowers and its intoxicating sweet perfume, Phalaenopsis violacea is a jewel in any orchid collection. If you’ve ever admired its beauty or intoxicating scent and wished you had another one, you’re in luck! Propagating this lovely orchid can be incredibly rewarding.
Now, for the beginner question: is violacea easy to propagate? I’d say it’s on the slightly more challenging side compared to some other orchids, but absolutely within reach with a bit of careful attention. It’s a project that will teach you a lot.
The Best Time to Start
Generally, the best time to think about propagating Phalaenopsis violacea is during its active growth period. This is typically after it has finished flowering and is putting out new leaves or roots. You’ll know it’s happy and ready when you see fresh, green growth appearing. Trying to propagate when the orchid is stressed or dormant is like asking a sleepy bear to run a marathon – it’s just not going to work.
Supplies You’ll Need
Before we get our hands dirty, let’s gather our arsenal:
- Sterile Pruning Shears or a Sharp Knife: For clean cuts. We want to avoid crushing tissue.
- Activated Charcoal: To help keep the medium clean and prevent fungal issues.
- Orchid Potting Mix: A specific mix for epiphytic orchids is best. I usually use a blend of bark, perlite, and sphagnum moss. Some growers prefer finer mixes for babies.
- Small Pots or Containers: Clean ones, of course! Small net pots are excellent for visibility.
- Rooting Hormone (Optional but Recommended): A good quality rooting powder or gel can really give your cuttings a boost.
- Long-Fiber Sphagnum Moss: This stuff is a miracle worker for retaining moisture without getting waterlogged.
- Water (Distilled or Filtered Preferred): Tap water can sometimes contain minerals that aren’t ideal for orchids.
- Clear Plastic Bag or Dome: To create a humid environment.
- Spray Bottle: For misting.
- Labeling Stakes: To keep track of your projects.
Propagation Methods
The most common and successful way to propagate Phalaenopsis violacea is through keikis. A keiki is essentially a baby orchid that grows from a node on the mother plant. It looks like a miniature version of the parent and will eventually develop its own roots and leaves.
Here’s how to encourage and separate them:
- Look for the Signs: Keep an eye on your violacea. You’ll often see a small growth emerge from a dormant node, usually located between the leaf bases, sometimes along the stem. It might look like a tiny nub at first.
- Be Patient (This is Key!): This is where most people get impatient. A keiki needs time to develop. You want to wait until the keiki has at least two to three healthy leaves and, crucially, several roots that are at least 1-2 inches long. If you try to separate it too early, it won’t have enough stored energy or root structure to survive on its own.
- Prepare for Separation: Once your keiki looks ready, gather your supplies.
- Sterilize Your Tools: This is paramount. Thoroughly clean your pruning shears or knife with rubbing alcohol to prevent the spread of any potential diseases.
- Gently Separate: Using your sterile tool, make a clean cut in the stem connecting the keiki to the mother plant. Try to take a small piece of the mother plant’s stem with the keiki if possible, as this can sometimes aid in rooting.
- To Pot or Not to Pot:
- Potting Method: I find this to be the most reliable for violacea. Fill a small pot with your orchid mix. Make a little well in the center. Place the keiki in the pot so its new roots are nestled into the mix. Gently pack the potting medium around the base.
- Water Propagation (Carefully!): Some growers have success with water propagation. Place the keiki in a jar of water, ensuring only the roots touch the water. The leaves must remain dry. Change the water every few days. This method can be trickier, as it’s easy for the leaves to rot if they get submerged.
- Provide Humidity: Whichever method you choose, the goal is to keep the keiki humid. If you’ve potted it, you can place the pot inside a clear plastic bag, ensuring the leaves don’t touch the plastic. You can also use a clear plastic dome. If you’re water propagating, the jar itself provides humidity.
- Positioning: Place your new little orchid in bright, indirect light. No direct sun ever!
The “Secret Sauce” (Pro Tips)
Here are a few things I’ve learned over the years that can make a difference:
- Don’t Rush the Keiki’s Roots: Seriously, it’s tempting, but resist the urge. Those roots are the keiki’s lifeline. A good set of roots means it can start drawing its own water and nutrients. Look for roots that are sturdy and have healthy, pointed tips.
- A Little Cinnamon Can Be Your Friend: If you have to cut into a stem or if the cut end of where the keiki was attached looks a bit raw, I sometimes dust it with a very light coating of cinnamon. It’s a natural antifungal and can help seal the wound. Just a tiny sprinkle!
- Bottom Heat is a Game Changer: If you’re serious about propagation, consider investing in a small seedling heat mat. Placing your potted keikis on a gentle heat mat (around 70-75°F or 21-24°C) can really stimulate root growth. It mimics the warm, humid conditions orchids love for reproduction.
Aftercare & Troubleshooting
Once your keiki has roots and is potted, continue to keep it humid. Misting the surfaces around the pot (not directly on the leaves unless you’re very careful about drying them off quickly) can help. Water when the potting mix starts to feel dry to the touch – usually when it’s lighter in color and weight. Don’t let it sit in soggy conditions.
The biggest thing to watch out for is rot. If the leaves turn yellow and mushy, or if the stem turns black and soft, it’s likely rot. This usually happens from too much moisture and poor air circulation. If you see rot, try to cut away the affected parts with a sterile knife, then allow the remaining healthy part to dry out a bit before trying again. Sometimes, a little bit of hydrogen peroxide (diluted 1:1 with water is a good starting point) can help keep things sterile if applied to a cut surface.
A Little Patience Goes a Long Way
Propagating orchids is a journey, not a race. It takes time, observation, and a good dose of patience. Don’t be discouraged if your first attempt isn’t an instant success. Every orchid is a little different, and you’ll learn so much by simply observing and adjusting. Enjoy the process of nurturing these tiny new lives – the bloom from a plant you grew yourself is incredibly special! Happy growing!
Resource:
https://identify.plantnet.org/k-world-flora/species/Phalaenopsis%20violacea%20H.Witte/data