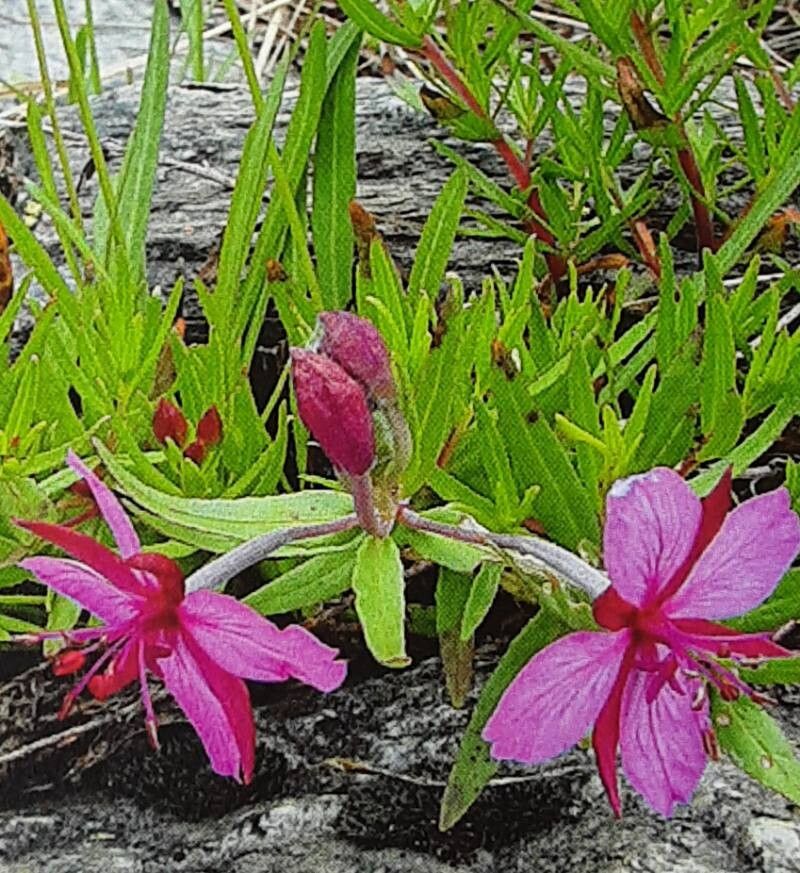
Oh, hello there! Come on in, grab a mug. I’m so glad you’re interested in Epilobium fleischeri. This little beauty, often called alpine willowherb, brings such a charming splash of color and texture to any garden. Its delicate pink to magenta flowers, usually appearing in late summer, are just delightful, and its fuzzy, silvery foliage has a unique appeal, especially in rock gardens or borders. Propagating it yourself is incredibly rewarding. It’s not the trickiest plant out there, but it does have a few preferences, making it a wonderfully satisfying challenge for even a beginner.
The Best Time to Start
For the absolute best chance of success, I find late spring to early summer is your golden window. This is when the plant is actively growing, brimming with energy. You’re ideally looking for softwood cuttings, which are the new, flexible shoots that haven’t yet started to harden off. Think of them like the tender new growth on a rose bush before it gets woody.
Supplies You’ll Need
Here’s what I always have on hand when I’m ready to get propagating:
- Sharp pruning shears or a clean, sharp knife: For making clean cuts.
- Rooting hormone (optional but recommended): A good powder or gel can really give cuttings a boost.
- Potting mix: I love a mix that drains well. A combination of perlite, peat moss, and coarse sand (about 1:1:1) is fantastic. You can also find specific seedling or propagation mixes.
- Small pots or trays: Clean containers are a must. Any size from 2-4 inches will do.
- Plastic bags or a propagator: To create a humid environment.
- Watering can with a fine rose: To avoid disturbing young cuttings.
- Labels: Don’t forget to label your creations!
Propagation Methods
While Epilobium fleischeri can be grown from seed, I find it’s most reliably propagated by stem cuttings. It’s simple, effective, and you get a plant identical to the parent.
Taking Stem Cuttings:
- Select your shoots: Head out to your healthy Epilobium fleischeri plant and look for those lovely, bright green, non-flowering shoots. You want pieces that are about 3-5 inches long.
- Make the cut: Using your sharp tool, take cuttings just below a leaf node (that little bump where a leaf emerges from the stem). This is where the plant has a higher concentration of rooting hormones. For a clean cut, be decisive!
- Prepare the cutting: Gently remove the lower leaves, leaving just a couple at the top. This prevents them from rotting in the soil. If your cutting is longer than 5 inches and has multiple sets of leaves, you can take your cut just above a leaf node higher up, essentially shortening the cutting.
- Apply rooting hormone (optional): Dip the cut end of the stem into your rooting hormone, tapping off any excess. This step isn’t strictly necessary for Epilobium fleischeri, but it can speed things up and increase success rates.
- Pot them up: Fill your small pots with your well-draining potting mix. Gently insert the prepared cuttings into the soil, making sure at least one leaf node is buried. You can fit a few cuttings in a pot, giving them a little space.
- Water gently: Water thoroughly but carefully, using your fine rose watering can, until the soil is moist but not waterlogged.
- Create humidity: Cover the pots with a clear plastic bag, securing it with a rubber band. This creates a mini-greenhouse effect, keeping the humidity high, which is crucial for cuttings that can’t yet take up water through roots. You can also use a propagator lid.
The “Secret Sauce” (Pro Tips)
Over the years, I’ve learned a few little tricks that seem to make a difference:
- Don’t let the leaves touch the water (if you try water propagation): Though I prefer soil for this plant, if you do try water, ensure the leaves are well above the water line. Leaves submerged will rot and attract disease, which is the kiss of death for cuttings.
- Bottom heat is your friend: If you have a heat mat, placing your pots on it can significantly speed up root development. Just a gentle warmth, not hot! This mimics ideal spring conditions.
- Be patient with your initial watering: After potting, I like to let the soil settle and give it one good watering. Then, I let the humidity within the plastic bag do most of the work until I see signs of new growth. Overwatering at this stage is a common mistake.
Aftercare & Troubleshooting
Once your cuttings have rooted, you’ll start to see new leaf growth. This is your cue! Carefully remove the plastic bag gradually over a few days to acclimate them to normal humidity. Continue to keep the soil consistently moist but never soggy. Once they’re a decent size with a good root system showing at the bottom of the pot, you can transplant them into slightly larger individual pots.
The main issue you might encounter is rot. If a cutting turns black and mushy, it’s usually a sign of too much moisture and not enough air circulation. If you see this, remove the affected cutting immediately and allow the remaining ones to dry out just a touch. Sometimes, despite your best efforts, a cutting just won’t take. Don’t be discouraged! It’s part of the learning process.
A Encouraging Closing
Propagating Epilobium fleischeri is a journey, and like all good gardening experiences, it’s about the process as much as the outcome. Patience is key. Those tiny rootlets are working hard in the soil. So, don’t fuss too much, enjoy the clean cuts, the smell of damp soil, and the anticipation. You’ll soon have a whole new little family of these delightful plants to share, or to fill your own garden with their magic. Happy propagating!
Resource:
https://identify.plantnet.org/k-world-flora/species/Epilobium%20fleischeri%20Hochst./data