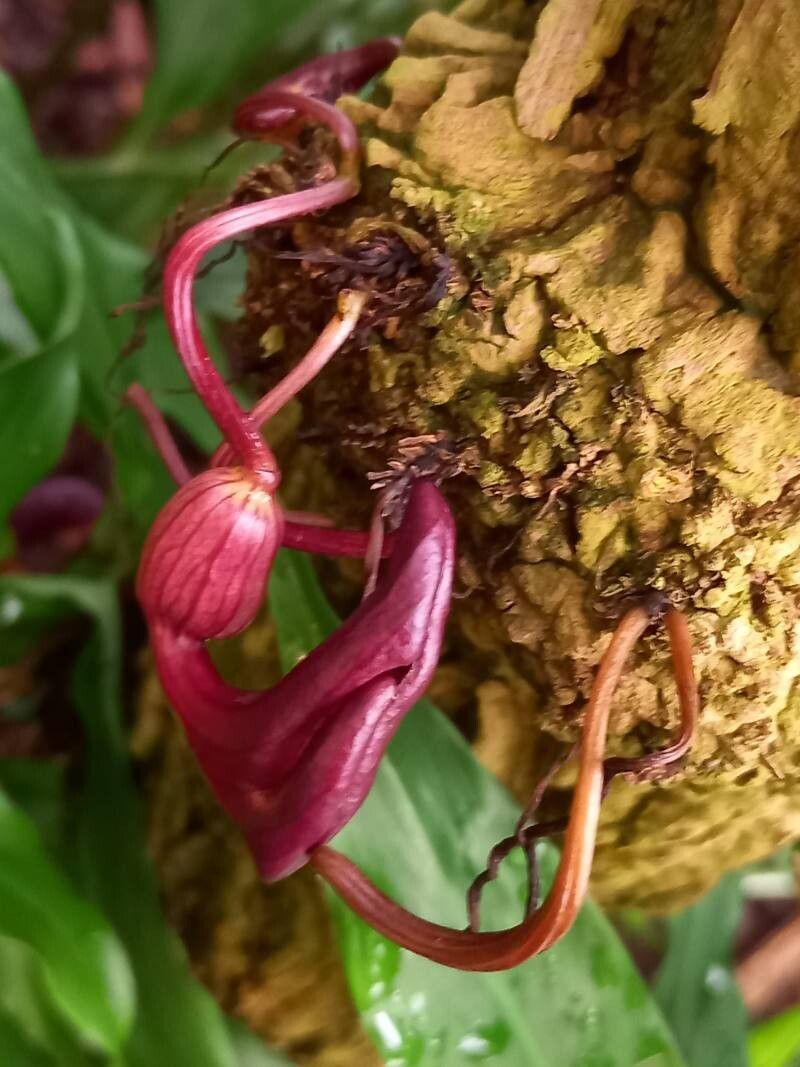
Oh, hello there! Come on in, grab a mug. I’m so glad you’re interested in Aristolochia cauliflora. It’s a truly magnificent plant, isn’t it? Those incredible, intricate flowers that seem to bloom right from the branches! It’s like nature’s own fantastical sculpture. Propagating it is such a rewarding journey, watching a tiny piece of your beloved plant grow into something new. Now, is it a beginner’s dream? I’d say it’s a rewarding challenge, a step up that will teach you a lot. But with a little patience and these tips, you’ll be well on your way!
The Best Time to Start
For Aristolochia cauliflora, the magic happens when the plant is in its most vigorous growth phase. That’s usually late spring through early summer. You want to be working with healthy, actively growing stems. Avoid trying to propagate from wood that looks old and tired, or during periods of stress for the plant, like extreme heat or drought. That fresh, green growth is what holds all that life-giving energy.
Supplies You’ll Need
Gathering your supplies beforehand makes the whole process much smoother. Here’s what I always have on hand:
- Sharp Pruning Shears or a Clean Knife: For making precise cuts.
- Potting Mix: I prefer a light, well-draining mix. A good blend is about 50% perlite to 50% peat moss or coco coir. This helps prevent soggy roots.
- Small Pots or Trays: Four-inch pots with drainage holes are perfect.
- Rooting Hormone (Optional but Recommended): A powder or gel can really boost your success rate for stem cuttings.
- Watering Can or Mister: For consistent moisture without disturbing the soil too much.
- Plastic Bags or a Clear Dome: To create a humid environment around your cuttings.
- Heat Mat (Optional but Helpful): For encouraging root development from below.
Propagation Methods: Let’s Get Growing!
We’ll focus on stem cuttings for Aristolochia cauliflora, as it’s typically the most successful and straightforward method for this vine.
- Take Your Cuttings: When you see those active shoots, look for stems that are about pencil-thick and have at least two or three sets of leaves. Use your sharp shears to make a clean cut just below a leaf node – that’s the little bump where a leaf grows from the stem. Aim for cuttings that are around 4-6 inches long. Remove any leaves from the bottom half of the cutting, keeping just one or two at the very top.
- Prepare the Cutting: Gently dip the cut end of the stem into your rooting hormone, tapping off any excess. This isn’t strictly necessary, but it’s a little insurance policy to encourage those roots to form more quickly.
- Planting Time: Fill your small pots with your prepared, damp potting mix. Make a hole in the center with your finger or a pencil. Carefully insert the cut end of the stem, ensuring it’s buried about 1-2 inches deep. Gently firm the soil around the stem to ensure good contact.
- Create a Humid Environment: Water the soil lightly. Then, I like to place a stake or two in the pot and cover the whole thing with a clear plastic bag, making sure the leaves of the cutting don’t touch the plastic. This traps moisture and creates the humid microclimate the cutting needs to survive before it can form roots. If you have a propagation dome, that works beautifully too!
The “Secret Sauce” (Pro Tips)
These are the little things I’ve learned over the years that can really make a difference.
- Bottom Heat is Your Friend: If you have a heat mat, place your pots on it. Aristolochia cauliflora, like many tropical vines, loves a little warmth from below. It really kicks its root-forming abilities into high gear. Just set it to a gentle warmth, not hot!
- Don’t Drown Your Dreams: While humidity is crucial, overwatering at this stage is the quickest way to invite rot. The soil should be consistently moist, not soggy. Check the soil moisture with your finger regularly. If it feels dry to the touch an inch down, give it a light watering.
- Watch for the Signs: Patience is key here. It can take several weeks, sometimes even a couple of months, for cuttings to root. You’ll know they’re happy when you see new leaf growth pushing out from the top. You can also give a very gentle tug – if there’s resistance, that’s a good sign roots are forming.
Aftercare & Troubleshooting
Once you see that lovely new growth or feel that resistance, it’s time to start acclimatizing your new plant.
Gradually remove the plastic bag or dome for longer periods each day over a week or so. This helps the young plant get used to less humid air without a shock. Continue to keep the soil consistently moist. When the roots have filled the small pot, you can then transplant it into a slightly larger container with your regular potting mix.
The most common issue you’ll encounter is rot. This usually happens because the soil is staying too wet. If you see your cutting wilting and looking mushy at the base, it’s likely rot. Unfortunately, there’s not much you can do once this takes hold. The best prevention is good drainage and careful watering. Another sign of failure is if the cutting simply dries out and shrivels, which means the humidity wasn’t sufficient or it was planted in an environment that was too dry.
A Little Bit of Patience Goes a Long Way
So there you have it! Propagating Aristolochia cauliflora is a journey of observation, a little bit of faith, and a whole lot of love for your plants. Don’t be discouraged if your first attempt isn’t a runaway success. Every gardener has lost a cutting or two! The important thing is to learn, adjust, and keep trying. Soon enough, you’ll be surrounded by these beauty vines, a testament to your growing green thumb. Happy gardening!
Resource:
https://identify.plantnet.org/k-world-flora/species/Aristolochia%20cauliflora%20Ule/data