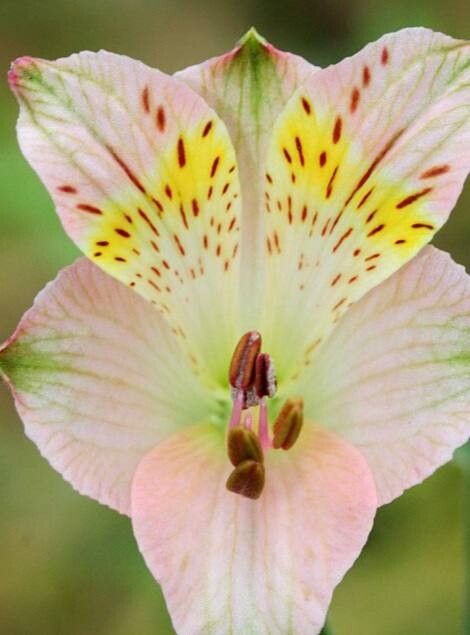
Oh, Alstroemeria hookeri! If you’ve ever seen those vibrant, almost exotic-looking blooms gracing a garden, you know exactly why we fuss over them. They bring such a cheerful splash of color and last for ages in a vase, too. Growing them from scratch feels like a real accomplishment, and honestly, it’s not as daunting as you might think. For most home gardeners, starting with division is a lovely way to get going.
The Best Time to Start
The absolute sweet spot for propagating Alstroemeria hookeri is early spring, just as the plant is waking up from its winter rest. Think of it as giving these beauties a fresh start. You’ll see new growth emerging, and that’s your cue that they’re ready to be divided. If spring slips by, you can do it again in late summer or early autumn, but spring gives them the longest growing season to establish themselves.
Supplies You’ll Need
Gathering your tools beforehand makes the whole process much smoother. Here’s what I like to have on hand:
- Sharp Pruning Shears or a Spade: For cleanly dividing the plant.
- Gardening Gloves: Alstroemeria can sometimes cause mild skin irritation for some people, so it’s always good to protect your hands.
- Potting Soil or a Seed Starting Mix: Something that drains well is key. I often mix in some perlite or sand for extra aeration.
- Pots or Containers: With drainage holes, of course!
- Watering Can or Hose with a Gentle Nozzle: To avoid disturbing your new divisions.
- (Optional) Rooting Hormone: While not strictly necessary for divisions, it can give cuttings an extra boost.
Propagation Methods
For Alstroemeria hookeri, the most successful and straightforward method for home gardeners is division. They grow from fleshy rhizomes, which are perfect for splitting apart.
Division Step-by-Step:
- Gentle Excavation: With your spade or trowel, carefully dig around the base of your established Alstroemeria plant. You want to lift the whole clump out of the ground, trying to keep as much of the root ball intact as possible.
- Gently Tease Apart: Once the clump is out, you’ll see those thick, fleshy rhizomes. Gently shake off excess soil. Now, using your hands or a clean, sharp tool, carefully separate the rhizomes. Look for segments that have at least one eye or growth bud. Don’t be afraid to be a little firm, but also try not to snap them cleanly. It’s better to have a few connected pieces than to rip them apart haphazardly.
- Inspect and Trim: Check over your divisions. If any parts look rotten or damaged, trim them off with your clean shears.
- Planting Time: Now, plant your divisions. Dig a hole in your prepared garden bed or fill your pots with your chosen potting mix. Plant each division so the top of the rhizome is just about an inch below the soil surface.
- Water Wisely: Water them in gently but thoroughly. You want the soil to be moist, but not waterlogged.
The “Secret Sauce” (Pro Tips)
Here are a couple of little tricks that have helped me over the years:
- Don’t Over-Divide: Resist the urge to create dozens of tiny divisions. Larger pieces with more robust rhizomes and at least a couple of healthy shoots will establish much faster and have a better chance of survival. It’s better to have fewer, strong new plants.
- Mulch Gently: Once your new divisions are planted, a light layer of mulch can help retain moisture and keep the soil temperature consistent. Just be sure to keep the mulch away from the crown of the plant to prevent rot.
Aftercare & Troubleshooting
After planting your new Alstroemeria divisions, the most important thing is to keep them consistently moist. They’re establishing new roots, and drying out is their biggest enemy at this stage. Don’t drown them, but don’t let the soil become bone dry either.
You’ll know things are going well when you start to see new leaf growth appearing from the divisions. This can take a few weeks.
The most common sign of trouble is rot. If you notice any mushy, brown sections on your rhizomes, or if your division simply refuses to show any signs of life after a good amount of time, it’s likely succumbed to rot, usually due to overwatering or poor drainage. If you see this early on, you might be able to salvage a healthy part of the rhizome, but often, it’s best to start again with a fresh division.
A Little Patience Goes a Long Way
Propagating plants can feel like a little bit of magic, can’t it? Getting your Alstroemeria hookeri to multiply takes a bit of care and the right timing, but it’s incredibly rewarding. Don’t get discouraged if your first try isn’t perfect. Gardening is a journey of learning and observation. Enjoy the process, celebrate your successes, and before you know it, you’ll have beautiful blooms to share!
Resource:
https://identify.plantnet.org/k-world-flora/species/Alstroemeria%20hookeri%20Sweet/data