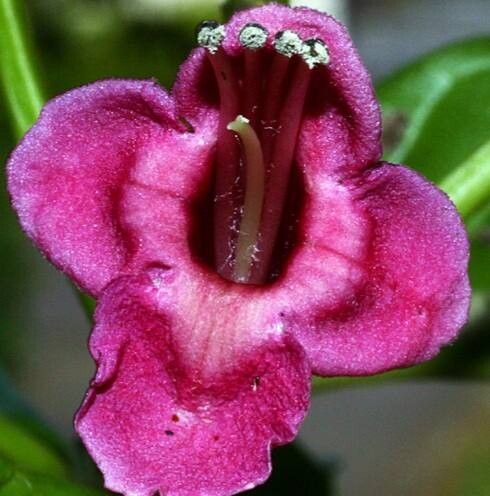
I adore Vitex lucens – that gorgeous shrub with its striking purple blooms and long, elegant flower spikes. It’s a magnet for pollinators, smells divine, and brings such a vibrant splash of color to the garden. Plus, the idea of growing your own from a tiny cutting or a division? Absolutely thrilling! Don’t let the thought of propagation scare you; while it takes a little patience, Vitex is surprisingly forgiving. I’d say it’s a moderately easy plant for beginners to try their hand at, especially with a few pointers.
The Best Time to Start
The sweet spot for propagating Vitex lucens is during its active growth phase. For most of us, this means late spring or early summer, after the plant has finished its initial flush of spring growth but before the intense heat of midsummer really sets in. You’re looking for stems that are firm but still flexible, not yet woody. Softwood cuttings taken at this time root more readily.
Supplies You’ll Need
Getting your supplies ready is half the battle, really!
- Sharp pruning shears or a clean knife: For taking cuttings cleanly.
- Small pots or trays: With drainage holes, of course!
- Potting mix: A light, airy mix is best. I often use a blend of equal parts perlite, peat moss, and good quality potting soil. For added drainage, you can also incorporate a bit of coarse sand.
- Rooting hormone (optional but recommended): A good quality powder or gel can give your cuttings a helpful boost.
- Plastic bags or a propagation dome: To create a humid environment.
- Water: For misting and for water propagation.
- Labels and a marker: To keep track of what you’ve planted!
Propagation Methods
Here are the two methods I find most successful for Vitex:
Stem Cuttings
This is my go-to for increasing my Vitex collection.
- Take your cuttings: In late spring or early summer, select healthy, non-flowering shoots. Using your clean shears, cut stems about 4-6 inches long. Make your cut just below a leaf node (where a leaf grows from the stem).
- Prepare the cuttings: Gently remove the leaves from the bottom half of each cutting. Pinch off any tiny flower buds that might be forming.
- Dip in rooting hormone (optional): If you’re using rooting hormone, dip the cut end into the powder or gel. Tap off any excess.
- Pot them up: Fill your small pots with your prepared potting mix. Make a hole in the center of the mix with your finger or a pencil. Insert the cutting into the hole, ensuring the leaf nodes are buried. Gently firm the soil around the stem.
- Water and cover: Water the pots thoroughly until you see water draining from the bottom. Then, cover each pot with a plastic bag or place them under a propagation dome to maintain humidity. You can use stakes to keep the plastic from touching the leaves.
- Provide light and warmth: Place the pots in a bright spot that gets indirect sunlight. If you have a heat mat, placing the pots on it can significantly speed up rooting.
Water Propagation
This method is satisfying because you can actually see the roots forming!
- Take cuttings: Follow steps 1 and 2 from the stem cuttings method.
- Place in water: Fill a clean jar or glass with fresh water. Place the prepared cuttings in the water, making sure none of the leaves are submerged. The water level should just cover the leafless portion of the stem.
- Change the water: Change the water every few days to keep it fresh and prevent any bacterial growth.
- Find a good spot: Like the stem cuttings, place them in a bright location with indirect light.
The “Secret Sauce” (Pro Tips)
After two decades, a few tricks really do make a difference:
- Don’t let the leaves touch the water: This is crucial for water propagation. Submerged leaves will rot, and that rot can quickly kill your cutting. Keep them high and dry!
- Bottom heat is your friend: Especially for stem cuttings, a gentle warmth from beneath (like a heating mat) will encourage root development much faster. It mimics the warmth of spring soil, waking up those rooting hormones.
- Air circulation is key: While you want humidity, stagnant air can lead to fungal issues. If you’re using a propagation dome, lift the lid or open the vents for a short period each day to allow for some air exchange.
Aftercare & Troubleshooting
Once you start seeing those tiny white roots emerging from the drainage holes (or clearly visible in your water jar), congratulations!
- For rooted cuttings in soil: Gradually acclimate them to drier air by removing the plastic bag or dome for increasingly longer periods over a week or two. Continue to keep the soil consistently moist but not waterlogged. They’re still delicate, so avoid letting them dry out completely.
- For rooted cuttings from water: Once the roots are about an inch long, you can carefully pot them up into your prepared potting mix, following the instructions for planting cuttings in soil. Be gentle with those new roots.
- Troubleshooting: The most common problem you’ll face is rot. This usually happens due to too much moisture and poor air circulation. If you see a cutting turning mushy or black, it’s best to discard it to prevent it from affecting others. Wilting can also occur, but if you check the soil and it’s moist, it might just be the cutting adjusting. Keep it humid and give it time.
Now, go forth and multiply your Vitex! Propagation is a process of observation and patience. Don’t get discouraged if not every cutting takes. Each attempt is a learning opportunity, and the joy of seeing new life emerge from your efforts is truly rewarding. Happy gardening!
Resource:
https://identify.plantnet.org/k-world-flora/species/Vitex%20lucens%20Kirk/data