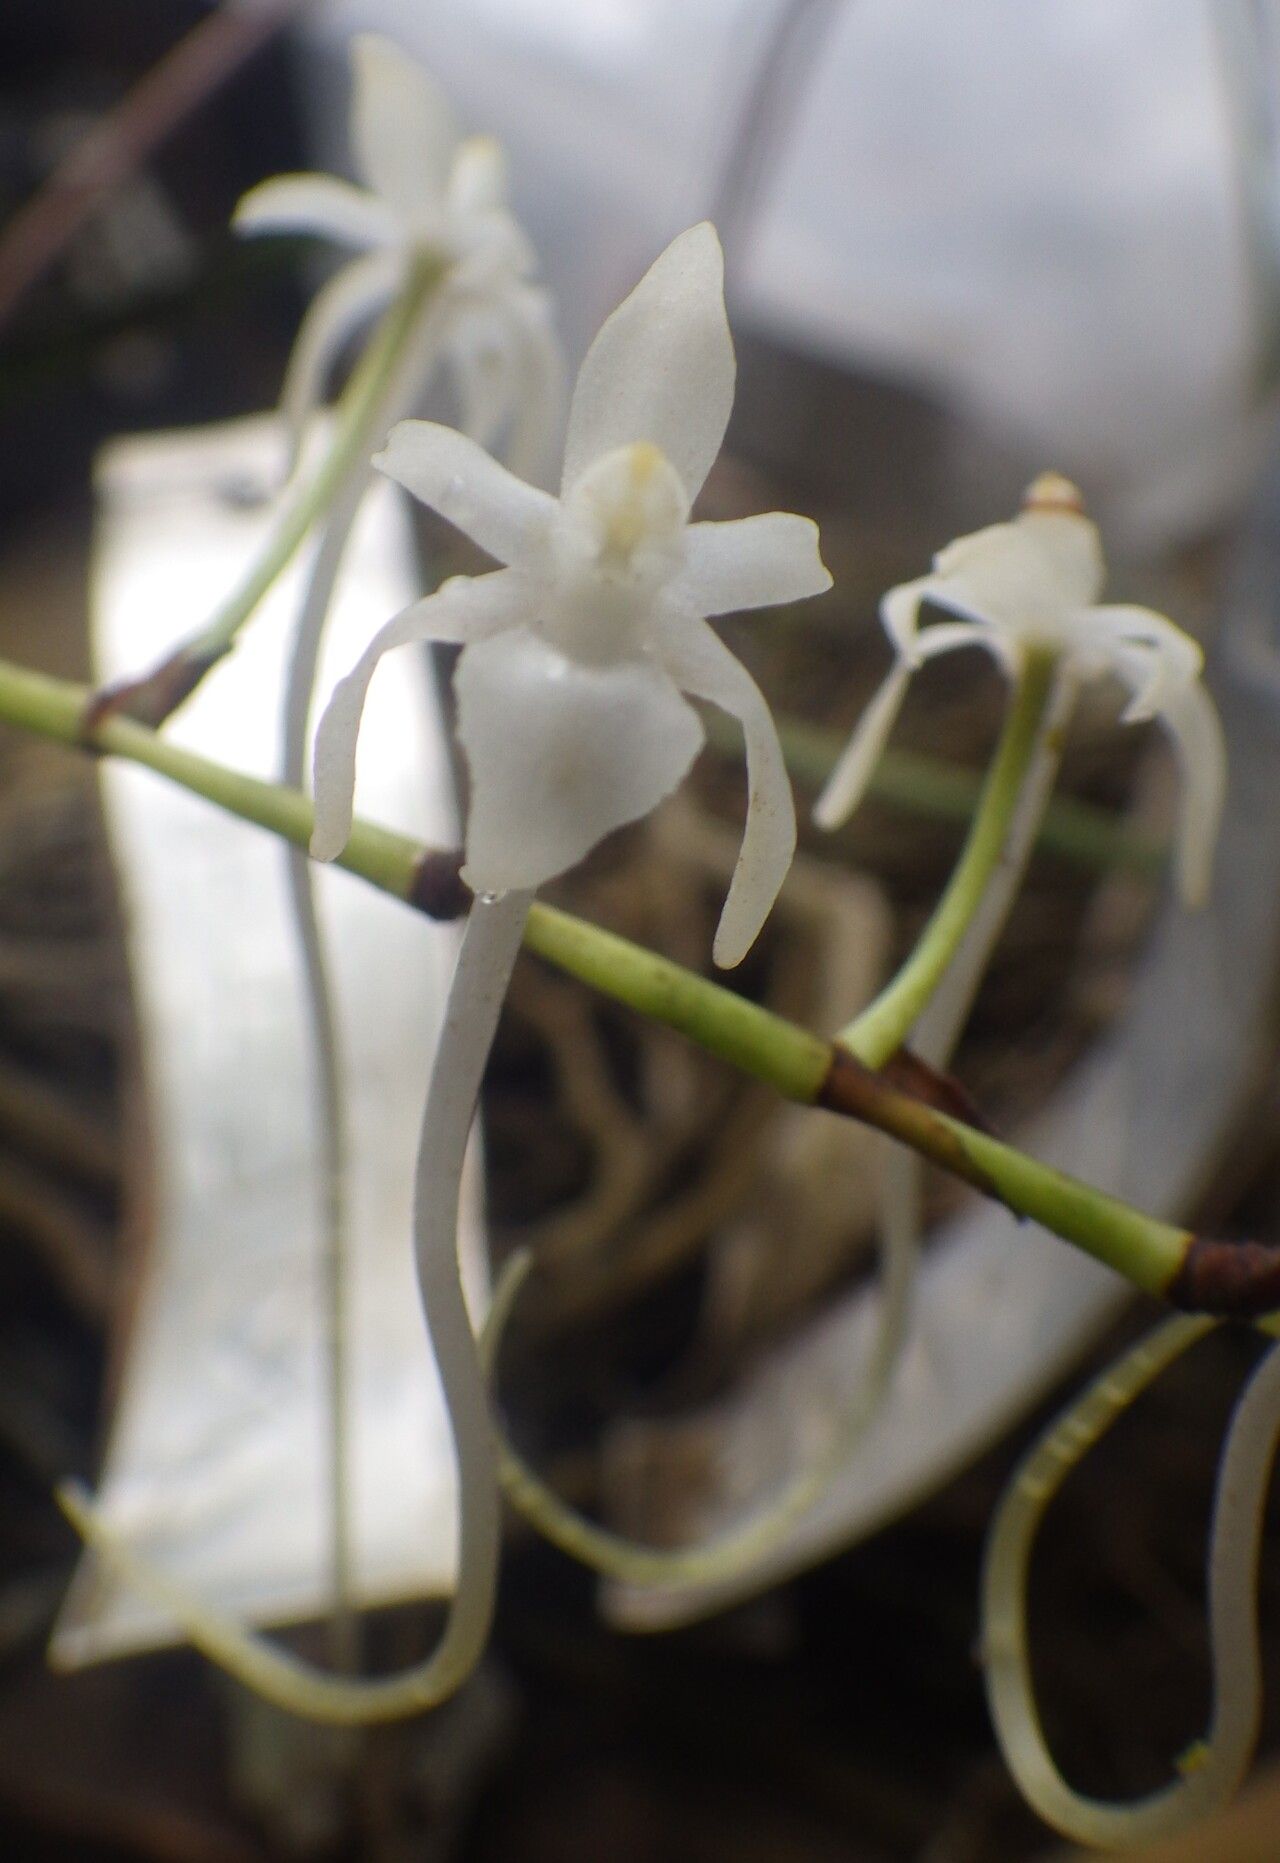
Oh, hello there! Come on in and grab a cup of coffee. I’m so glad you’re interested in Rangaeris muscicola, isn’t it just the sweetest little orchid? With its delicate, moss-green blooms and its sweet, citrusy fragrance, it truly is a gem in any collection. And the best part? Propagating it yourself is incredibly rewarding. Now, is it a beginner’s plant? Honestly, I’d say it’s more of a gem for the intermediate grower. It can be a tad fussy, but with a little patience and these tips, I’m confident you’ll have success.
The Best Time to Start
For Rangaeris muscicola, I find the sweet spot for propagation is late spring into early summer. This is when the plant is actively growing, pushing out new shoots and leaves. Starting when the plant “wakes up” after its rest period gives your cuttings the best chance to establish quickly.
Supplies You’ll Need
Gathering your tools beforehand makes the whole process much smoother. Here’s what I always have on hand:
- Sharp, sterile pruning shears or a clean knife: Essential for making clean cuts.
- Sphagnum moss: This is your best friend for orchids like this. It holds moisture without becoming waterlogged. I prefer long-fibered sphagnum.
- Perlite: To improve drainage and aeration.
- A small amount of orchid bark: For added structure.
- A clear plastic bag or a mini greenhouse: To create a humid environment for your cuttings.
- Small pots or seedling trays: Whatever works for your space.
- Rooting hormone (optional, but helpful): A powdered or gel form can give cuttings a boost.
- A spray bottle: For misting.
Propagation Methods
We’ll focus on the most successful method for Rangaeris muscicola: stem cuttings. This gorgeous orchid tends to produce little keikis (baby plants) and basal growths, which are perfect for taking cuttings.
- Identify a healthy growth: Look for a mature pseudobulb (the swollen stem) that has a small, developing shoot or a bit of leafless growth at its base. This is a prime candidate.
- Make the cut: Using your sterilized shears, carefully cut the growth away from the mother plant. Try to include a small piece of the parent’s pseudobulb if possible. If you’re taking a keiki, ensure it has at least one or two tiny roots already.
- Prepare the cutting: If there are any old, spent leaves, gently remove them. If your cutting has leaves, you can trim them slightly if they are very large, but be cautious not to remove too much.
- (Optional) Apply rooting hormone: If you’re using it, dip the cut end of the pseudobulb or the base of the keiki into the rooting hormone, tapping off any excess.
- Planting medium: In your small pot or tray, create a mix of roughly equal parts sphagnum moss and perlite, with a small sprinkle of orchid bark. Moisten this mix thoroughly, but squeeze out any excess water so it’s just damp, not dripping.
- Potting up: Gently place your cutting into the prepared medium. You want the base of the pseudobulb or the keiki to be nestled in, with the developing shoot pointing upwards. You can use a small stake to support it if needed.
- Create humidity: Place the pot inside a clear plastic bag or in a mini greenhouse. Seal it up to maintain high humidity. You can also use a plastic dome if you have one.
The “Secret Sauce”
Now, for a couple of things I’ve learned over the years that really make a difference:
- Bottom heat is your friend: Orchids love a little warmth to encourage rooting. If you have an old heating mat that you use for seedlings, place your potted cutting on it. Not blazing hot, just a gentle warmth. This can significantly speed up root development.
- Don’t overwater the medium: This is critical. While Rangaeris muscicola loves humidity, its roots hate to sit in soggy conditions, especially when they’re trying to form. The sphagnum moss will hold moisture, so check the dampness of the medium by gently squeezing a bit. If it feels dry, give it a light misting.
Aftercare & Troubleshooting
Once your cutting is potted up and in its humid environment, the waiting game begins!
- Misting: Lightly mist the sphagnum moss around the base of your cutting every few days, or whenever the moss starts to look dry. Avoid misting the leaves directly as much as possible, as this can also encourage rot.
- Light: Place your cutting in a bright spot, but out of direct sunlight. Filtered light, like that from an east-facing window, is perfect.
- Patience is key: Rooting can take anywhere from a few weeks to a couple of months. You’ll know it’s working when you see new root tips emerging from the medium, or a new shoot starting to grow vigorously.
- Troubleshooting: The most common issue is rot. If you see your cutting turning black and mushy at the base, it’s likely because the medium is too wet or there isn’t enough air circulation. If this happens, try to remove the rotting part with your sterile knife and repot the healthy portion in fresh, drier medium. You might also notice the leaves shriveling. This is usually a sign that it’s not getting enough moisture to its emerging roots, so check the humidity and dampness of the medium.
Keep Growing!
Propagating Rangaeris muscicola is a journey, and like any good gardening adventure, it requires a bit of patience and a lot of observation. Don’t be discouraged if your first attempt isn’t perfect. Every orchid is a little different, and every gardener learns by doing. Enjoy the process, celebrate the small victories, and soon you’ll have more of these delightful little orchids to share! Happy growing!
Resource: