Hello there, fellow garden enthusiasts!
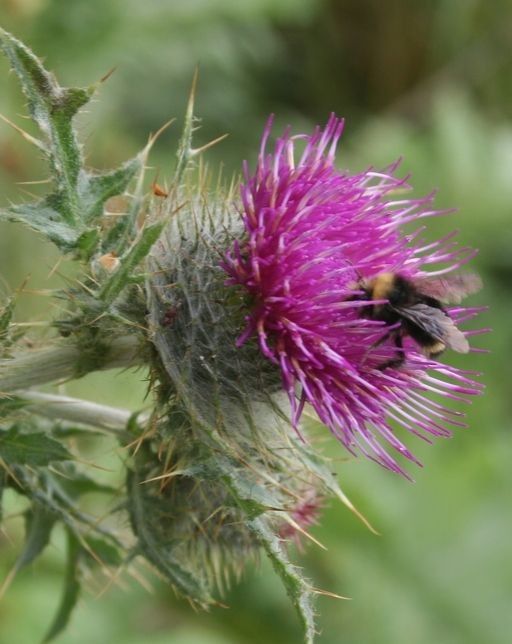
Today, we’re diving into the wonderful world of propagating Cirsium andrewsii, commonly known as the Foothill Thistle. Now, I know what some of you might be thinking – thistle? But trust me, this elegant native California native is a real gem. It brings such a unique texture and a delicate, almost airy bloom to the garden, attracting all sorts of pollinators. Plus, growing more of these beauties from your existing plants? That’s a deeply satisfying feeling, like sharing a good secret with nature.
For those just starting out on their propagation journey, I’d say Cirsium andrewsii falls somewhere in the middle. It’s not quite as foolproof as a simple pothos cutting, but with a little attention and the right approach, you’ll be successful. Don’t let that deter you!
The Best Time to Start
The sweet spot for propagating Cirsium andrewsii is generally in the late spring to early summer. This is when the plant is actively growing and has plenty of energy to put into developing new roots. You’re looking for healthy, non-flowering stems, typically when the plant is putting on new growth after its initial spring burst.
Supplies You’ll Need
Before we get our hands dirty, let’s gather our tools:
- Sharp, clean pruning shears or a razor blade: For taking clean cuts.
- Rooting hormone (optional, but recommended): A powder or gel to encourage root development.
- Well-draining potting mix: I like a blend of equal parts peat moss, perlite, and coarse sand.
- Small pots or seed trays: For your cuttings. Make sure they have drainage holes!
- Watering can or spray bottle: For gentle watering.
- Plastic bags or a propagation dome: To create a humid environment.
- Labels and a marker: To keep track of what you’ve planted and when.
Propagation Methods
The most reliable way I’ve found to propagate Cirsium andrewsii is through stem cuttings. It gives you a great chance to expand your collection.
Stem Cuttings
- Select your cuttings. Look for healthy, upright stems that are about 4-6 inches long. Pinch off any flower buds you see – we want the plant to focus on roots, not flowers right now. Make sure to get stems that are a mix of softer new growth and slightly more mature woody growth at the base.
- Make the cut. Using your sharp shears or razor blade, make a clean cut just below a leaf node (where a leaf attaches to the stem).
- Prepare the cutting. Gently remove the lower leaves from the bottom 2 inches of the stem. If there are any very small leaves remaining, you can trim them back as well.
- Apply rooting hormone. Dip the cut end of the stem into your water and then into the rooting hormone powder or gel. Tap off any excess. This step really gives your cuttings a boost!
- Plant the cuttings. Fill your small pots with the prepared potting mix. Make a hole in the center with your finger or a pencil. Carefully insert the prepared cutting into the hole, ensuring the hormone-coated part is in the soil. Gently firm the soil around the base of the cutting.
- Water gently. Water the potting mix thoroughly but gently to settle the soil around the cutting.
- Create humidity. Cover the pot with a plastic bag or place it under a propagation dome. This creates a mini-greenhouse effect, keeping the humidity high, which is crucial for cuttings to root. You want the plastic bag to not touch the leaf tips if possible.
The “Secret Sauce” (Pro Tips)
- Bottom heat is your friend! While not strictly necessary, placing your pots on a gentle heating mat can significantly speed up root development. It mimics the warmth of spring soil and gives those roots a real kickstart.
- Don’t overcrowd your cuttings. Give each cutting enough space in its pot. Overcrowding can lead to increased humidity and a higher risk of fungal issues. One or two cuttings per small pot is usually plenty.
- Watch out for wilting before they root. If your cuttings start to look droopy before you see new growth or feel resistance when gently tugging, the air might be too dry. Double-check your humidity cover or give them a light misting.
Aftercare & Troubleshooting
Once your cuttings have roots forming (you might see them poking out of the drainage holes or feel resistance when you gently tug), it’s time to ease them out of their humid environment. Gradually remove the plastic bag for longer periods each day over a week. Once they seem adjusted, you can remove it completely. Continue to water regularly, keeping the soil consistently moist but not waterlogged.
The most common issue you might encounter is rot. This usually happens when the cuttings are kept too wet, or there’s not enough air circulation. You’ll see the stem turn mushy and brown. Unfortunately, if rot sets in, it’s usually too late for that particular cutting. Don’t get discouraged; just try again with a new cutting, ensuring better drainage and air circulation. Sometimes, a cutting might just fail to root for no apparent reason. That’s part of gardening – nature has its own rhythm!
A Little Encouragement
Propagating plants is a journey of patience and observation. Sometimes things take time, and sometimes we learn from setbacks. So, take a deep breath, enjoy the process of nurturing these new lives, and celebrate every little bit of success. Happy propagating, and may your gardens be ever more beautiful!
Resource:
https://identify.plantnet.org/k-world-flora/species/Cirsium%20andrewsii%20Jeps./data