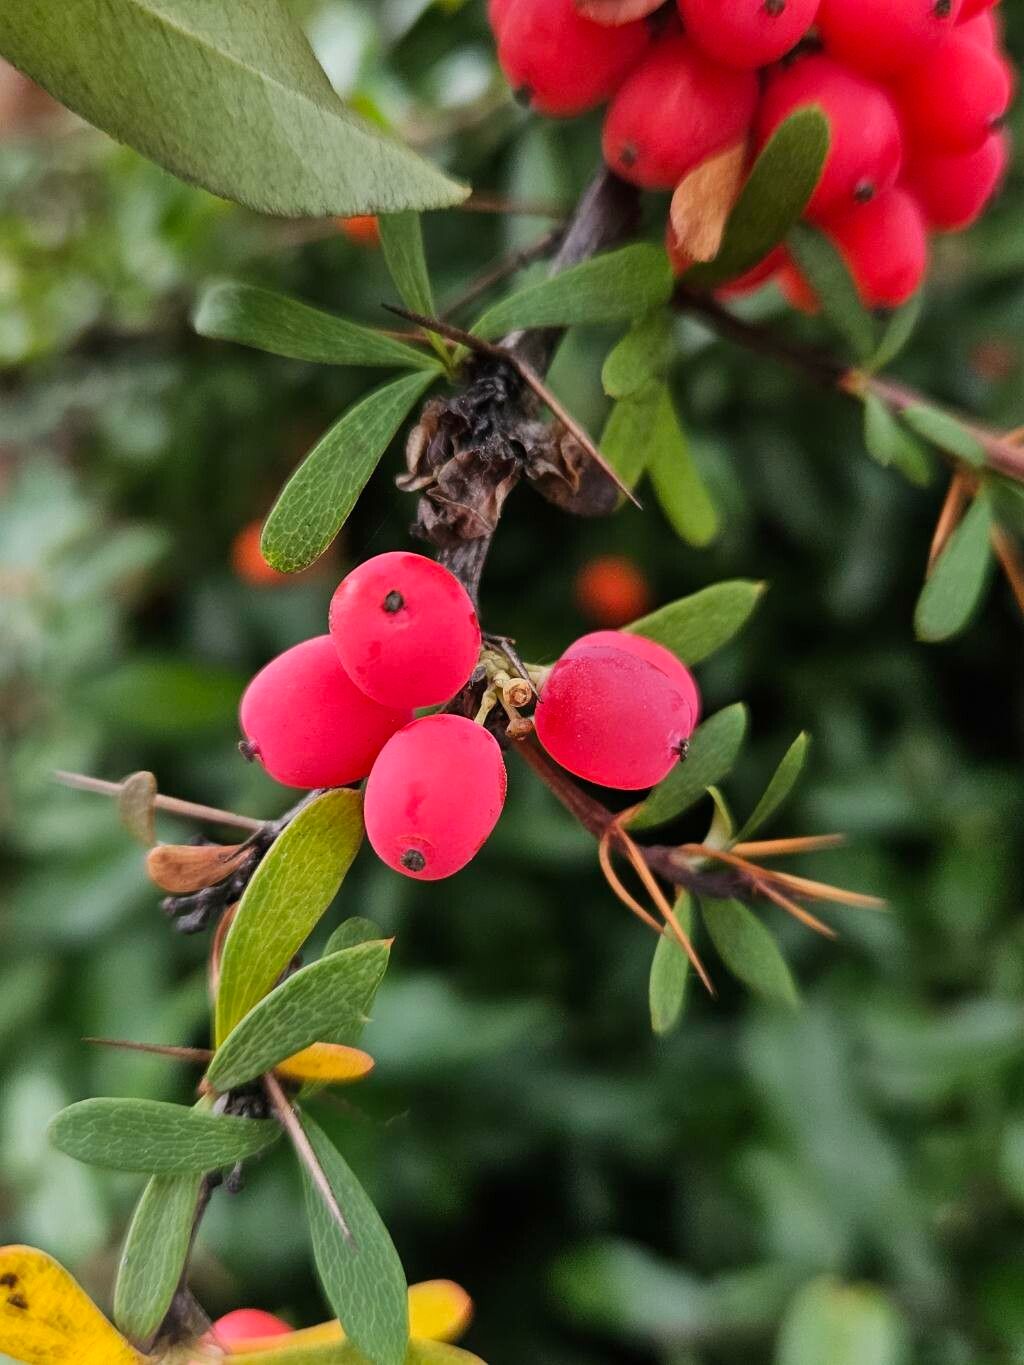
Hello fellow plant lovers! Today, we’re diving into the wonderful world of Berberis aggregata, also known as the cluster barberry. This shrub is a real gem in the garden. Its vibrant spring flowers, often followed by a stunning display of berries, bring so much life and color. Plus, it’s a magnet for birds! Propagating your own Berberis aggregata is incredibly rewarding. You get to multiply that beauty and share it with friends. For beginners, I’d say this plant is moderately easy to propagate, especially if you’re patient. Don’t worry, I’ll walk you through it.
The Best Time to Start
The sweet spot for propagating Berberis aggregata from cuttings is late spring to early summer. This is when the plant is actively growing, and the stems have started to mature a bit but are still somewhat flexible. You’re looking for stems that feel firm, not soft and floppy, but not woody either. Think of it as the “snap test” – a good cutting will snap cleanly rather than bending.
Supplies You’ll Need
Here’s a quick rundown of what you’ll want to have on hand:
- Sharp Pruning Shears or a Craft Knife: Cleanliness is key!
- Rooting Hormone: Powder or gel; it really gives cuttings a boost.
- Potting Mix: A light, well-draining mix is essential. I like to use a blend of peat moss, perlite, and a little bit of sand, or a good quality seed-starting mix.
- Small Pots or Trays: Make sure they have good drainage holes.
- Plastic Bags or Domes: To create a humid environment.
- Labels: So you don’t forget what you planted!
- Watering Can or Spray Bottle: For gentle watering.
Propagation Methods
We’ll focus on stem cuttings, as this is generally the most successful method for Berberis aggregata.
Stem Cuttings
- Take Your Cuttings: In late spring or early summer, select healthy, non-flowering shoots from your mature Berberis aggregata. Using your clean shears, cut pieces about 4-6 inches long. Try to take them from the current year’s growth.
- Prepare the Cuttings: Gently remove the leaves from the lower half of the cutting. You want to expose a few leaf nodes, as this is where roots will emerge. If the leaves are large, you can even cut them in half crosswise to reduce water loss.
- Apply Rooting Hormone: Dip the cut end of each stem into your rooting hormone, ensuring it’s coated. Tap off any excess.
- Potting Up: Fill your pots or trays with your prepared potting mix. Make a hole in the center with your finger or a pencil.
- Insert Cuttings: Place each prepared cutting into the hole, gently firming the soil around it to ensure good contact.
- Water Gently: Water the soil thoroughly but gently. You don’t want to dislodge the cuttings.
Water Propagation (Less Common, but possible for some)
If you’re feeling adventurous, you can try water propagation, though it’s often less successful for shrubs like Berberis aggregata.
- Prepare Cuttings: Follow steps 1 and 2 above, but you don’t need the rooting hormone for this method.
- Place in Water: Put the cuttings in a clean jar or vase filled with room-temperature water. Make sure no leaves are submerged; they will rot.
- Change Water Regularly: Change the water every few days to keep it fresh.
- Wait for Roots: You’ll be looking for small white roots to emerge from the nodes. Once they are about an inch long, you can try to pot them into soil.
The “Secret Sauce” (Pro Tips)
Here are a few things I’ve learned over the years that can really make a difference:
- Bottom Heat is Your Friend: Berberis aggregata cuttings love a bit of warmth from below. If you have a heated propagator or a heat mat, place your pots on it. This encourages root development.
- Don’t Overcrowd: Give your cuttings space. If they’re too close, they can encourage fungal diseases. Good air circulation is important.
- Humidity is Key (but not too much): Covering your pots with a plastic bag or a propagator lid creates that essential humid environment. Just make sure to vent it occasionally to prevent condensation buildup, which can lead to rot. You don’t want it to be steamy, just moist.
Aftercare & Troubleshooting
Once your cuttings are potted, place them in a bright spot, but out of direct sunlight. The goal is to keep them consistently moist, but not waterlogged.
You’ll know roots have formed when you gently tug on a cutting and feel resistance, or when you see new leaf growth. This can take anywhere from 4-8 weeks, sometimes longer.
The biggest challenge you might face is rot. If a cutting turns black and mushy, it’s usually a sign of too much moisture and not enough air circulation, or the presence of fungal issues. Sadly, these are best discarded to prevent the spread. If your cuttings look healthy but show no signs of rooting after a long while, patience is key! Sometimes they just take their time.
A Little Patience Goes a Long Way
Propagating plants is a journey of observation and a healthy dose of patience. Don’t be discouraged if every single cutting doesn’t make it. Celebrate the successes, learn from the challenges, and most importantly, enjoy the process of growing something new. Happy gardening!
Resource:
https://identify.plantnet.org/k-world-flora/species/Berberis%20aggregata%20C.K.Schneid./data