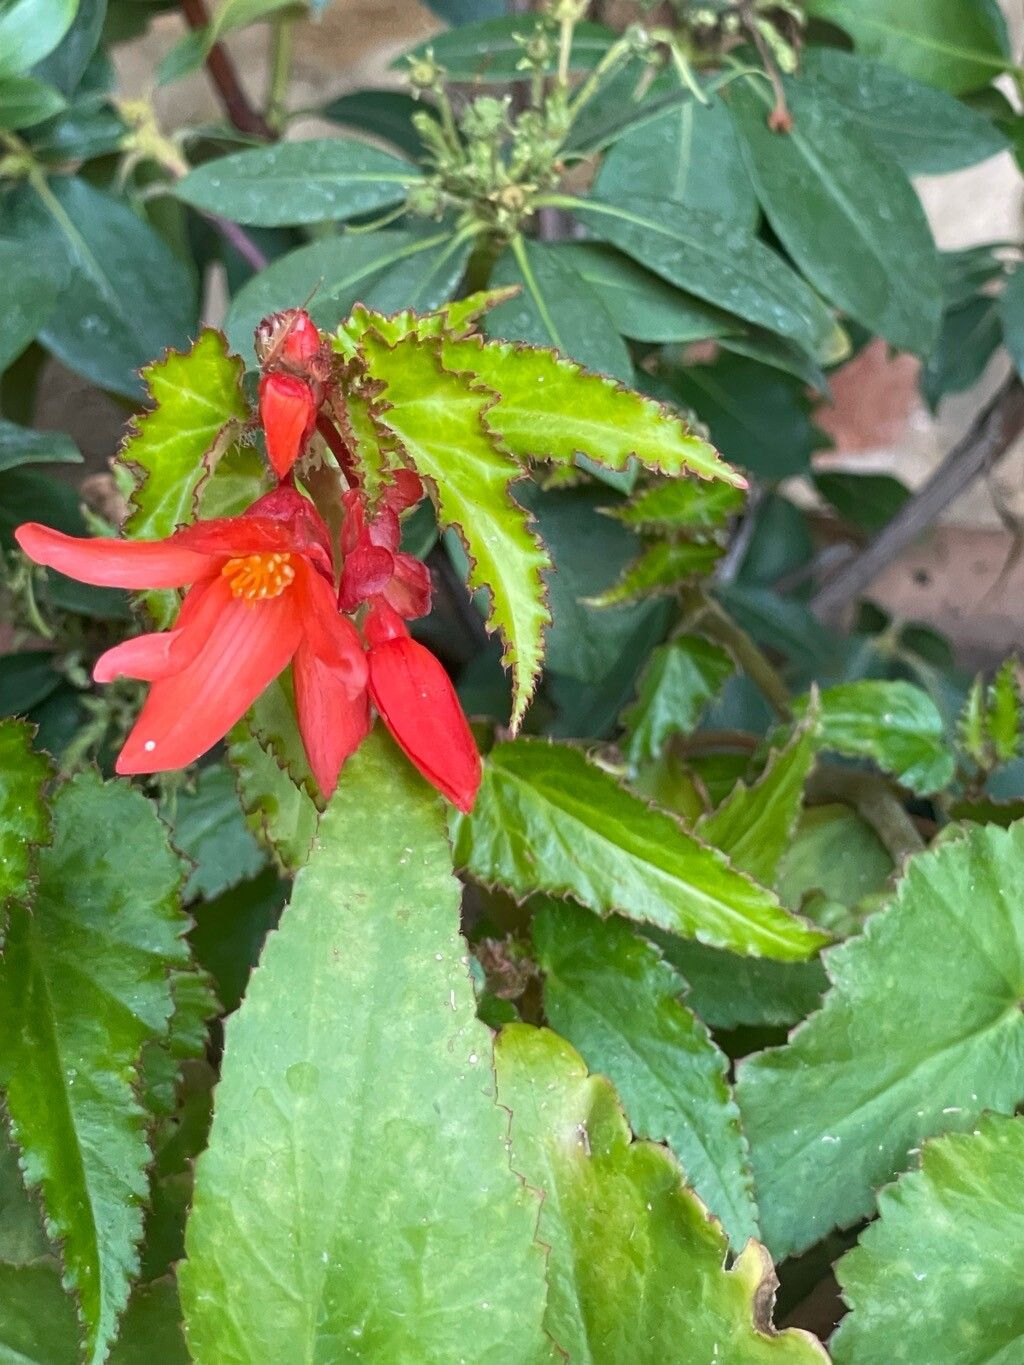
Oh, hello there! Pull up a chair, grab a mug of something warm, and let’s chat about an absolute gem of the plant world: Begonia boliviensis. If you’re not familiar, imagine cascades of delicate, jewel-toned flowers spilling over the edges of a pot, usually in shades of vibrant red, pink, or orange. They’re simply captivating, especially when they’re tumbling down from a hanging basket or window box.
Now, the thought of propagating might sound a little daunting at first, especially if you’re new to the gardening game. But I promise you, Begonia boliviensis is surprisingly forgiving. It’s one of those plants that just makes you feel like a plant wizard when you succeed. And seeing a little cutting transform into a whole new plant? Pure magic. It’s definitely beginner-friendly!
The Best Time to Start
The sweet spot for propagating Begonia boliviensis is definitely in late spring or early summer. This is when the plant is in its most vigorous growth phase. The days are getting longer, the light is abundant, and everything is just bursting with life. Starting then gives your cuttings plenty of time to establish themselves before cooler weather rolls in. You can try it at other times, of course, but you’ll likely see the quickest, most robust results if you aim for this window.
Supplies You’ll Need
Before we dive in, let’s gather our trusty tools. Having everything ready makes the process so much smoother.
- Sharp Pruning Shears or a Clean Knife: For making clean cuts.
- Rooting Hormone (Optional, but Recommended): Helps speed up root development. Look for one specifically for cuttings.
- Well-Draining Potting Mix: A good blend for me is about 50% perlite and 50% peat moss or coco coir. This ensures good aeration and prevents soggy soil. You can also buy pre-made commercial mixes for succulents or cacti, which often work well too.
- Small Pots or Seedling Trays: Clean pots are a must to avoid introducing any nasties.
- Plastic Bags or a Small Greenhouse/Propagator: To maintain humidity.
- Watering Can with a Fine Rose: For gentle watering.
- Labels and a Marker: Trust me, you’ll thank yourself later!
Propagation Methods
Begonia boliviensis is remarkably adaptable, and I’ve had great luck with a couple of methods.
Stem Cuttings: My Go-To
This is usually the most straightforward way to get new plants.
- Take Your Cuttings: In late spring or early summer, select a healthy, vigorous stem. Using your sharp shears or knife, take a cutting that’s about 3-4 inches long. Look for a stem with at least two leaf nodes (the little bumps where leaves emerge). It’s best to make your cut just below a leaf node.
- Prepare the Cutting: Gently remove the lower leaves from the cutting, leaving just one or two at the top. This prevents them from rotting when buried. If your leaves are quite large, you can even cut them in half horizontally.
- Apply Rooting Hormone (Optional): Dip the bottom end of the cutting into your rooting hormone powder, tapping off any excess.
- Plant the Cuttings: Fill your small pots or trays with your well-draining potting mix. Make a small hole with your finger or a pencil. Insert the bottom end of the cutting into the hole, ensuring at least one node is buried in the soil. Gently firm the soil around the cutting.
- Water Gently: Water the soil lightly, ensuring it’s moist but not waterlogged.
- Create a Humid Environment: Pop each pot into a clear plastic bag, sealing it loosely, or place them inside a propagator. This traps humidity, which is crucial for cuttings to root.
Water Propagation (Use with Caution!)
While some begonias do well in water, Begonia boliviensis can be a bit fussier. If you try this, be extra vigilant.
- Take and Prepare Cuttings: Follow steps 1 and 2 from the stem cutting method.
- Place in Water: Find a clean glass or jar and fill it with fresh, room-temperature water. Place the cuttings inside, making sure only the stem is submerged. Crucially, do not let the leaves touch the water.
- Change Water Regularly: This is the most important part. Change the water every 2-3 days to keep it fresh and prevent bacterial growth.
- Watch for Roots: You should start to see tiny white roots appearing in a few weeks.
- Pot Up Promptly: Once the roots are about an inch long, pot them up into your well-draining mix immediately. They are delicate when initially transferred.
The “Secret Sauce” (Pro Tips)
Okay, here are a few little tricks that have made a world of difference for me over the years.
- Bottom Heat is Your Friend: If you have a heat mat designed for seedlings, placing your pots on top of it can significantly speed up rooting. Begonias love warmth, and this provides them with that cozy temperature from below, encouraging those roots to get a move on.
- Don’t Overwater! This is probably the single biggest mistake people make. Begonias, especially cuttings, are susceptible to rot if the soil stays too wet. It’s much better to let the surface of the soil dry out slightly between waterings. A good rule of thumb is to water when the top inch of soil feels dry to the touch.
- Location, Location, Location: Place your cuttings in a spot that receives bright, indirect light. Direct sun will scorch those tender new leaves and potentially dry out your cuttings too quickly under the plastic. An east-facing window or a spot a few feet back from a south-facing window is usually perfect.
Aftercare & Troubleshooting
Once you spy those little roots peeking out from the drainage holes or pushing up the soil, congratulations! You’ve done it!
- Acclimatize Gradually: Slowly introduce your new plant babies to normal room humidity. After a week or so, you can start to open up the plastic bag for a few hours each day, eventually removing it altogether.
- Water Appropriately: Continue to keep the soil moist but not soggy. As the plant grows and its root system develops, you can water it more thoroughly, letting the top layer of soil dry out between waterings.
- Watch for Rot: The most common sign of trouble is rot. If you see the cutting turning mushy, black, and falling over, it’s likely due to too much moisture or a fungal issue. Sadly, these are often beyond saving. Discard any rotted material immediately to prevent it from spreading.
- Lack of Growth: If nothing seems to be happening after several weeks, don’t panic entirely. Sometimes it just takes a while for them to get going. Ensure they have enough light and warmth. If you used rooting hormone, that should help motivate things.
And there you have it! Propagating Begonia boliviensis is a truly rewarding process. Be patient, let nature do its work, and enjoy the delightful journey of growing your own cascades of color. Happy gardening!
Resource:
https://identify.plantnet.org/k-world-flora/species/Begonia%20boliviensis%20A.DC./data