Hello there, fellow plant lovers! I’m so glad you’ve stopped by my little corner of the garden. Today, we’re going to talk about a gem that often gets overlooked, but oh, the joy it brings! We’re diving into the world of Aira praecox.
A Little About Aira Praecox: Nature’s Delicate Whisper
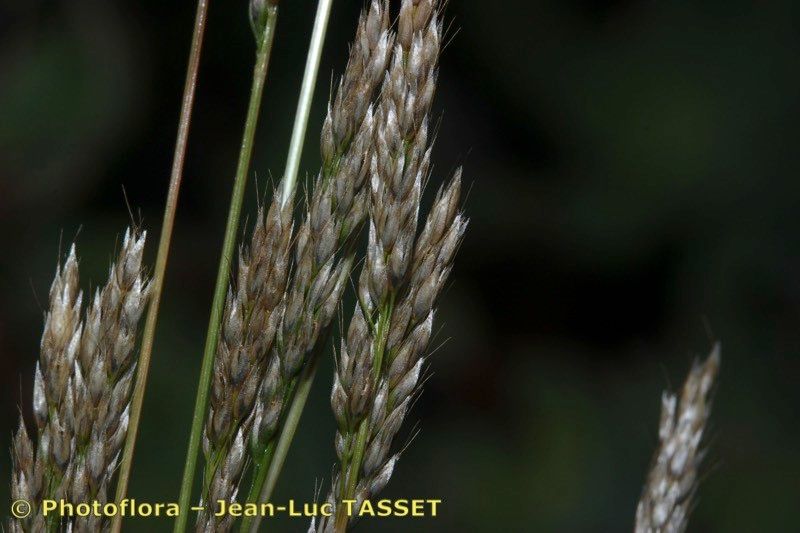
If you’re looking for a touch of airy elegance in your garden, Aira praecox, also known as early hair grass, is a delightful choice. Its fine, delicate foliage and wispy flower stalks create a soft, naturalistic feel, perfect for meadows, rock gardens, or even spilling over edges. Propagating it is a wonderfully rewarding way to expand your collection, and I’m happy to say, it’s quite accessible, even for those of you just starting out on your green journey. It’s not a fussbudget plant at all!
The Best Time to Start: Catching the Growing Wave
For the highest success rate, I always recommend propagating Aira praecox in the spring or early summer. This is when the plant is actively growing and has plenty of energy to dedicate to developing new roots. You can also have success with seeds collected in late summer or fall from mature plants.
Supplies You’ll Need: Gathering Your Tools
Before we get our hands dirty, let’s make sure we have everything we need:
- Sharp pruning shears or a clean knife: For making precise cuts.
- Small pots or trays: With good drainage holes.
- Well-draining potting mix: A mix of peat moss, perlite, and a little sand works beautifully. I often use a beginner-friendly seed starting mix with added perlite.
- Watering can with a fine rose attachment: For gentle watering.
- Optional: Rooting hormone powder: While Aira praecox is quite cooperative, this can give an extra boost.
- Optional: A clear plastic bag or a propagation dome: To maintain humidity.
Propagation Methods: Let’s Get Growing!
There are a couple of excellent ways to multiply your Aira praecox. I find seed propagation to be the most straightforward and successful.
Method 1: Seed Propagation
This is my go-to for Aira praecox. It’s like magic watching tiny seedlings emerge!
- Collect your seeds: Once the feathery seed heads have matured and turned a light brown, you can carefully snip them off. You can either sow them directly or dry them further by placing them in a paper bag for a week or two.
- Prepare your pots: Fill your chosen pots or trays with your well-draining potting mix. Gently press the soil down, but don’t compact it too much.
- Sow the seeds: Scatter the tiny seeds thinly over the surface of the soil. They are quite small, so don’t worry about perfect spacing at this stage.
- Lightly cover: You can gently press them into the soil or cover them with a very thin layer of fine grit or more potting mix – just enough to keep them in place.
- Water gently: Use your watering can with the fine rose to moisten the soil thoroughly but avoid washing the seeds away.
- Provide warmth and light: Place your pots in a bright location out of direct, harsh sunlight. A warm windowsill is perfect.
- Maintain humidity: Covering the pots with a clear plastic bag or a propagation dome will help keep the soil consistently moist and create a humid environment, which seeds love.
- Be patient: Germination can take anywhere from one to four weeks. Keep the soil consistently moist and watch for those first tiny green shoots.
The “Secret Sauce”: Insider Tips from My Garden
Now, for a couple of little tricks I’ve learned over the years that can really make a difference:
- Don’t overwater those delicate seedlings! This is the biggest pitfall. Aira praecox prefers consistently moist soil, not soggy. If you have drainage holes, that’s your first line of defense. But when watering, always err on the side of caution.
- Consider a gentle chilling period for seeds. While Aira praecox often germinates readily, some gardeners find that a brief period in the refrigerator (stratification) can improve germination rates, especially for seeds collected later in the fall. Just pop your seeds in a damp paper towel inside a sealed bag in the fridge for about 2-4 weeks before sowing.
Aftercare & Troubleshooting: Nurturing Your New Sprouts
Once you see those little seedlings emerging, it’s time to adjust your care slightly.
- Remove the cover: Once germination has occurred, gradually remove the plastic bag or dome to allow the seedlings to acclimate to normal humidity.
- Continue gentle watering: Keep the soil consistently moist. As the seedlings grow larger, you can water a little more thoroughly, but always ensure excess water can drain away.
- Provide more light: As the seedlings develop true leaves, they can handle a bit more light, but still, avoid direct, scorching sun. Gradually introduce them to brighter conditions.
- Transplanting: When your seedlings are a few inches tall and have developed a decent root system, you can carefully transplant them into individual pots. Handle them by their leaves, not their delicate stems.
The most common issue you might encounter is damping off, which is a fungal disease that causes seedlings to rot at the soil line. This is almost always due to overwatering and poor air circulation. If you see seedlings wilting and falling over, immediately stop watering, improve air flow, and consider using a fungicide if you have one on hand. It’s a tough lesson, but a valuable one!
A Final Encouraging Word
Propagating Aira praecox is such a lovely way to connect with nature and bring more of its delicate beauty into your life. Be patient with the process – nature has its own timetable. Enjoy watching those tiny seeds transform into graceful grasses. Happy gardening, my friends!
Resource:
https://identify.plantnet.org/k-world-flora/species/Aira%20praecox%20L./data