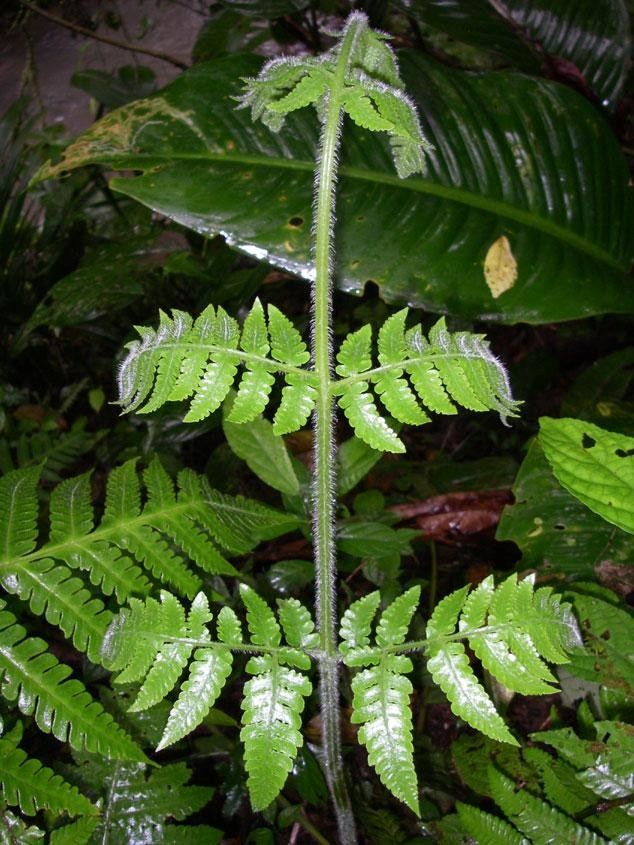
Hello there, fellow plant lovers! Today, I want to chat about a truly special fern: Lonchitis hirsuta. If you’ve ever seen this beauty, you know its appeal. Its fronds are a delicate, feathery masterpiece, adding a touch of wild, yet elegant, charm to any shady corner. And the best part? It’s surprisingly rewarding to multiply! Don’t let the word “fern” intimidate you; while it has its quirks, propagating Lonchitis hirsuta is a journey you can absolutely enjoy, even if you’re just starting out.
The Best Time to Start
For the highest chance of success with Lonchitis hirsuta, I find spring is your golden ticket. As the days lengthen and the plant breaks dormancy, it’s bursting with energy. That’s precisely when it’s most receptive to new growth, making cuttings more likely to root and divisions less stressful for the parent plant. You can also try in early summer, but spring gives you a nice, long growing season for your new babies.
Supplies You’ll Need
Gathering your tools beforehand makes the whole process so much smoother. Here’s what I usually have on hand:
- Sharp pruning shears or a clean, sharp knife: For taking clean cuts.
- Well-draining potting mix: A good blend of peat moss, perlite, and some orchid bark works wonders. You want it to hold moisture but not become waterlogged.
- Rooting hormone (optional, but helpful): A powder or gel form can give your cuttings an extra boost.
- Small pots or seed trays: For your new propagations. Make sure they have drainage holes!
- Plastic bags or a propagation dome: To create a humid environment.
- Watering can with a fine rose: For gentle watering.
- Soft brush (optional): For dusting off excess rooting hormone.
- Labeling tags and a marker: Trust me, you’ll thank yourself later!
Propagation Methods
Let’s get our hands dirty! Lonchitis hirsuta is best propagated through stem cuttings or division.
Stem Cuttings
This is my go-to method for increasing my collection.
- Select a healthy stem: Look for a young, vigorous stem that hasn’t flowered or gone to seed. It should be firm and green, not woody.
- Make the cut: Using your sharp shears, make a clean cut just below a node (where a leaf attaches to the stem). Aim for cuttings about 4-6 inches long. Remove any lower fronds, leaving 2-3 at the top.
- Apply rooting hormone (optional): Dip the cut end into your rooting hormone, gently tapping off any excess.
- Plant the cutting: Fill your small pots with your prepared potting mix. Make a hole with your finger or a pencil and insert the cutting, ensuring the node is buried. Gently firm the soil around it.
- Create humidity: Water the soil gently until it’s evenly moist. Then, cover the pot with a clear plastic bag or place it under a propagation dome. This traps humidity, which ferns absolutely adore. Pop it in a spot with bright, indirect light. You can even give it a little bottom heat with a seedling mat if you have one – it really speeds things up!
Division
If your Lonchitis hirsuta has grown into a larger clump, dividing it is a fantastic way to get more plants.
- Carefully unpot the main plant: Gently tip the pot on its side and slide the plant out.
- Examine the root ball: Gently tease apart the soil to expose the roots and identify natural breaking points. You’re looking for sections that have their own roots and shoots.
- Make the division: Using your hands or a clean knife, carefully separate the clump into smaller sections. Try to ensure each division has a good amount of healthy roots and at least one or two healthy fronds.
- Pot up the divisions: Plant each division in its own pot with fresh, well-draining potting mix.
- Water and mist: Water thoroughly and then mist the fronds. Place them in a location with bright, indirect light and high humidity.
The “Secret Sauce” (Pro Tips)
Here are a few little tricks I’ve picked up over the years:
- Don’t let the leaves touch the water: If you’re doing water propagation (though stem cuttings in soil are usually more successful for this fern), make sure the fronds stay dry. They’re prone to rot if they sit in water.
- Patience is truly a virtue with ferns: Don’t be discouraged if you don’t see immediate results. It can take several weeks for roots to form or for a division to settle in. Keep the environment consistently humid and the soil lightly moist.
- Air circulation matters: While humidity is key, you don’t want stagnant air. If your cuttings are in a bag, occasionally lift it for a few minutes to allow for some air exchange. This helps prevent fungal issues.
Aftercare & Troubleshooting
Once you see new growth emerging from your cuttings or divisions, that’s a great sign! Continue to keep the soil consistently moist but not waterlogged. Gradually introduce your new plants to slightly less humid conditions over a few weeks, and gradually increase the light.
The most common pitfalls are rot and drying out. If your cutting turns mushy or black, that’s rot. This usually indicates too much moisture and not enough air circulation. If the fronds start to yellow and wilt, it might be drying out. Adjust your watering and humidity accordingly. Sometimes, a cutting just doesn’t take – it’s part of the process, so don’t get discouraged!
A Encouraging Closing
Propagating Lonchitis hirsuta is a wonderful way to fill your home and garden with these elegant beauties. It’s a chance to connect with nature and witness the magic of new life. Be patient, observe your plants, and enjoy the fulfilling journey of garden multiplication. Happy propagating!
Resource:
https://identify.plantnet.org/k-world-flora/species/Lonchitis%20hirsuta%20L./data