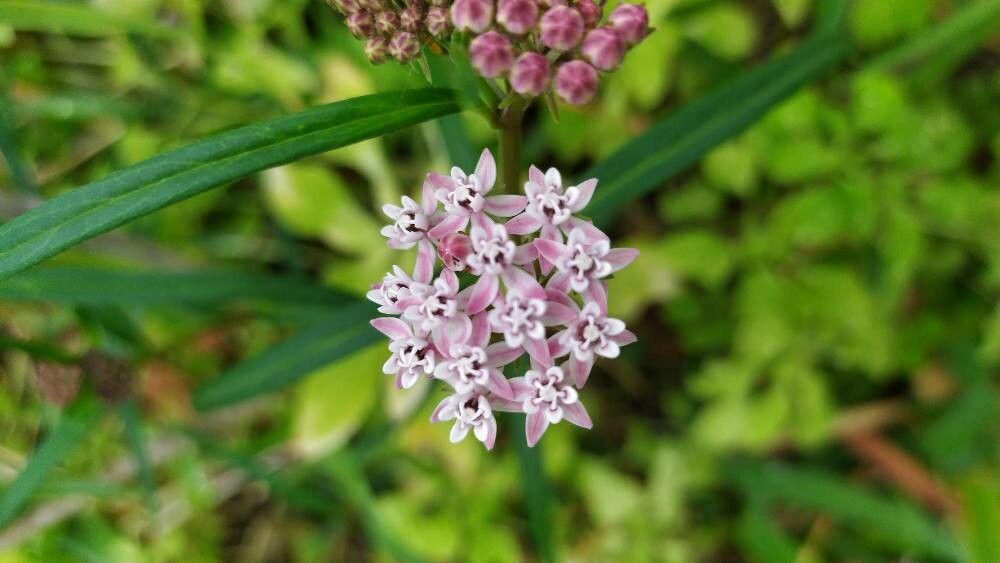
Hello, fellow plant enthusiasts! Today, I want to talk about a gem that’s been a favorite of mine for years: Asclepias perennis, commonly known as perennial or swamp milkweed. If you’re looking for a beautiful native plant that’s a magnet for pollinators and brings a touch of wild charm to your garden, this is it.
The lovely pale pink to lavender flowers aren’t just eye candy; they’re a vital food source for Monarch butterflies and so many other beneficial insects. And the best part? Propagating Asclepias perennis is a really rewarding way to expand your collection or share the joy with friends. Don’t worry if you’re new to this; it’s not overly fussy, and I’ll guide you through it every step of the way.
The Best Time to Start
When it comes to getting the most successful starts, I’ve found that late spring to early summer is your golden window. This is when the plant is actively growing and has plenty of energy to put into developing new roots. You can also take cuttings in early fall, but the success rate might be a tad lower as the plant prepares for dormancy.
Supplies You’ll Need
Gathering your supplies ahead of time makes the whole process smoother. Here’s what I usually have on hand:
- Sharp pruning shears or a clean, sharp knife: For taking clean cuts.
- Small pots or seedling trays: Cleanliness is key!
- A well-draining potting mix: I often use a blend of perlite, peat moss, and a bit of compost. You can also buy specific seed-starting or potting mixes.
- Rooting hormone (optional but helpful): A powder or gel can give your cuttings a little boost.
- Watering can or spray bottle: For gentle watering.
- Clear plastic bags or a propagation dome: To maintain humidity.
- Marker and labels: To keep track of what you’ve planted.
Propagation Methods
Asclepias perennis is quite obliging and can be propagated through a couple of straightforward methods.
Stem Cuttings
This is my go-to method for Asclepias perennis. It’s efficient and often yields great results.
- Take your cuttings: On a bright, healthy stem, make a cut just below a leaf node (where a leaf attaches to the stem). Aim for cuttings about 4-6 inches long. Remove the lower leaves, leaving just one or two at the top.
- Dip in rooting hormone (optional): If you’re using hormone, dip the cut end into it.
- Plant your cuttings: Fill your small pots with your prepared potting mix. Make a hole with your finger or a pencil and gently insert the cutting. Firm the soil around it.
- Water gently: Water thoroughly until the soil is moist but not soggy.
- Create a humid environment: Place the pots in a warm spot with bright, indirect light. Cover the pots with a clear plastic bag (propped up so it doesn’t touch the leaves) or place them under a propagation dome.
Division
If you have an established clump of Asclepias perennis, dividing it in early spring is another excellent way to get new plants.
- Gently dig up the clump: Be careful not to damage the roots too much.
- Separate the root ball: With clean hands or a trowel, gently pull apart the clumps. You want to ensure each new division has a good portion of roots and at least one or two healthy shoots.
- Replant immediately: Plant the divisions in their new homes, watering them in well.
The “Secret Sauce” (Pro Tips)
Here are a few tricks I’ve picked up over the years that can really make a difference:
- Don’t skip the sticky sap step! Asclepias plants weep a milky sap when cut. This sap can sometimes deter rooting. A quick rinse under cool water can help wash away excess sap before you plant your cuttings.
- Bottom heat is your friend: If you’re serious about getting speedy root development, placing your pots on a gentle heated propagation mat can significantly speed up the process, especially if your room is a bit cooler.
- Patience with the “wilt”: Don’t be alarmed if your cuttings wilt a bit in the first week or so. This is normal as they’re adjusting and trying to establish themselves. As long as the leaves aren’t completely black and mushy, keep them in their humid environment!
Aftercare & Troubleshooting
Once your cuttings have developed a healthy root system (you can gently tug on them – if there’s resistance, they have roots!), it’s time to give them a bit more room. Gradually acclimate them to less humidity by opening the plastic bag or dome a little more each day before removing it entirely. Water them regularly, allowing the top inch of soil to dry out between waterings.
The main thing to watch out for is rot. If you see stems turning mushy and black, it’s usually a sign of overwatering or poor drainage. Make sure your potting mix is airy and you’re not keeping them waterlogged. If a cutting rots, it’s best to discard it to prevent it from affecting others.
A Little Encouragement
Propagating plants is a journey, and each success feels like a small victory. So, be patient with your Asclepias perennis, observe them closely, and most importantly, enjoy the process of creating new life. Happy gardening!
Resource:
https://identify.plantnet.org/k-world-flora/species/Asclepias%20perennis%20Walter/data