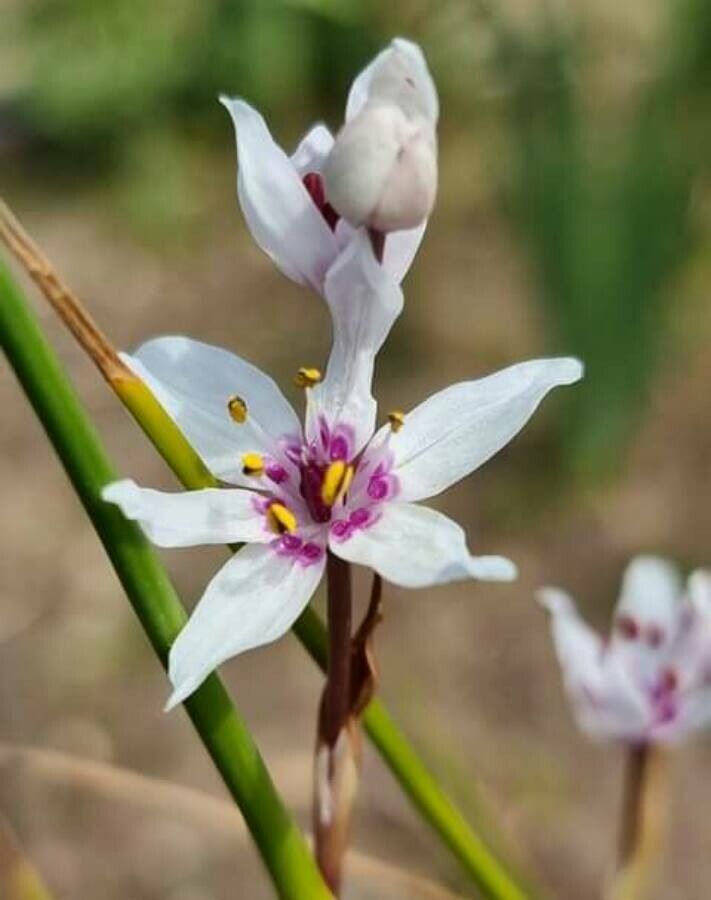
Oh, Wurmbea stricta! If you’ve ever seen one of these beauties in bloom, you know exactly why I’m so excited to share how to bring more of their magic into your own garden. Their delicate, star-shaped flowers, often a lovely shade of purple or pink, are a real delight, nodding gently on slender stems. Propagating them isn’t just about getting more plants; it’s about extending that joy, sharing it with friends, and building a deeper connection with these charming wildflowers. Now, I won’t lie to you straight away – Wurmbea stricta can be a tad particular, especially for absolute beginners. But with a bit of gentle guidance and some patience, you’ll be rewarded. Think of it as learning a new dance with your plants.
The Best Time to Start
For these darlings, timing is everything! The most successful propagation usually happens in late spring or early summer, right after they’ve finished flowering. This is when the plant has a good store of energy to put into new growth. You’re essentially working with a plant that’s hormonally primed to create!
Supplies You’ll Need
Here’s what you’ll want to have on hand before you dive in:
- Sharp, clean pruning shears or a sharp knife: For making clean cuts. Sterilize them with rubbing alcohol!
- Well-draining potting mix: A mix designed for natives or succulents works beautifully. You can also create your own by combining equal parts perlite, coarse sand, and good quality potting soil.
- Small pots or trays: With drainage holes, of course.
- Rooting hormone powder (optional): While not always strictly necessary for all Wurmbea, it can give those cuttings a little extra boost.
- Watering can with a fine rose: To water gently.
- A spray bottle: For misting.
- A dab of activated charcoal (optional but recommended): To help prevent fungal issues in your potting mix.
Propagation Methods
While Wurmbea stricta primarily reproduces from corms (more on that in a moment!), we can often coax new plants from cuttings and even by careful division.
Stem Cuttings
This is a great way to get started, especially if you have a healthy, established plant.
- Take your cuttings: Look for healthy, non-flowering stems. Using your sterilized pruners, snip stems that are about 3-4 inches long. Try to take them from near the top of the plant.
- Prepare the cutting: Gently remove the lower leaves from the stem, leaving just a few at the very top. This helps the plant focus its energy on rooting rather than supporting unnecessary foliage.
- Apply rooting hormone (if using): Dip the cut end of the stem into the rooting hormone powder, tapping off any excess.
- Pot them up: Fill your small pots or trays with your well-draining potting mix. Make a small hole in the center of the mix with your finger or a pencil.
- Insert the cutting: Gently place the cut end of the stem into the hole and firm the soil around it.
- Water gently: Water thoroughly until you see water drain from the bottom.
- Provide humidity: Cover the pot or tray with a clear plastic bag or lid to create a mini-greenhouse effect. Make sure the leaves don’t touch the plastic. This is crucial to prevent rot.
- Place them in a bright spot: They need bright, indirect light. Avoid direct sun, which can scorch tender new cuttings.
Division (Best for Established Plants)
If you have a mature Wurmbea stricta that looks like it’s producing little offsets around its base, this is a wonderful way to divide it.
- Gently remove the plant: In late spring or early summer, carefully lift the entire Wurmbea stricta plant from its pot or the garden bed.
- Identify the divisions: Look closely at the root ball. You’ll likely see smaller corms or pups clustered around the main plant. Gently tease them apart with your fingers. If they are very tightly attached, you can use your clean knife to carefully separate them. Ensure each division has at least one healthy corm and some root system.
- Pot them individually: Pot each division into its own small pot filled with your well-draining mix.
- Water and place: Water them in gently and place them in a bright, indirect light location.
The “Secret Sauce” (Pro Tips)
Here are a few little tricks I’ve learned over the years that make a big difference:
- The bottom heat trick: While not always essential, placing your pots on a gentle heat mat can significantly speed up root formation for cuttings. It mimics the warmth of spring soil and gives those roots a real nudge! Just make sure the mat is set to a low-medium temperature.
- Don’t overwater, but don’t let them dry out: This is a delicate balance! The potting mix should always be kept consistently moist but never soggy. A good way to check is by feeling the weight of the pot or sticking your finger about an inch into the soil.
- Watch for the green shoots: When propagating from cuttings, you might see the leaves stay looking good for a while. Don’t get discouraged! The real sign of success is when you see new green shoots emerging from the base or along the stem. This means roots have established!
Aftercare & Troubleshooting
Once your cuttings have rooted (you’ll see that new growth!), you can gradually remove the plastic cover over a few days. Water them regularly, allowing the top inch of soil to dry out between waterings. Continue to provide bright, indirect light.
Now, let’s talk about what might go wrong. The most common issue is rot. This usually happens due to overwatering or poor drainage. If you see your cutting turning mushy, black, or wilting dramatically despite being watered, it’s likely succumbing to rot. Unfortunately, often there’s no coming back from that. The best approach is often to discard the affected cutting to prevent it from spreading to others and start again with fresh material and a lighter hand on the watering. Sometimes, cuttings simply fail to root. That’s okay! It’s a learning process. Just try again with different stems or at a slightly different time.
A Encouraging Closing
Propagating Wurmbea stricta is a journey, and like any good garden project, it’s about the process just as much as the outcome. Be patient with yourself and your new little plants. Watch for those subtle signs of life, celebrate every new root and shoot, and most importantly, enjoy the magic of growing more of these lovely blooms. Happy gardening!
Resource: