Hello Garden Friends!
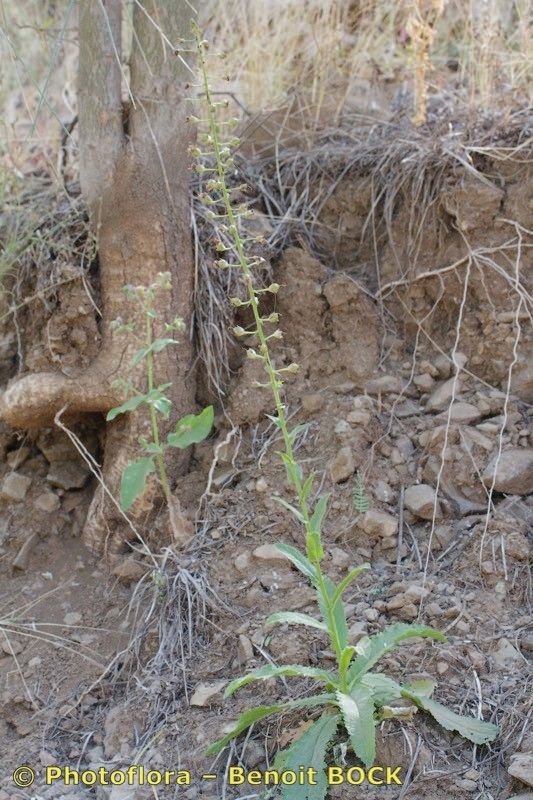
Today, I want to chat about a plant that truly captures my heart: Verbascum capitis-viridis, or the Algerian Mullein. If you’ve ever seen its elegant spires reaching for the sky, adorned with beautiful, often yellow or white, blooms, you know it’s a showstopper. And honestly, coaxing a new Verbascum into being from an existing one? That’s a reward all its own. Don’t let visions of fussy plants deter you; while it has its quirks, propagating Verbascum capitis-viridis is absolutely doable, even for those of you just starting your gardening journey.
The Best Time to Start
For the highest chance of success with Verbascum capitis-viridis, I always lean towards late spring to early summer. This is when the plant is actively growing and has plenty of energy to put into developing new roots. You want to work with healthy, vigorous material, so avoid trying to propagate from plants that are stressed, have just finished flowering, or are looking a bit weary.
Supplies You’ll Need
Here’s what I gather before I get my hands dirty:
- Sharp, clean pruning shears or a sharp knife: For making those crucial cuts. Sterilize them with rubbing alcohol to prevent disease.
- Potting mix: A well-draining mix is paramount. I often use a blend of equal parts peat moss or coco coir, perlite, and a bit of compost. You can also buy commercial seed-starting or propagation mixes.
- Small pots or trays: Clean containers with drainage holes are essential.
- Rooting hormone (optional but recommended): This is a powder or gel that encourages root development.
- Plastic bags or a propagation dome: To maintain humidity.
- Watering can or spray bottle: For gentle watering.
- Labels: Trust me, you’ll thank yourself later!
Propagation Methods
Verbascum capitis-viridis is best propagated from cuttings or by dividing existing plants which can sometimes be a bit tricky with their basal rosette. I find stem cuttings to be the most straightforward and reliable method.
Stem Cuttings
- Take the cutting: In late spring or early summer, select a healthy, non-flowering stem. Using your sterilized shears, make a clean cut about 4-6 inches down from the tip of the stem. I aim for a piece that has at least two sets of leaves.
- Prepare the cutting: Remove the lower leaves from the cutting, leaving just the top cluster. This prevents them from rotting when buried or submerged. If the leaves are very large, you can even cut them in half horizontally to reduce water loss.
- Apply rooting hormone (optional): Dip the cut end of the stem into rooting hormone, tapping off any excess.
- Plant the cutting: Fill your small pots with your prepared, moistened potting mix. Make a small hole with your finger or a pencil and insert the cut end of the stem. Gently firm the soil around the cutting.
- Create a humid environment: Water the soil lightly. Cover the pot with a clear plastic bag, securing it with a rubber band, or place it under a propagation dome. This traps moisture and helps the cutting stay hydrated while it roots. Place it in a bright spot, but out of direct, hot sun.
Division (If you have a mature plant)
If you have an established, mature Verbascum, you might notice root structures that can be carefully divided. This is best done in early spring as new growth begins.
- Gently excavate: Carefully dig around the base of the plant, exposing the root ball.
- Separate chunks: Look for natural divisions in the root system. Using a sharp spade or trowel, or even your hands for smaller divisions, gently pull apart sections of the root ball, ensuring each piece has some healthy roots and a bit of top growth.
- Replant immediately: Plant the divisions into prepared, well-draining soil as you would a new plant. Water thoroughly.
The “Secret Sauce” (Pro Tips)
Here are a couple of tricks I’ve learned over the years that really make a difference:
- Bottom heat is your friend! Verbascum cuttings often root much faster and more reliably when they have a gentle warmth coming from below. A simple seedling heat mat, set to a low temperature, can work wonders. You’ll see roots develop quicker and there’s less risk of rot.
- Don’t let those leaves touch the soil (or the water in water propagation): This is a big one for preventing fungal issues and rot. When you’re planting cuttings, ensure the leaves are held above the soil line. If you decide to try water propagation, make sure only the stem is submerged, not the leaves.
Aftercare & Troubleshooting
Once your cuttings have been planted, patience is key! Check them periodically. You’ll know they’ve rooted when you see new leaf growth and feel a slight resistance when you gently tug on the cutting. This can take anywhere from 4-8 weeks, sometimes longer depending on the conditions.
Once roots have formed, gradually remove the plastic cover over a few days to acclimate the new plant to normal humidity. Continue to water them, allowing the soil to dry slightly between waterings.
The most common problem you might encounter is rot. This usually happens if the cuttings are kept too wet or don’t have enough air circulation. If you see your cutting turning mushy or developing dark spots, it’s likely a sign of rot. Unfortunately, at that point, it’s usually best to discard it and try again, focusing on better drainage and less moisture.
A Encouraging Closing
So there you have it! Propagating Verbascum capitis-viridis is a wonderfully rewarding process. It’s a chance to connect with your plants on a deeper level and, of course, to fill your garden with even more of those stunning spires. Be patient, pay attention to their needs, and don’t be discouraged if your first few attempts aren’t perfect. Every gardener has had their share of failures – it’s all part of the learning curve. Happy propagating, and enjoy watching your new Verbascum thrive!
Resource:
https://identify.plantnet.org/k-world-flora/species/Verbascum%20capitis-viridis%20Hub.-Mor./data