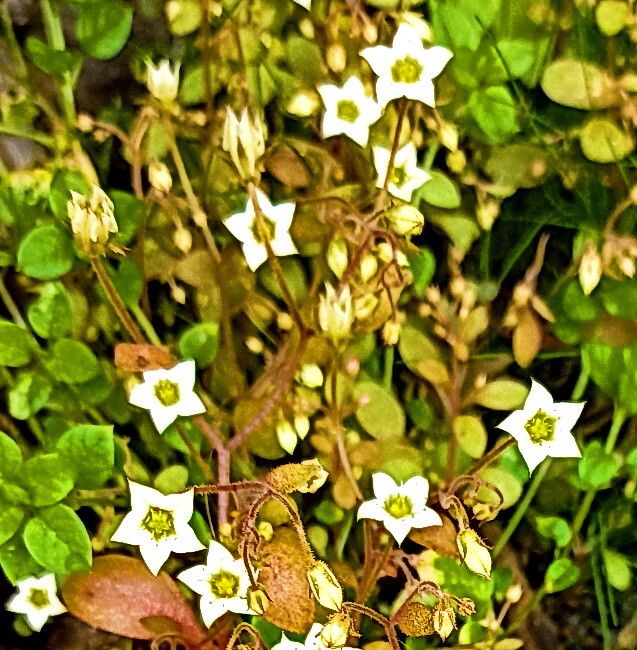
Hello, fellow plant lovers! You know those little succulent gems that bring such charm to a sunny spot? Today, we’re diving into the delightful world of Sedum alsinifolium, sometimes called “False Saxifrage” or just a darling little stonecrop. Its bright green, often slightly lobed leaves and delicate starry white flowers in summer are just so cheerful. And guess what? Propagating it is wonderfully rewarding, and I’m thrilled to share that it’s a fantastic choice for beginners! You’ll be surrounded by your own little Sedum babies in no time.
The Best Time to Start
For the highest success rates, I always aim to take cuttings when the plant is in its active growing season. That typically means from late spring through mid-summer. The stems are plump with energy, ready to put down roots. You can also get away with propagating in early fall, but you’ll want to bring those new babies indoors before the first frost.
Supplies You’ll Need
Don’t worry, you won’t need a whole greenhouse full of fancy equipment to get started! Here’s what I usually have on hand:
- Sharp pruning shears or a clean knife: To make clean cuts.
- Well-draining potting mix: A cactus and succulent mix is perfect. You can also make your own by mixing equal parts potting soil and perlite or coarse sand.
- Small pots or seed trays: Whatever you have is usually fine. Make sure they have drainage holes!
- Rooting hormone (optional but helpful): A powder or gel can give your cuttings a nice boost.
- Watering can or spray bottle: For gentle watering.
- Labels (optional): If you’re propagating more than one thing, it’s a lifesaver!
Propagation Methods
Now, for the fun part! Sedum alsinifolium is quite obliging and can be propagated in a couple of easy ways. My favorite is stem cuttings.
Stem Cuttings
This is my go-to method and it’s super effective.
- Select healthy stems: Look for vibrant, mature stems that are at least 3-4 inches long. Avoid any that look leggy or are showing signs of stress.
- Make the cut: Using your sharp shears or knife, make a clean cut just below a leaf node (where a leaf attaches to the stem). Remove any leaves from the bottom inch or so of the cutting. You want to expose a bit of bare stem so it can form roots.
- Let them callus: This is a crucial step for succulents! Place your cuttings in a dry, well-ventilated spot out of direct sunlight for 2-3 days. You’ll see the cut end dry out and form a protective callus. This prevents rot when you plant them.
- Plant your cuttings: Gently dip the callused end into your rooting hormone, if you’re using it. Then, insert the cuttings about an inch deep into your well-draining potting mix. You can plant several cuttings in the same pot, leaving a little space between them.
- Water sparingly: Give your newly potted cuttings a light watering. You want the soil to be barely moist, not soggy.
Water Propagation
This method is visually satisfying as you can watch the roots grow!
- Prepare cuttings: Follow steps 1 and 2 above for selecting and cutting your stems. Skip the callusing step for water propagation, but do remove enough leaves so that none of them will be submerged in water.
- Place in water: Put the cuttings in a jar or glass filled with fresh water. Make sure that no leaves are touching the water. Only the cut stem should be submerged.
- Find a bright spot: Place the jar in a bright location, but out of direct, harsh sunlight.
- Change water regularly: Refresh the water every few days to keep it clean and prevent bacterial growth.
The “Secret Sauce” (Pro Tips)
Here are a few tricks I’ve picked up over the years that really make a difference:
- Don’t overcrowd your pots: Give those little cuttings space to breathe and develop. It helps prevent fungal issues and allows for better air circulation.
- Bottom heat is a game-changer: If you have a seedling heat mat, placing your pots on it can significantly speed up root development, especially if the weather is a bit cooler. It mimics the warmth of spring!
- Patience is key with water roots: If you’re water propagating, it can take a week or two to see roots. Once you have roots that are about an inch long, it’s time to transition them to soil. Let them air dry for a day or two before planting in well-draining soil, just like you would with cuttings.
Aftercare & Troubleshooting
Once your cuttings have developed roots (you can gently tug on them to feel resistance, or you might see roots peeking out of drainage holes), it’s time to treat them like a mature Sedum!
- Gradually introduce to sunlight: Start by placing them in a spot with bright, indirect light and slowly move them to their permanent sunny location over a week or two.
- Water when dry: Let the soil dry out completely between waterings. Overwatering is the most common mistake.
- Watch out for rot: Mushy, black stems are a clear sign of rot, usually caused by too much moisture. If you see this, unfortunately, that cutting is likely lost. You can try to salvage healthy parts of the stem if caught early.
- Legginess: If your new plants are stretching out and looking thin with big gaps between leaves, they aren’t getting enough light. Move them to a brighter spot!
A Encouraging Closing
And there you have it! Propagating Sedum alsinifolium is a joy, and with these simple steps, you’ll be well on your way to a whole collection of these charming little plants. Don’t get discouraged if a cutting doesn’t make it – gardening is all about learning and experimentation. Just enjoy the process, celebrate your successes, and happy growing!
Resource:
https://identify.plantnet.org/k-world-flora/species/Sedum%20alsinifolium%20All./data