Hey there, fellow plant lovers!
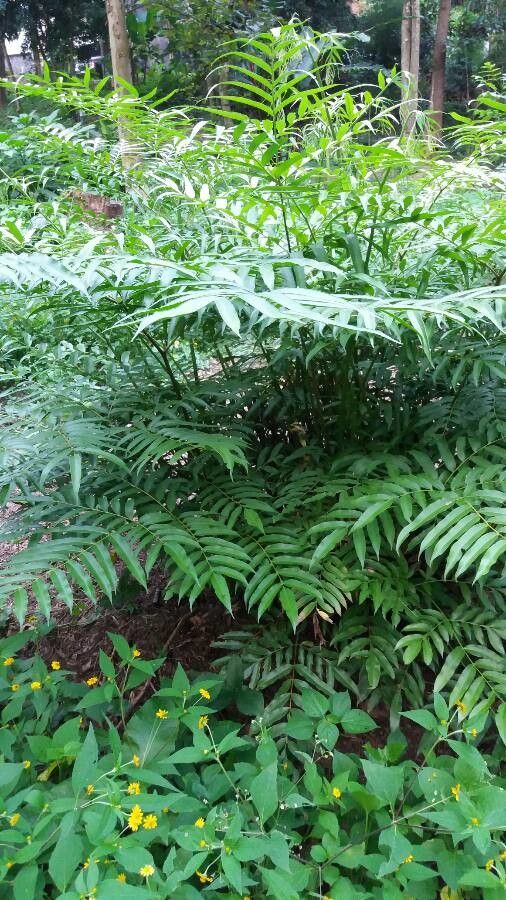
It’s so wonderful to have you here. Today, we’re diving into the fascinating world of propagating Phanerophlebia umbonata. If you’ve ever admired this beauty, with its unique, almost architectural foliage, you know how special it is. The reward of nurturing a brand-new plant from a little piece of its parent is truly one of gardening’s greatest joys, don’t you think? Now, when it comes to Phanerophlebia umbonata, I’d say it’s a moderately rewarding plant to propagate. It’s not quite a “stick it in the ground and forget about it” situation, but with a little care and attention, you’ll be successful.
The Best Time to Start
For the most successful propagation, I always aim to start in the late spring or early summer. This is when the plant is actively growing and has plenty of energy to put into developing new roots. Wait until new growth feels firm and mature, not super soft and floppy.
Supplies You’ll Need
Gathering your supplies before you begin always makes the process smoother. Here’s what I typically have on hand:
- Sharp, clean pruning shears or a sharp knife: Essential for making clean cuts.
- Rooting hormone (optional but recommended): A little boost can go a long way.
- Well-draining potting mix: I like a blend of perlite, coco coir, and a bit of compost.
- Small pots or trays: Whatever you have that will hold your cuttings comfortably.
- Clear plastic bags or a propagator: To create a humid environment.
- Plant labels and a marker: To keep track of your efforts!
Propagation Methods
There are a couple of ways we can go about this, but my favorite for Phanerophlebia umbonata is through stem cuttings.
- Take Your Cuttings: Using your clean shears, select a healthy stem that has at least two to three leaves. Make a cut just below a leaf node. A leaf node is that little bump where a leaf attaches to the stem. This is where roots will emerge from.
- Prepare the Cuttings: Gently remove the lower leaves, leaving two or three at the top. If you’re using rooting hormone, dip the cut end of the stem into it, tapping off any excess. This step is like giving your cutting a little “health insurance.”
- Planting: Fill your small pots with your pre-moistened potting mix. Make a small hole in the center with your finger or a pencil. Carefully insert the cut end of your stem into the hole, ensuring the node is well-covered by the soil. Gently firm the soil around the stem.
- Create Humidity: This is crucial! Water the soil lightly. Then, cover the pot with a clear plastic bag or place it in a propagator. This traps moisture and mimics the humid environment a cutting needs to thrive before it can establish roots. You can support the bag with stakes so it doesn’t touch the leaves.
- Placement: Place your cuttings in a bright spot with indirect light. Avoid direct sunlight, which can scorch the delicate young leaves.
The “Secret Sauce” (Pro Tips)
Here are a couple of tricks I’ve learned over the years that really up your propagation success.
- Don’t Let Water Pool: If you’re attempting water propagation (though stem cuttings in soil are generally more reliable for this plant), make sure no leaves are touching the water. They will rot very quickly. Only the stem should be submerged.
- Bottom Heat is Your Friend: If you have a seedling heat mat, placing your pots on it can significantly speed up root development. It mimics the warmth of spring soil and encourages those roots to get moving.
Aftercare & Troubleshooting
Once you start to see signs of new growth, that’s a great indicator that roots are forming! You can gently tug on the cutting – if there’s resistance, roots are likely present.
- Gradual Acclimation: As your cutting starts to grow, gradually remove the plastic bag or open the propagator vents over a week or so. This helps the new plant adjust to the normal humidity of your home.
- Watering: Keep the soil consistently moist but not soggy. Overwatering is the quickest way to invite rot.
- Signs of Trouble: The most common issue you’ll face is rot, indicated by mushy, discolored stems. If this happens, sadly, that cutting is usually a goner. It’s often caused by too much moisture, poor drainage, or not enough air circulation. Another sign of failure is wilting that doesn’t improve after watering, which can mean the roots haven’t developed or have dried out too much.
A Encouraging Closing
Gardening is a journey of patience and observation, and propagating your Phanerophlebia umbonata is a perfect way to practice both. Don’t be discouraged if not every cutting takes. Each attempt is a learning experience! Just keep at it, enjoy the process of nurturing something new, and you’ll soon be rewarded with beautiful new plants to admire and share. Happy propagating!
Resource:
https://identify.plantnet.org/k-world-flora/species/Phanerophlebia%20umbonata%20Underw./data