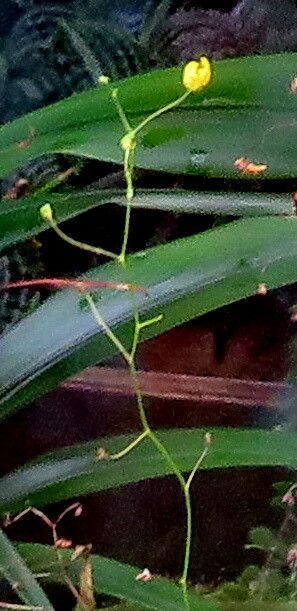
Ah, Utricularia flaccida! What a treat to talk about this little wonder. If you’re looking for a plant that brings a touch of the whimsical to your windowsill or bog garden, you’ve found it. These bladderworts are just fascinating with their tiny, delicate flowers and their carnivorous nature. Propagating them, I’ve found, is actually a rather rewarding and surprisingly simple endeavor, even for those just starting out on their plant parent journey. You get to witness new life spring forth from a tiny piece, and that’s always a thrill, isn’t it?
The Best Time to Start
For Utricularia flaccida, like many plants, spring and early summer are your golden ticket. When the plant is actively growing and the days are getting longer and warmer, it has all the energy it needs to put into developing those new roots and leaves. Aim for when you see new growth appearing, maybe a flush of fresh green shoots. Avoid trying to propagate during the plant’s dormant period; it’s like trying to bake a cake without an oven – just not going to work well!
Supplies You’ll Need
Gathering your supplies before you start makes the whole process smoother. Here’s what I like to have on hand:
- Sharp, clean pruning shears or a sharp knife. Sterilize them with rubbing alcohol first – we don’t want to introduce any unwelcome guests!
- A peat-free potting mix. Something airy and well-draining is key. I often use a mix of sphagnum peat moss, perlite, and a little bit of orchid bark.
- Small pots or propagation trays. These can be anything from tiny nursery pots to old yogurt containers with drainage holes.
- A spray bottle for keeping things nicely humid.
- Optional: Rooting hormone. While Utricularia flaccida is pretty good at rooting on its own, it can give a little boost.
Propagation Methods
Let’s get our hands dirty! Utricularia flaccida is quite amenable to a few different propagation techniques.
Stem Cuttings
This is my go-to method for Utricularia flaccida. It’s incredibly effective.
- Select a healthy stem. Look for a piece of the plant that has at least two or three nodes (where leaves emerge from the stem).
- Make a clean cut. Using your sterilized shears or knife, snip the stem just below a node. You want a cutting that’s about 2-3 inches long.
- Prepare the cutting. Gently remove the lower leaves from the bottom node. This prevents them from rotting once planted.
- Plant the cutting. Make a small hole in your prepared potting mix. Dip the cut end of the stem into the rooting hormone (if using), then gently insert it into the hole, ensuring the lower nodes are covered by the soil.
- Water gently. Water the potting mix thoroughly but gently. You don’t want to dislodge your cutting.
- Provide humidity. Place a clear plastic bag or a propagation dome over the pot to create a humid environment. Make sure the leaves aren’t touching the plastic if possible.
Division
If your Utricularia flaccida has become a nice clump, division is a simple way to get multiple plants.
- Gently remove the plant from its pot. Try not to disturb the root ball too much.
- Identify natural divisions. Look for where the plant naturally splits into separate sections.
- Carefully separate the sections. You can often do this by gently teasing them apart with your fingers. If it’s stubborn, use your clean knife to cut through any entwined roots.
- Pot up the divisions. Plant each section into its own small pot filled with your potting mix, just as you would a finished cutting. Water well.
The “Secret Sauce” (Pro Tips)
Here are a couple of things I’ve learned over the years that really make a difference:
- Don’t let the leaves of the cutting sit in standing water. If you’re using a method where parts of the plant might be submerged, ensure only the stem node is in contact with the moisture. Rot is the enemy here!
- Bottom heat is your friend. Setting your propagation tray or pots on a heat mat can dramatically speed up root development. It mimics the warmth of spring and encourages those roots to get a move on. Just a gentle warmth is all that’s needed.
Aftercare & Troubleshooting
Once you see new growth appearing on your cutting or division, that’s a great sign that roots have formed!
- Gradually acclimate. Once roots are established, you can start to slowly remove the humidity cover. Do this over a few days, increasing the time the plant is exposed to open air each day.
- Watering. Continue to keep the potting mix consistently moist but not waterlogged. I like to water when the top layer of soil just starts to feel dry.
- Light. Place your new plants in bright, indirect light. Avoid direct sun initially, as they can be quite sensitive.
- Troubleshooting: Rot. The most common issue you might face is rot. This usually happens when the cutting is kept too wet, or if air circulation is poor. If the stem turns mushy and black, unfortunately, it’s likely a lost cause. Don’t be discouraged; just try again with fresh material and adjust your watering. Another sign of failure might be the leaves wilting drastically and not recovering. This could also be due to lack of roots or too much stress.
A Little Patience Goes a Long Way
Propagating plants is a journey, not a race. Be patient with your little Utricularia flaccida cuttings. Some may take their sweet time to root, while others will practically fly. Enjoy the process of nurturing these new beginnings. Before you know it, you’ll have a whole collection of these charming carnivorous wonders to share! Happy propagating!
Resource:
https://identify.plantnet.org/k-world-flora/species/Utricularia%20flaccida%20A.DC./data