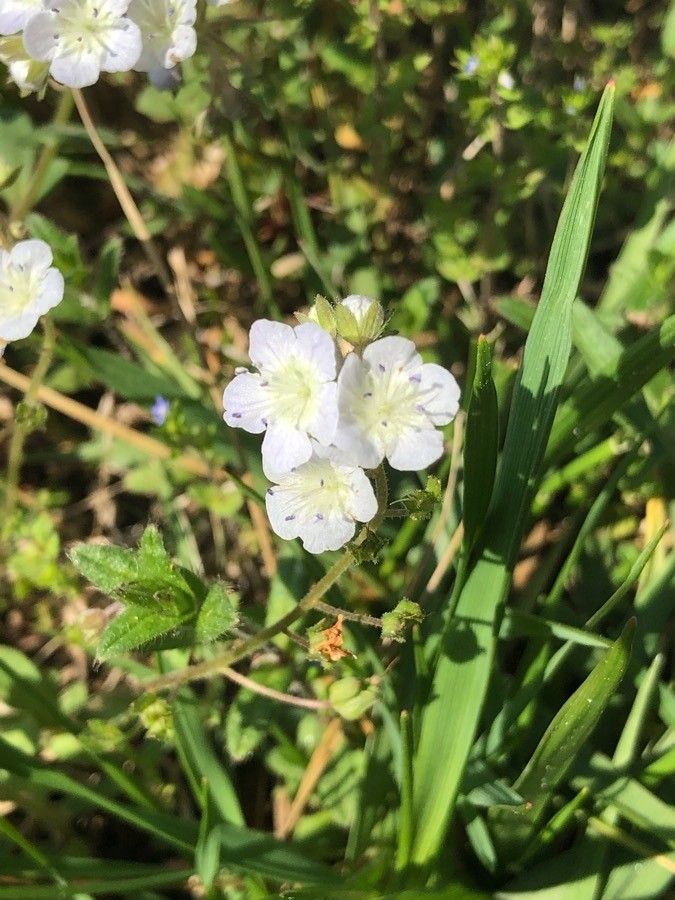
Hey there, fellow garden enthusiasts! Grab yourself a warm mug, because we’re about to chat about one of my absolute favorite wildflowers: Phacelia dubia. If you’ve ever seen this beauty gracing a meadow or a wild planting, you know what I mean. Those delicate, lavender-blue bell-shaped flowers are simply enchanting, attracting all sorts of buzzing friends. And the best part? Learning how to propagate Phacelia dubia yourself is a wonderfully rewarding process. For beginners, I’d say it’s moderately easy, a fantastic plant to get your feet wet with propagation.
The Best Time to Start
For the highest success rate, I find springtime is your best bet. Think late spring, just as the plant is hitting its stride after the initial flush of growth but before the intense heat of summer sets in. You want to work with healthy, actively growing stems.
Supplies You’ll Need
Here’s what you’ll want to have on hand:
- Sharp pruning shears or a clean knife: For making nice, clean cuts.
- Small pots or seed trays: Clean ones are a must!
- Well-draining potting mix: A cactus/succulent mix or a seed-starting mix works wonderfully. You can also create your own by blending equal parts peat moss, perlite, and coarse sand.
- Rooting hormone (optional but recommended): Especially helpful for cuttings.
- Plastic bag or clear dome: To create a humid environment.
- Watering can with a fine rose: For gentle watering.
- Spray bottle: For misting.
- Labels and a marker: To keep track of your efforts!
Propagation Methods
While Phacelia dubia can be grown from seed, I find the easiest and most satisfying method is through stem cuttings. It allows you to get established plants a bit quicker.
- Take Your Cuttings: In late spring, select a healthy, non-flowering stem from your mature plant. Using your sharp shears, make a clean cut just below a leaf node (where a leaf attaches to the stem). You’re aiming for cuttings that are about 3-4 inches long. Remove the lower leaves, leaving just a few at the top.
- Apply Rooting Hormone (Optional): If you’re using rooting hormone, dip the cut end of the stem into it, tapping off any excess.
- Plant Your Cuttings: Fill your clean pots or trays with your well-draining potting mix. Make a small hole in the center of the soil with your finger or a pencil. Insert the cut end of your Phacelia dubia cutting into the hole, ensuring the leaf node is below the soil surface. Gently firm the soil around the stem.
- Water and Cover: Water the soil gently until it’s evenly moist but not waterlogged. Then, cover the pots with a clear plastic bag or a dome. This is crucial for maintaining humidity, which encourages root development.
The “Secret Sauce” (Pro Tips)
Here are a couple of things I’ve learned over the years that really make a difference:
- Don’t let the leaves touch the water if you were to try water propagation (though I prefer cuttings for this one!): For cuttings, this tip applies to the humidity. Ensure the leaves are mostly above the soil line and not constantly sodden in mist. It helps prevent rot.
- Bottom heat can work wonders: If you have a heat mat designed for propagation, placing your pots on it can significantly speed up the rooting process. It mimics the warmth of the soil where roots are inclined to form.
Aftercare & Troubleshooting
Once your cuttings are planted and covered, place them in a bright spot with indirect sunlight. Avoid direct sun, as it can scorch the delicate cuttings. Mist the soil every few days if it seems to be drying out, or if you see condensation on the inside of the plastic, that’s a good sign.
You’ll start to see roots developing in about 4-6 weeks. You can gently tug on a cutting – if there’s resistance, roots have formed! Once they’ve established a good root system, you can gradually remove the plastic cover over a few days to acclimate them to normal humidity. Then, you can transplant them into their own individual pots.
The most common sign of failure is rot. If your cuttings turn mushy and black, it’s usually a sign of too much moisture and poor air circulation. If you see this happening, try removing the affected cutting immediately and ensure your soil is draining extremely well.
A Encouraging Closing
Propagating Phacelia dubia is a journey, and like all good gardening adventures, it requires a little patience. Don’t be discouraged if you have a few failures along the way. Each attempt is a learning opportunity. Take pleasure in nurturing these new little plants, and before you know it, you’ll have a whole meadow of these delightful blooms to share! Happy gardening!
Resource:
https://identify.plantnet.org/k-world-flora/species/Phacelia%20dubia%20(L.)%20Trel./data