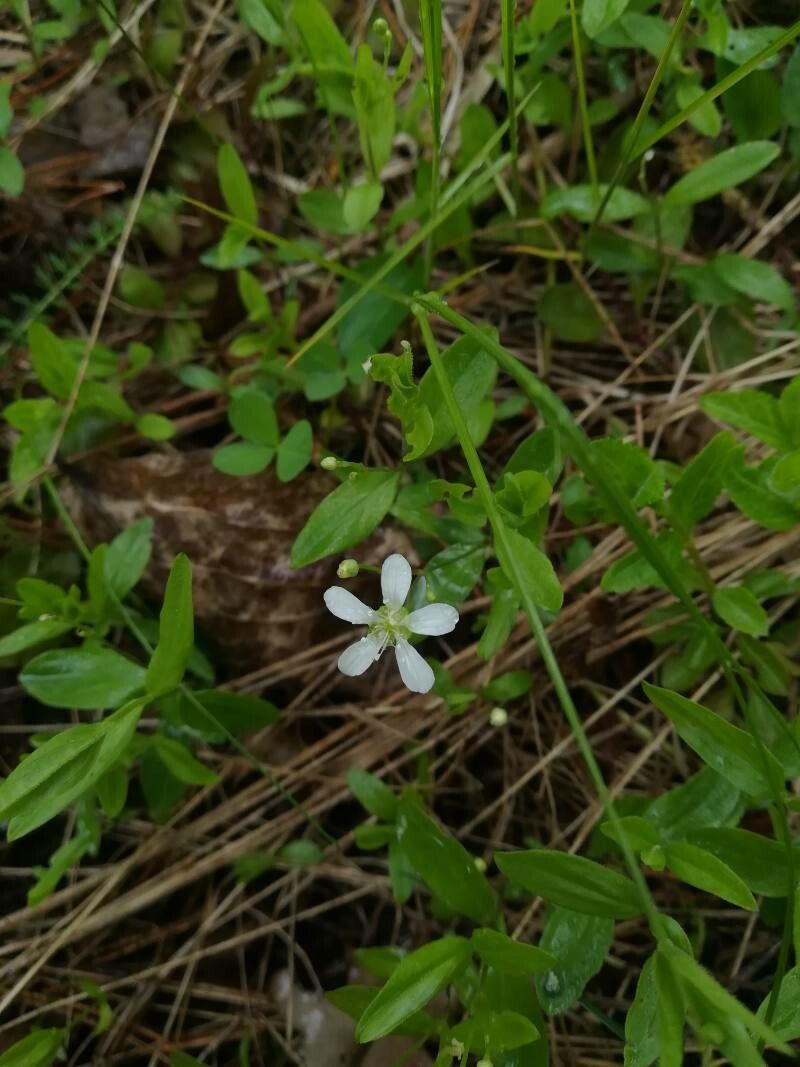
Hey everyone! Today, we’re diving into the delightful world of Moehringia lateriflora, also known as shade sandwort. I’ve been coaxing these little beauties to multiply for years, and let me tell you, there’s a special kind of joy in watching a tiny snippet of plant transform into a whole new, thriving specimen. If you’re looking for a charming, low-growing groundcover that’s happy in shady spots and offers delicate, starry white flowers, you’re in for a treat. Propagating Moehringia lateriflora can be a bit of a rewarding challenge, and while it might not be the absolute easiest plant for a complete beginner, with a little patience and these tips, you’ll be well on your way!
The Best Time to Start
For the highest success rate with Moehringia lateriflora, I’ve found that late spring to early summer is your golden window. This is when the plant is actively growing and has plenty of energy to invest in putting out roots. Aim for when the stems are still relatively flexible but have developed a bit of woody texture. Avoid taking cuttings from flowering stems; you want the plant to focus its energy on roots, not blooms.
Supplies You’ll Need
Gathering your supplies beforehand makes the whole process so much smoother. Here’s what I always have on hand:
- Sharp Pruning Shears or a Craft Knife: Clean cuts are crucial for preventing disease.
- Rooting Hormone (Optional but Recommended): A good quality powder or gel can really give your cuttings a boost.
- Well-Draining Potting Mix: A 50/50 blend of perlite and peat moss or coco coir works wonders. Some gardeners also like to add a bit of coarse sand to improve aeration further.
- Small Pots or Propagation Trays: Clean, small pots (around 3-4 inches) or cell trays are perfect.
- Dibber or Pencil: To make a nice hole for your cutting.
- Plastic Bags or Cling Film: To create a humid environment.
- Watering Can with a Fine Rose: For gentle watering.
- Labels and a Permanent Marker: To keep track of what’s what!
Propagation Methods: Let’s Get Our Hands Dirty!
The most successful way I’ve found to propagate Moehringia lateriflora is through stem cuttings. Here’s how I do it:
- Selecting the Cuttings: Gently look over your established plant. You’re looking for healthy, non-flowering stems. Snip off pieces that are about 3-4 inches long. Try to get pieces that include at least a few sets of leaves.
- Preparing the Cuttings: Once you have your cuttings, carefully remove the leaves from the lower half of the stem. This is important because those buried leaves will just rot in the soil and introduce fungal issues. If the remaining leaves are quite large, you can even trim them in half to reduce water loss.
- Applying Rooting Hormone: Now for the magic! Dip the cut end of each stem into your rooting hormone. Tap off any excess – you just want a light coating.
- Planting the Cuttings: Using your dibber or pencil, make a hole in your prepared potting mix. Gently insert the prepared cutting into the hole, making sure the nodes where you removed the leaves are below the soil surface. Firm the soil gently around the base of the cutting to ensure good contact.
- Creating a Humid Environment: Lightly water the soil. Then, cover the pot or tray with a clear plastic bag or cling film. You can use stakes to keep the plastic from touching the leaves, or drape it loosely. This creates a mini-greenhouse effect, keeping humidity high, which is crucial for cuttings that haven’t developed roots yet.
- Placement: Place your pots in a bright spot that receives indirect light. Avoid direct sunshine, which can scorch the delicate cuttings.
The “Secret Sauce” (Pro Tips)
I’ve learned a few tricks over the years that can really make a difference.
- Bottom Heat is Your Friend: If you have a heated propagator mat, using it can significantly speed up root development. Moehringia lateriflora loves a bit of warmth from below.
- Don’t Drench, Mist! While you need humidity, you don’t want soggy soil. Keep the soil moist but not waterlogged. For the first few weeks, it’s often better to mist the cuttings and the inside of the cover than to water from the top, which can dislodge them.
- Patience with Propagation: Sometimes, especially with plants that aren’t super fast growers, you just have to wait. I often leave cuttings in their propagation tray for at least 6-8 weeks, sometimes longer, before I even think about checking for roots.
Aftercare & Troubleshooting
Once you start seeing signs of new growth – tiny new leaves or a little tug when you gently pull on a cutting – you know you’re getting somewhere!
- Acclimatize Gradually: If you’ve covered your pots, start gradually removing the cover over a few days. This helps the young plant adjust to the drier air of your home or garden.
- Potting Up: When the roots are well-established and you can see them coming out of the drainage holes (or you feel a good resistance when gently tugging), it’s time to pot your new Moehringia lateriflora into slightly larger individual pots.
- Watch for Rot: The most common issue you’ll encounter is rot. If you notice stems turning mushy and black, it’s a sign of too much moisture and not enough air circulation. Discard any rotting cuttings immediately and ensure your soil mix is airy enough.
- Leggy Growth: If your cuttings are getting long and thin with few leaves, they might not be getting enough light, or the humidity is too low.
A Little Encouragement
Propagating plants is a wonderfully rewarding journey, and even seasoned gardeners have a few failures along the way. Don’t get discouraged if your first attempt doesn’t yield a forest of new plants. Keep experimenting, observe your cuttings closely, and learn from each experience. The satisfaction of nurturing a new life from a tiny piece of your beloved garden is truly special. Happy propagating!
Resource:
https://identify.plantnet.org/k-world-flora/species/Moehringia%20lateriflora%20(L.)%20Fenzl/data