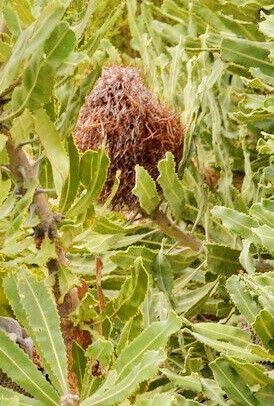
Ah, Banksia menziesii! That fiery display of toothbrush-like blooms is enough to make any gardener swoon. I’ve grown these beauties for years, and there’s something incredibly special about coaxing a new life from a parent plant. If you’re looking for a rewarding project, propagating them is definitely it. Now, I won’t sugarcoat it: Banksias can be a little finicky, but with a bit of patience and the right approach, you can absolutely succeed! It’s not quite like striking a rose, but it’s far from impossible.
The Best Time to Start
For Banksia menziesii, I find the sweet spot for taking cuttings is late spring to early summer. This is when the plant is actively growing after its main flowering period. You’re looking for semi-hardwood cuttings. These are stems that were once soft and green but have started to firm up, losing that floppy quality. Avoid brand new, bright green growth or old, woody stems.
Supplies You’ll Need
To get your Banksia menziesii off to a good start, gather these essentials:
- Sharp, clean pruning shears or a knife: For making clean cuts. Sterilize them with rubbing alcohol between each cut to prevent spreading any nasties.
- Rooting hormone: A powder or gel specifically for woody plants or semi-hardwood cuttings.
- Rooting medium: A well-draining mix is crucial. I usually use a 50/50 blend of perlite and coarse sand, or a commercial propagation mix designed for natives. Regular potting soil just holds on to too much moisture.
- Small pots or trays: Clean containers with drainage holes are a must.
- A clear plastic bag or a propagator lid: To create a humid environment.
- Dibber or pencil: To make holes in the potting mix for your cuttings.
- Gentle misting bottle: For keeping things moist.
Propagation Methods: Taking Stem Cuttings
This is generally the most successful route for Banksia menziesii.
- Select Your Cuttings: Look for healthy, non-flowering stems on your established plant. You want pieces that are about 10-15 cm (4-6 inches) long. Make your cut just below a leaf node (where a leaf attaches to the stem). This is where the magic happens for root development.
- Prepare the Cuttings: Remove any leaves from the lower half of the cutting. You can leave the top few leaves, but trim them in half if they’re very large to reduce water loss.
- Apply Rooting Hormone: Dip the cut end of the stem into your rooting hormone, tapping off any excess. Make sure the hormone coats the bottom centimeter or so.
- Pot Them Up: Fill your clean pots with your well-draining rooting medium. Use your dibber or a pencil to make a hole in the center. Gently insert the cutting into the hole, making sure the rooting hormone stays in place. Firm the mix around the base of the cutting.
- Water and Cover: Water the pots gently to settle the rooting medium. Then, place the pots into a clear plastic bag, sealing it loosely with a twist tie, or cover them with a propagator lid. This creates a mini-greenhouse effect to maintain humidity.
The “Secret Sauce” (Pro Tips)
Over the years, I’ve learned a few tricks that can really boost your success rate:
- Bottom Heat is Your Friend: Banksias love a bit of warmth from below. If you have a heat mat designed for seedlings, pop your pots on it. It encourages root formation much faster than ambient room temperature alone.
- Don’t Let the Leaves Drip: When you mist, make sure the leaves aren’t sitting in water for too long. Fungal issues can arise quickly in a humid, enclosed environment. A gentle mist is good; a constant soaking is not.
- Think Like a Dripper: When you water, water until it just starts to drain from the bottom. Then, let the mix dry out slightly before watering again. Banksia roots are adapted to sandy, well-drained soils, so they hate sitting in soggy conditions even during propagation.
Aftercare & Troubleshooting
Once your cuttings are potted, find them a bright spot that doesn’t get direct, harsh sunlight. A windowsill that gets morning sun is often perfect.
Keep an eye on the humidity inside your propagator. You might want to open the bag or lid for a few minutes each day to allow some air circulation.
You’ll know your cuttings are rooting when you gently tug on them and feel resistance, or you might see new leaf growth starting. This can take anywhere from 4-12 weeks.
If you see mould or signs of rot (blackening or mushy stems), unfortunately, that cutting is probably lost. You can try to salvage it by taking a fresh cutting from a healthy part of the stem and starting again, making sure your medium is even better drained. Sometimes, it’s just one of those things in gardening – don’t let it get you down!
A Little Patience Goes a Long Way
Propagating Banksia menziesii is a journey, and like all good things, it requires a bit of patience. Don’t get discouraged if your first few attempts don’t pan out. Each time you try, you learn a little more. Enjoy the process of nurturing these new plants, and soon you’ll have your very own fiery bottlebrushes to admire! Happy gardening!
Resource:
https://identify.plantnet.org/k-world-flora/species/Banksia%20menziesii%20R.Br./data