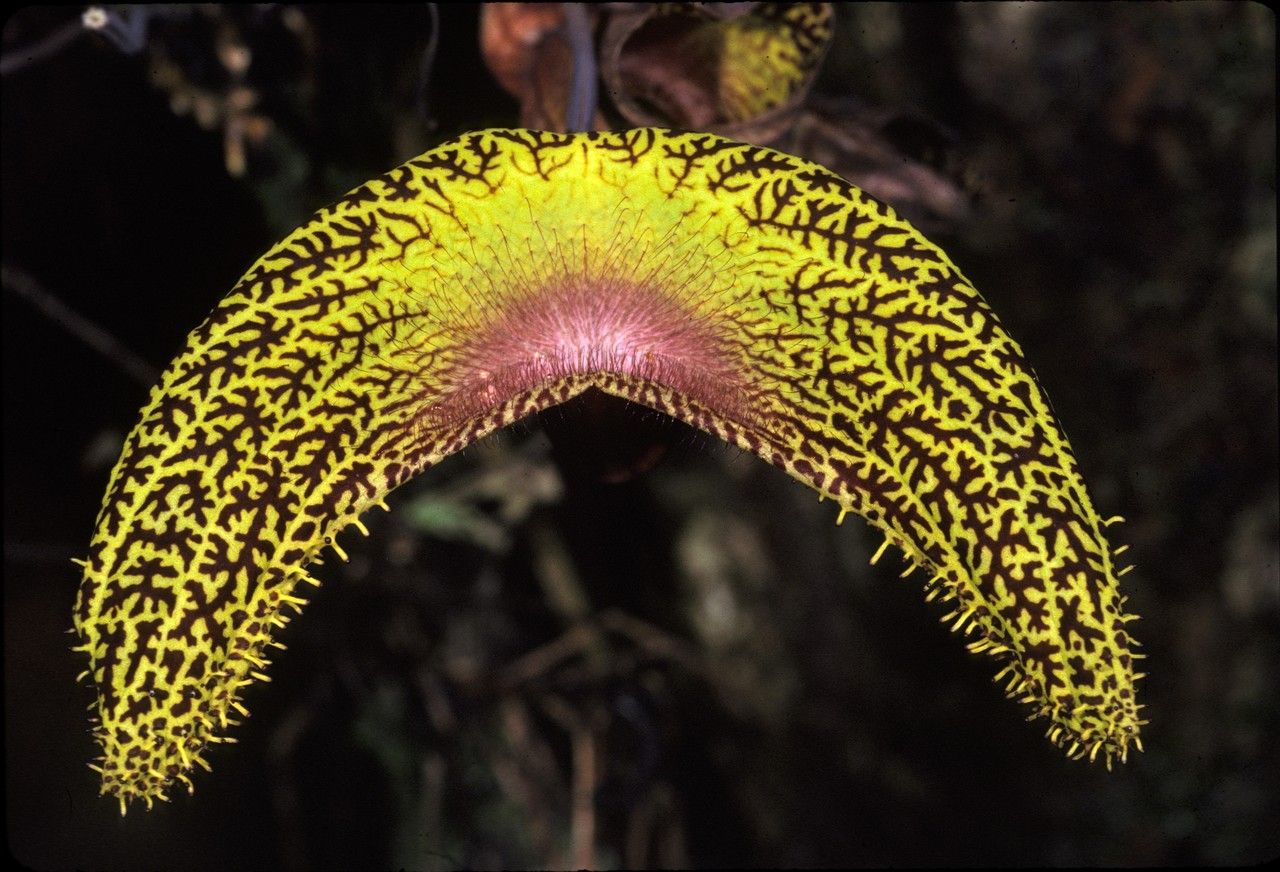
Hello fellow plant lovers! Today, we’re diving into the wonderful world of Aristolochia cornuta, often called the “deer’s horn” or “duck flower.” You know, the plant with those absolutely fascinating, trumpet-shaped blooms that look like they’ve stepped right out of a botanical illustration? It’s truly a showstopper, and there’s an immense satisfaction in coaxing new life from an existing beauty. While Aristolochia species have a reputation for being a bit… particular, propagating Aristolochia cornuta is, I’ve found, moderately challenging. It’s not one for the absolute beginner to start with, but with a little care and attention, you can absolutely succeed.
The Best Time to Start
For Aristolochia cornuta, your best bet is to propagate during its active growing season. This is typically in the late spring to early summer, after the risk of frost has passed and the plant is putting on plenty of new growth. You’ll want to look for softwood cuttings – those vibrant, flexible new shoots that are just starting to form. Avoid old, woody stems; they’re much less likely to root.
Supplies You’ll Need
Here’s what you’ll want to have on hand for our propagation adventure:
- Sharp, clean pruning shears or a sharp knife: Essential for clean cuts to prevent disease.
- Rooting hormone: A liquid or powder form works well. This gives your cuttings a helpful boost.
- Well-draining potting mix: A good blend of peat moss or coco coir, perlite, and a bit of coarse sand is ideal. You want something that doesn’t stay soggy.
- Small pots or trays: Clean containers with drainage holes are a must.
- Plastic bags or a propagator: To create a humid environment around your cuttings.
- Optional: Heat mat: Bottom heat can significantly speed up rooting.
Propagation Methods
I’ve had the most success with Aristolochia cornuta through stem cuttings. It’s a reliable method if you get the conditions just right.
Stem Cuttings:
- Take your cuttings: In late spring or early summer, select healthy, vigorous shoots that are about 4-6 inches long. Make your cut just below a leaf node (where a leaf attaches to the stem). This is where the plant is most likely to initiate roots.
- Prepare the cuttings: Gently remove the lower leaves, leaving just a couple of leaves at the top. If the remaining leaves are very large, you can cut them in half to reduce water loss through transpiration.
- Dip in rooting hormone: Dip the cut end of each stem into your chosen rooting hormone, ensuring it’s well coated. Tap off any excess.
- Pot them up: Fill your clean pots with your prepared potting mix. Make a small hole in the center of the soil with your finger or a pencil. Insert the cutting into the hole, making sure the rooting hormone stays in place. Gently firm the soil around the stem.
- Water lightly: Water the soil very gently so it’s moist but not waterlogged.
- Create humidity: Cover each pot with a clear plastic bag, ensuring the bag doesn’t touch the leaves. You can prop it up with small stakes or skewers if needed. Alternatively, place the pots inside a propagator. The goal is to create a mini-greenhouse.
- Place in bright, indirect light: Find a warm spot that receives plenty of bright, indirect light. Avoid direct sun, which can scorch the delicate cuttings.
The “Secret Sauce” (Pro Tips)
Here are a few things I’ve learned over the years that make a real difference:
- Don’t overcrowd your cuttings: Give them a bit of breathing room in their pots. If they get too crowded, they’re more susceptible to fungal issues, and you might end up losing them all.
- Bottom heat is your friend: If you can, place your pots on a heat mat set to around 70-75°F (21-24°C). This warmth stimulates root development and dramatically increases your chances of success. It really is a game-changer for trickier-to-root plants.
- Mist, but don’t drench: While humidity is crucial, you don’t want the leaves to sit in water constantly. I like to lightly mist the leaves once or twice a day to keep them turgid, but the soil should only be watered when it feels dry to the touch.
Aftercare & Troubleshooting
Once your cuttings have developed roots (this can take anywhere from 4-8 weeks, sometimes longer!), you’ll notice a bit of resistance when you gently tug on the stem. You might also see new leaf growth. Congratulations!
At this point, you can gradually acclimatize your new plants to normal room humidity by opening the plastic bags a little more each day over a week. Once they’re fully weaned, you can water them as you would any established Aristolochia. Keep them in bright, indirect light and continue to use well-draining soil.
The main challenge you’ll face is rot. If your cuttings turn black and mushy, that’s usually a sign of too much moisture or lack of air circulation. If you see fuzzy mold on the soil surface, remove it immediately and improve air flow. Sometimes, despite your best efforts, a cutting just won’t take. It’s part of the process, so don’t be discouraged!
A Word of Encouragement
Propagating plants is a journey, and with Aristolochia cornuta, it’s one that requires patience. Celebrate every little sign of progress – a turgid leaf, a tiny new shoot. Enjoy the act of nurturing new life. Before you know it, you’ll have your very own “deer’s horn” blooming, and that’s a reward all its own. Happy propagating!
Resource:
https://identify.plantnet.org/k-world-flora/species/Aristolochia%20cornuta%20Mast./data