Hey there, fellow garden enthusiasts!
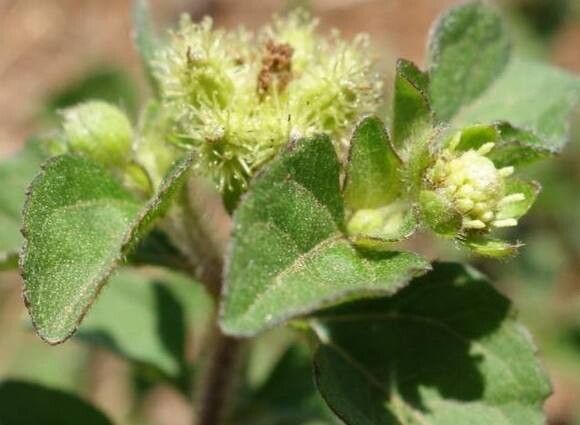
Today, I want to chat about a plant that’s been bringing a little extra sunshine to my garden beds: Acanthospermum australe. If you’re looking for a plant that’s a bit of a showstopper with its cheerful yellow daisy-like flowers and interesting spiky seed heads, then you’re in for a treat. Not to mention, propagating this beauty yourself is incredibly rewarding. I’ve found Acanthospermum australe to be a surprisingly easy plant to propagate, even for those just starting out on their green-thumb journey. So, let’s get our hands dirty!
The Best Time to Start
For the highest success rate, my go-to time is late spring or early summer. This is when the plant is actively growing and has plenty of energy to put into developing new roots. You want to be taking cuttings from healthy, vigorous stems that aren’t flowering. Think of it as capturing that peak growth phase – it makes all the difference!
Supplies You’ll Need
Here’s a quick rundown of what you’ll want to have on hand:
- Sharp pruning shears or a clean knife: For taking clean cuts, which helps prevent rot.
- Rooting hormone (optional but recommended): Especially for stem cuttings, this can give your new plants a real boost.
- Well-draining potting mix: I like a blend of 50% peat moss or coco coir and 50% perlite or coarse sand. This is crucial to prevent waterlogging.
- Small pots or trays: Clean containers are a must.
- Clear plastic bags or a propagation dome: To create a humid environment for your cuttings.
- Water: For watering and potentially for water propagation.
Propagation Methods
Acanthospermum australe is quite forgiving, and I’ve had great luck with a couple of different methods.
Stem Cuttings
This is my favorite and usually the most successful way to go!
- Select healthy stems: Look for non-flowering stems that are about 4-6 inches long.
- Make the cut: Using your clean shears or knife, make a clean cut just below a leaf node. This is where the magic happens – roots tend to form best from these points.
- Prepare the cutting: Gently remove the lower leaves, leaving just a few at the top. If the remaining leaves are large, you can even snip them in half to reduce water loss through transpiration.
- Apply rooting hormone (optional): Dip the cut end of the stem into your rooting hormone powder or gel. Tap off any excess.
- Plant your cuttings: Fill your small pots with your well-draining mix. Make a small hole with your finger or a pencil, and carefully insert the cut end of the stem. Gently firm the soil around it.
- Water gently: Water thoroughly, but avoid waterlogging the soil.
- Create humidity: Cover the pots loosely with a clear plastic bag or place them under a propagation dome. Make sure the leaves aren’t touching the sides of the bag! You can prop up the bag with a few stakes if needed.
- Place in bright, indirect light: Find a warm spot that gets plenty of light but no direct sun.
Water Propagation
This method is wonderfully visual and can be very satisfying!
- Take cuttings: Follow steps 1-3 from the stem cutting method.
- Place in water: Put the cuttings in a clean jar or glass filled with fresh, room-temperature water.
- Crucial tip: Ensure that no leaves are submerged in the water. Leaves sitting in water will rot and can take your cutting down with them.
- Change the water regularly: Aim to change the water every couple of days, or whenever it starts to look cloudy. This keeps it fresh and prevents bacterial growth.
- Keep in bright, indirect light: Similar to stem cuttings, a bright window is ideal.
The “Secret Sauce” (Pro Tips)
Here are a couple of little tricks I’ve learned over the years that can really up your propagation game:
- Bottom heat is your friend: If you have a seedling mat or can place your pots on top of a warm appliance, it can significantly speed up root development. A little warmth from below encourages those roots to push out.
- Don’t be afraid to mist: Especially if you’re not using a dome, a light misting of water on the leaves once or twice a day can help keep them turgid while the roots are forming. Just don’t overdo it and create soggy conditions in the soil.
Aftercare & Troubleshooting
Once you see new root growth (you can gently tug on a cutting – if there’s resistance, you have roots! Or, if you’re feeling brave, you can gently unpot to check), it’s time for a little adjustment.
- Acclimate slowly: If you’ve used a plastic bag or dome, start by gradually opening it up a bit each day for a week. This helps the young plant adjust to the drier air outside.
- Water when the top inch of soil is dry: Continue to use that well-draining mix.
- Move to a slightly larger pot: Once the root system is well-established, you can transplant your new Acanthospermum australe into a slightly larger pot with fresh potting mix.
What if things go wrong? The most common issue I see is rot. This usually happens when the soil is too wet, there’s poor air circulation, or leaves are left in standing water. If a cutting turns mushy or black, it’s usually a goner. Don’t be discouraged! Just discard it and try again. Sometimes, a cutting might simply fail to root. That’s also part of the process.
A Encouraging Closing
Propagating plants is a journey, and Acanthospermum australe offers a wonderful way to practice and expand your gardening skills. Be patient with yourself and with your new little green babies. Enjoy the process of watching them grow and soon you’ll have more of these cheerful blooms to share with friends or to fill your own garden with sunshine. Happy propagating!
Resource: