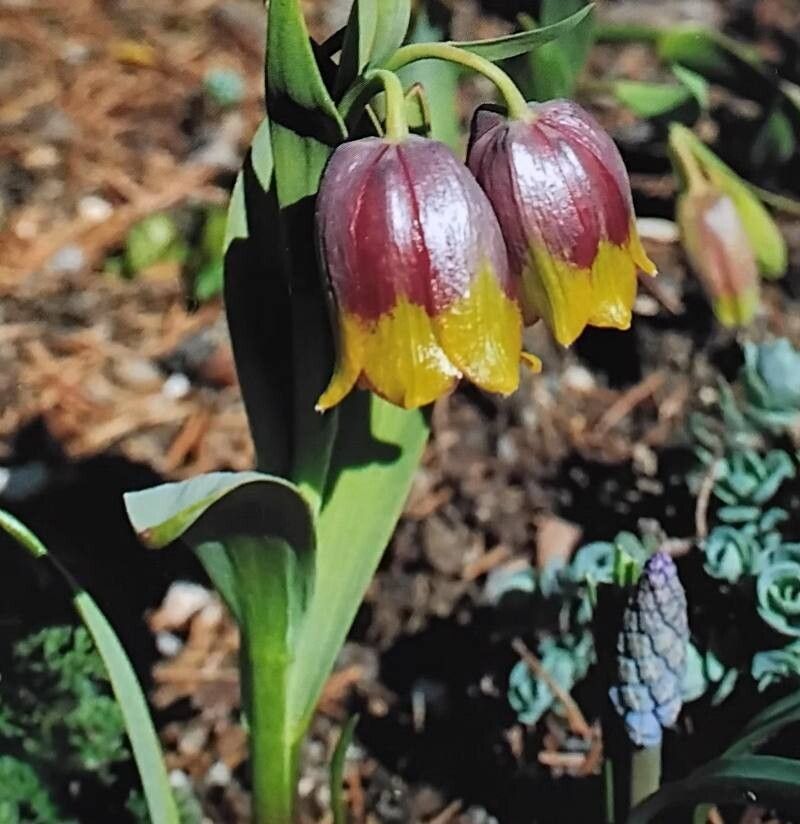
Oh, Fritillaria michailovskyi! If you’ve ever seen one of these beauties gracing a garden, you know exactly why I’m so smitten. Those nodding bell-shaped flowers, a deep, rich maroon with delicate yellow edges, are simply captivating. They have this gorgeous, almost regal droop that adds such charm to early spring displays. And the best part? You can multiply these treasures yourself! It’s a truly rewarding feeling to nurture a tiny bulb into a blooming plant.
Now, I’ll be honest. Fritillaria michailovskyi can be a tad finicky when it comes to propagation compared to, say, a common marigold. It’s not impossible for beginners, but it does require a little more attention to detail and some patience. Think of it as a special project, a delightful challenge that yields an even more special reward.
The Best Time to Start
The absolute golden window for propagating Fritillaria michailovskyi is immediately after the plant has finished flowering and the foliage begins to yellow and die back. This is usually in late spring or very early summer. This is when the bulb is storing up energy for its next blooming season, and any offsets will be well-developed enough to handle separation. Trying to propagate before this life cycle stage is generally unsuccessful.
Supplies You’ll Need
Before we get our hands dirty, let’s gather our toolkit:
- Well-draining potting mix: A good quality seedling mix is fine, but I often amend it with about 20% perlite or coarse horticultural sand. This is crucial for bulbous plants.
- Sharp, clean pruning shears or a small knife: For making precise cuts. Sterilize them with rubbing alcohol before and after use!
- Small pots or seedling trays: Clean ones, of course.
- Watering can with a fine rose: For gentle watering.
- Rooting hormone powder (optional but recommended): Especially beneficial when separating bulbs.
- Labels and a waterproof marker: To keep track of your efforts!
- A shallow tray or a sandy bed: For potential bulb storage if needed.
Propagation Methods
For Fritillaria michailovskyi, the most effective and commonly used method is division. These bulbs don’t typically produce viable seed readily, and cuttings are also not a practical option.
Here’s how we’ll tackle it:
- Wait for the die-back: As I mentioned, this is non-negotiable. Don’t be tempted to dig around while the leaves are still green! Wait until they’ve turned yellow and started to die back, signaling the bulb is entering dormancy.
- Gently excavate: Carefully dig around the base of the plant with your trowel or hands. You want to unearth the cluster of bulbs without damaging them. I always try to dig a bit wider than the visible foliage to avoid nicking the bulbs.
- Identify the offsets: You’ll likely find several smaller bulbs, called offsets, attached to the main mother bulb. These are your new Fritillaria babies!
- Separate with care: Using your clean pruning shears or knife, carefully cut or twist away the offsets from the mother bulb. Try to keep as much of the basal plate (the bottom of the bulb where roots grow) intact as possible on each offset. If they are very small, it’s sometimes better to leave them attached, or they might struggle to survive.
- Inspect and trim (if necessary): Give the bulbs a quick once-over. Remove any damaged or diseased-looking parts. If there are any remaining remnants of the old flower stalk, gently trim those away.
- Apply rooting hormone (optional): If you have rooting hormone, dip the cut end of each offset into it. This can encourage faster root development.
- Potting up: Fill your clean pots or trays with your well-draining potting mix. Plant the offsets about 2-3 inches deep, with the pointed end facing upwards. Give them a little space; don’t overcrowd them.
- Initial watering: Water gently but thoroughly, ensuring the soil is evenly moist but not waterlogged.
The “Secret Sauce” (Pro Tips)
Here are a few things I’ve learned over the years that really seem to make a difference:
- The “Dormant Dry” Trick: Sometimes, especially if your offsets are very tiny or you’re not planting them immediately, it’s best to let them air dry for a day or two in a cool, airy spot. This helps any cut surfaces toughen up and reduces the risk of rot when you plant them. However, for Fritillaria, I usually advise planting them as soon as possible after separation.
- Bottom Heat is Your Friend: If you’re able to give your pots a bit of gentle bottom heat (around 60-65°F or 15-18°C), this can significantly speed up root formation. A seedling heat mat works wonders for this! It mimics the warmth of spring and encourages those bulbs to get busy.
- Don’t Overwater the Mom Bulb: When you’re done with the offsets, if the mother bulb still looks healthy, you can often replant it. Just make sure its spot in the garden has excellent drainage, and water sparingly until it shows signs of new growth next spring.
Aftercare & Troubleshooting
Once your Fritillaria michailovskyi offsets are potted, here’s how to nurture them:
- Location, Location, Location: Place the pots in a cool, bright location, out of direct, harsh sunlight. A protected spot outdoors or a cool greenhouse is ideal.
- Watering Regime: Keep the soil consistently moist but never soggy. Allow the top inch of soil to dry out slightly between waterings. Overwatering is the quickest way to invite bulb rot, which is sadly the most common sign of failure. You might see a mushy base or a plant that wilts and dies very quickly.
- Patience is Key: It’s unlikely you’ll see significant top growth from the offsets in the first year. Their main job is to establish a strong root system. You might see a tiny shoot emerge, or you might not. Don’t panic if nothing happens above ground; trust the process below.
- The Second Year: By the second year, you should see some more vigorous growth, and in the third year, you’ll hopefully be rewarded with your very first bloom!
A Little Encouragement
Propagating Fritillaria michailovskyi is truly a journey. It’s not always instant gratification, but the satisfaction of watching those tiny bulbs develop into flowering plants is immense. Be patient with them, observe their needs, and enjoy the process of growing your own special garden treasures. Happy propagating!
Resource:
https://identify.plantnet.org/k-world-flora/species/Fritillaria%20michailovskyi%20Fomin/data