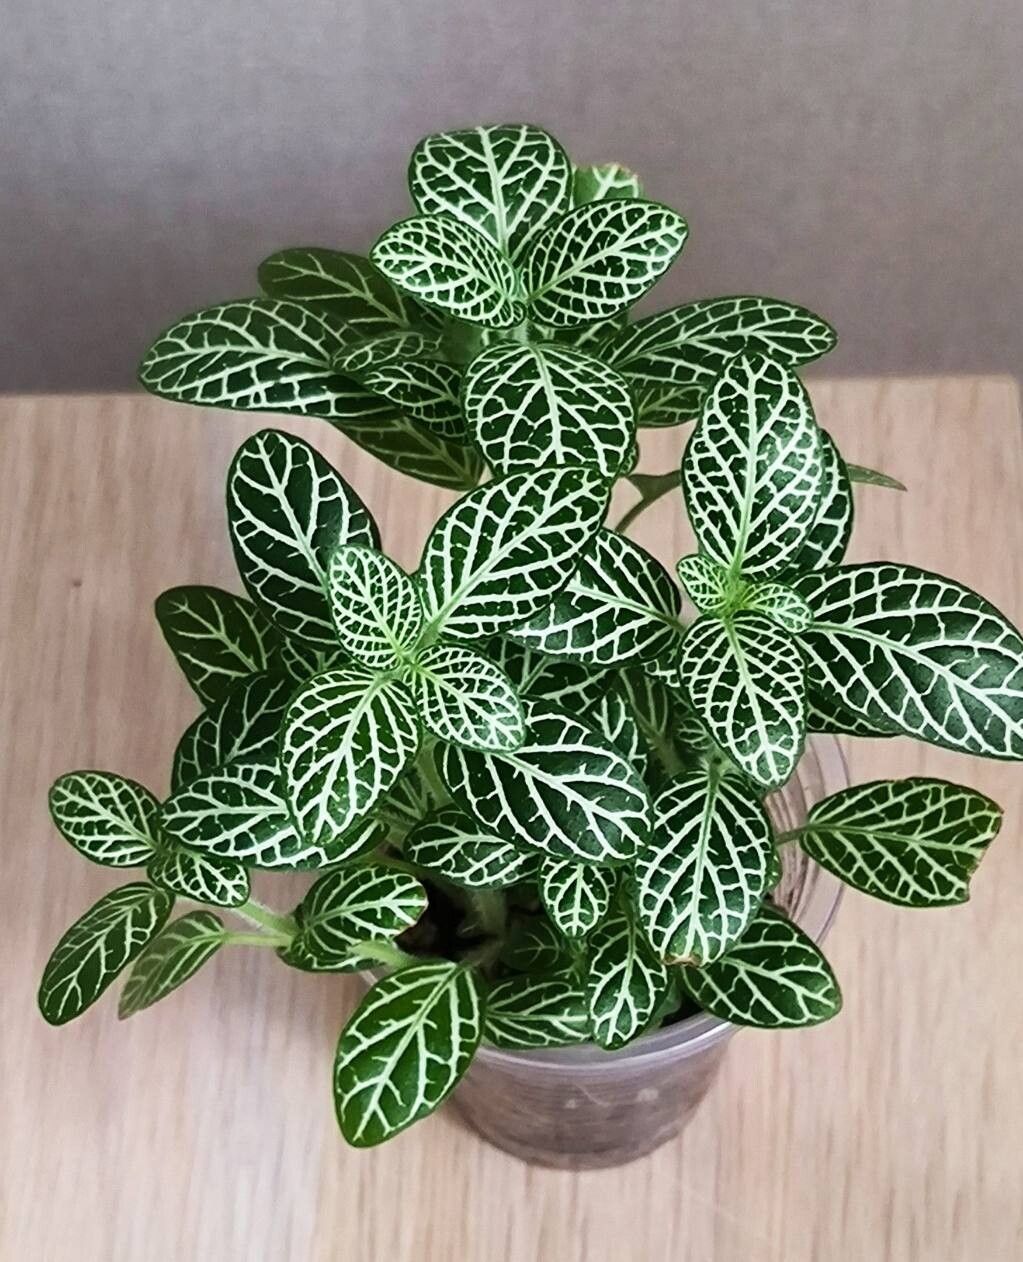
Well hello there, fellow plant enthusiast! It’s wonderful to have you here. Today, we’re going to dive into the delightful world of propagating Fittonia albivenis, those gorgeous little jewels often called nerve plants. You know, the ones with those stunning, intricate veining that just pop in a shady corner?
Their delicate beauty is truly captivating, making them a favorite for terrariums and humid environments. And the best part? Bringing new nerve plants into existence from your existing beauties is incredibly rewarding. I’ve found Fittonias to be surprisingly forgiving, making them a fantastic choice for beginners wanting to dip their toes into the exciting world of plant propagation. You’ll be amazed at how easy it can be to multiply your collection!
The Best Time to Start
For the highest success rate with Fittonia albivenis, spring and early summer are your golden ticket. This is when the plant is actively growing, meaning it has more energy reserves to put into developing those new roots. You’re essentially working with its peak vigor. Look for stems that are growing robustly, not those that are leggy or looking a bit sad. A healthy parent plant is always the best starting point.
Supplies You’ll Need
Gathering your supplies before you begin will make the whole process so much smoother. Here’s what I always have on hand:
- Sharp Pruning Shears or Scissors: Clean cuts are essential to prevent disease.
- Rooting Hormone (Optional, but Recommended): This gives your cuttings a little boost to encourage faster root development. I prefer a powder or gel form.
- Good Quality Potting Mix: A well-draining mix is crucial. I usually use a blend of peat moss, perlite, and a bit of coco coir. For Fittonias, adding a bit more perlite helps with aeration in their new pots.
- Small Pots or Seedling Trays: Whatever you have available for your new little plants to get their start in.
- Plastic Bag or Dome: To create a humid environment for your cuttings.
- Water: Fresh, clean water for watering your cuttings (and for the water propagation method!).
- Labels: Trust me on this one, you’ll thank me later when you have a collection of similar-looking babies!
Propagation Methods
There are a couple of ways to go about multiplying your Fittonias, and both are quite effective.
Stem Cuttings
This is my go-to method for Fittonias, and it’s wonderfully straightforward.
- Make the Cut: Select a healthy stem that’s at least 4-6 inches long. Using your clean pruning shears, cut just below a leaf node (the point where a leaf attaches to the stem). This is where the magic happens, as new roots will emerge from these nodes.
- Prepare the Cutting: Gently remove the leaves from the bottom half of the cutting. You want to expose the nodes. Leave a couple of leaves at the top to help the cutting photosynthesize. If the remaining leaves are very large, you can cut them in half to reduce water loss.
- Apply Rooting Hormone (Optional): Dip the cut end of the stem into your rooting hormone, tapping off any excess.
- Plant Your Cuttings: Fill your small pots or trays with your prepared potting mix. Make a small hole with your finger or a pencil and insert the cutting, ensuring the leaf nodes are below the soil surface. Gently firm the soil around the stem.
- Water Gently: Water the soil thoroughly but gently. You don’t want to disturb the cutting.
- Create Humidity: Cover the pots with a clear plastic bag or a propagation dome. This creates a mini-greenhouse effect, keeping the humidity high, which is vital for cuttings. Just make sure the leaves aren’t touching the plastic. You might need to prop the plastic up with small stakes.
- Find a Cozy Spot: Place your pots in a bright spot out of direct sunlight. A warm location is also beneficial.
Water Propagation
This method is visually satisfying and a great way to get started if you’re short on pots.
- Take Your Cuttings: Follow steps 1 and 2 from the stem cutting method.
- Place in Water: Fill a clean jar or glass with fresh water. Place the cuttings in the water, ensuring that the leaf nodes are submerged, but none of the leaves themselves are in the water. This prevents rot.
- Change the Water Regularly: This is key! Change the water every 2-3 days to keep it fresh and prevent bacteria buildup.
- Find a Good Location: Just like with soil propagation, place your jar in a bright spot with indirect light.
- Wait for Roots: You’ll start to see tiny roots emerge from the nodes within a few weeks. Once the roots are about an inch or two long, you can transplant them into potting mix following the steps for soil-propagated cuttings.
The “Secret Sauce” (Pro Tips)
Here are a few little tricks I’ve picked up over the years that really make a difference when propagating Fittonias.
- Bottom Heat is Your Friend: If you have a heat mat designed for seedlings or propagation, this is a game-changer for Fittonias. Placing your pots on it provides gentle warmth to the soil, which significantly speeds up root development. It mimics the warmth they’d naturally experience in their native, tropical environments.
- Don’t Overwater the Soil: I know I said to water well initially, but once the cuttings are in their pots, avoid soggy soil. It’s much better to let the soil dry slightly between waterings. Overwatering is one of the quickest ways to invite root rot, which is the nemesis of propagation.
- Mist Freely (But Wisely): While the plastic bag or dome provides humidity, a light misting of the leaves every day or two can offer an extra boost, especially in drier indoor air. However, be careful not to let water sit on the leaves for extended periods, as this can also encourage fungal issues.
Aftercare & Troubleshooting
Once you start seeing new growth or feel some resistance when gently tugging on your cutting (a sign of roots!), it’s time to transition to aftercare.
Gradually reduce the humidity over a week or so. This means opening the plastic bag a little more each day, or removing the dome for longer periods. Continue to keep the soil moist but not waterlogged, and ensure they are still in bright, indirect light. Once they have a few sets of new leaves and a good root system, you can treat them as a mature Fittonia.
Now, what if things go wrong? The most common culprit is rot. If you notice your cutting turning mushy and black, it’s likely rot. This usually stems from too much moisture and poor air circulation. If you catch it early, you might be able to salvage a healthy section and try again. Wilting can also happen. If your cuttings wilt significantly, check the moisture of the soil and ensure the humidity is still up. Sometimes, a cutting just doesn’t take, and that’s part of the learning process. Don’t get discouraged!
A Encouraging Closing
Propagating plants is a journey, and with Fittonia albivenis, it’s a particularly charming one. Be patient with your new little charges. Observe them, learn from them, and celebrate every tiny success. The joy of nurturing a new plant from a small cutting is truly unparalleled. Happy propagating, and may your Fittonias thrive and multiply!
Resource: