Oh, hello there, fellow plant enthusiast! Pull up a chair and let’s chat about one of my favorite little gems: Erodium maritimum, or as some of us affectionately call it, Sea Stork’s-bill.
Why You’ll Love This Little Perennial
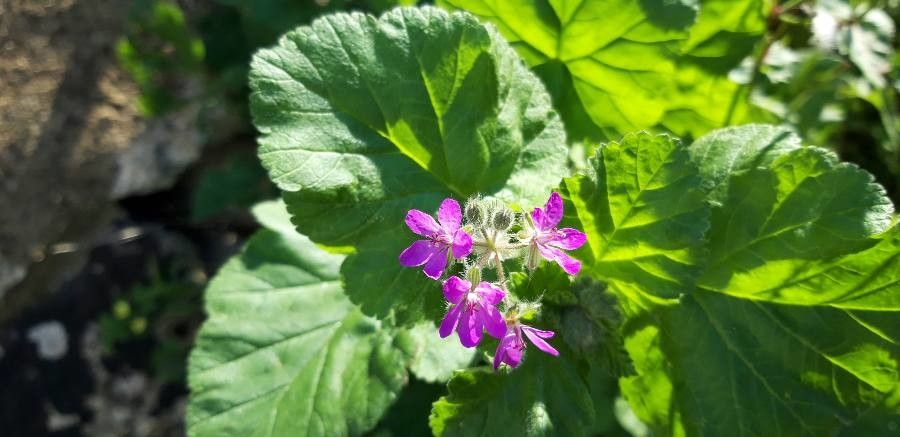
There’s something so charming about this plant. Its delicate, often feathery foliage spills gracefully, and those dainty, typically pink or purplish flowers are just a delight. It has a lovely, wild texture that can soften hard edges in a garden bed or add a touch of understated elegance in a pot. Propagating Erodium maritimum is incredibly rewarding, not just because you get more of these beauties, but because it’s a fantastic way to get to know the plant intimately. And for those of you just dipping your toes into propagation? Good news! I find Erodium maritimum to be quite forgiving, making it a wonderful project for beginners.
When to Get Your Hands Dirty
The absolute best time to propagate Erodium maritimum from cuttings is in the early to mid-spring, just as the plant is waking up and gearing up for its main growth spurt. You can also have good success in late summer, after the initial flush of flowering has passed. The key is to work with actively growing, but not overly stressed, material.
What You’ll Need to Get Started
Gathering your supplies beforehand makes the whole process so much smoother. Here’s what I usually have on hand:
- Sharp, clean pruning shears or a sharp knife: For making clean cuts.
- Seedling trays or small pots: Clean ones are a must to prevent disease.
- A well-draining potting mix: I like a blend of seed-starting mix and perlite. A 50/50 ratio usually works wonders.
- Rooting hormone (optional but recommended): This really gives your cuttings a little boost.
- A plastic bag or a propagation dome: To create a humid environment.
- Water: For misting.
- Labels and a permanent marker: So you don’t forget what you’ve planted where!
Bringing New Plants to Life
For Erodium maritimum, I’ve found the stem cutting method to be the most reliable and enjoyable.
- Take Your Cuttings: In spring or late summer, look for healthy, non-flowering stems. Using your sharp shears or knife, take cuttings that are about 3-4 inches long. Make a clean cut just below a leaf node (where the leaf attaches to the stem).
- Prepare the Cuttings: Gently remove the lower leaves, leaving just a couple of leaves at the top. This reduces water loss and directs the plant’s energy into root development. If your cuttings are a bit floppy, you can trim the remaining leaves in half horizontally to decrease the surface area.
- Dip in Rooting Hormone (Optional): If you’re using rooting hormone, dip the cut end of each stem into the powder, tapping off any excess.
- Plant Your Cuttings: Fill your small pots or seedling tray with your prepared potting mix. Make a small hole with a pencil or your finger, then gently insert the cut end of the stem. Firm the soil gently around the base.
- Create a Humid Environment: Water the soil lightly. Then, cover the pots with a plastic bag or a propagation dome. If using a bag, you might need to prop it up with a few chopsticks so it doesn’t touch the leaves.
My Little “Secret Sauce” Tips
After years of playing in the dirt, a few little tricks have become essential for me.
- Don’t let those leaves touch the water! Seriously, if you’re water propagating (which I sometimes do for Erodium as a quick check, though soil is better for long-term success), make sure the leaves are well above the water line. Any leaf submerged will just rot and potentially infect your cutting.
- Bottom heat is a game-changer. If you have a heat mat for seedlings, placing your cuttings on it can significantly speed up the rooting process, especially in cooler conditions. It mimics the warmth of spring.
- Patience is a virtue, and so is a gentle touch. Don’t be tempted to yank on your cuttings to see if they’ve rooted. Wait until you see definite new growth.
Aftercare and What to Watch For
Once your cuttings have developed a decent root system – you’ll usually see them peeking through the drainage holes or feel a bit of resistance when you gently tug – it’s time to give them a bit more attention.
- Acclimatize them: Gradually remove the plastic bag or dome over a few days, allowing them to get used to the ambient humidity.
- Water carefully: Water when the top inch of soil feels dry. Avoid waterlogging!
- Move to slightly larger pots: Once they’re a little bigger and seem well-established, you can pot them up into slightly larger containers.
The most common sign of trouble is rot. If your cuttings turn mushy, black, or just seem to be wilting away despite being kept moist, it’s usually a sign of too much moisture and not enough air circulation. Ensure your soil drains well and pull out any victims immediately to prevent it from spreading.
Go Forth and Multiply!
See? Nothing too intimidating, is there? Propagating Erodium maritimum is a simple, satisfying way to expand your plant collection. Be patient, enjoy the process of nurturing these little new lives, and soon you’ll have a whole cascade of these delightful plants to enjoy. Happy gardening!
Resource:
https://identify.plantnet.org/k-world-flora/species/Erodium%20maritimum%20L’Hér./data