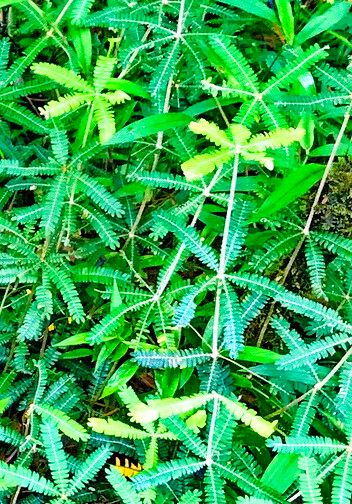
Hello, fellow plant lovers! Today, we’re diving into the wonderful world of propagating Biophytum aeschynomenifolia. If you’ve ever admired the delicate, almost fern-like foliage and the way this little charmer folds its leaves at night, you’re in for a treat. Creating more of these beauties from existing ones is incredibly satisfying, and I’m here to guide you through it.
Why Propagate This Little Wonder?
For me, propagating is like magic. It’s taking a piece of a plant I love and giving it a whole new life. Biophytum aeschynomenifolia is relatively straightforward to propagate, making it a great candidate for those looking to expand their collection without too much fuss. It doesn’t demand a whole lot of complex techniques, which is always a plus in my book.
When to Get Your Hands Dirty
The best time to start propagating is during the plant’s active growing season. Think late spring through summer. This is when the plant has the most energy to put into producing new roots. You’ll get the highest success rate when you take cuttings from healthy, vigorous stems that aren’t flowering or fruiting.
Your Propagation Toolkit
Here’s what you’ll want to have ready before you begin:
- Sharp pruning shears or a clean knife: For making clean cuts, preventing damage.
- Well-draining potting mix: A good blend is typically equal parts perlite, peat moss, and a bit of compost. For very small cuttings, a mix of perlite and a hint of seed-starting mix works wonders.
- Rooting hormone (optional but recommended): This helps cuttings establish roots faster and more reliably.
- Small pots or propagation trays: With drainage holes! Don’t skip this.
- Plastic bag or a clear dome: To create a humid environment.
- Watering can or spray bottle: For gentle watering.
- Labels and a permanent marker: To keep track of what you’ve propagated and when.
Let’s Get Growing: Propagation Methods
Biophytum aeschynomenifolia can be propagated quite successfully through stem cuttings. It’s my go-to method for this plant.
Stem Cuttings:
- Select Your Cutting: Choose a healthy stem that’s at least 3-4 inches long. Look for one that has several sets of leaves.
- Make the Cut: Using your sterilized shears or knife, make a clean cut just below a leaf node. A leaf node is where a leaf attaches to the stem, and it’s where roots are most likely to emerge.
- Prepare the Cutting: Gently remove the bottom leaves from the cutting, leaving about two sets of leaves at the top. This prevents them from rotting in the soil.
- Apply Rooting Hormone (Optional): Dip the cut end of the stem into your rooting hormone, tapping off any excess.
- Plant Your Cutting: Fill your small pot or tray with the well-draining potting mix. Make a hole with your finger or a pencil (wide enough for the stem) and gently insert the cutting. Firm the soil around the base of the stem to ensure good contact.
- Water Gently: Water the soil lightly until it’s evenly moist but not soggy.
- Create Humidity: Place the pot inside a clear plastic bag or cover it with a clear dome. Make sure the leaves don’t touch the sides of the bag too much. This keeps the humidity high, which is crucial for cuttings.
The “Secret Sauce”: My Personal Touches
Here are a few things I’ve learned over the years that make a big difference:
- Bottom Heat is Your Friend: If you have a seedling heat mat, placing your pots on it provides gentle bottom warmth. This encourages root development much faster than just relying on ambient room temperature. It’s like giving your cuttings a cozy little spa treatment!
- Don’t Be Afraid to Mist: While you want to avoid waterlogging the soil, a light misting of the leaves once or twice a day, especially if you notice them looking a bit droopy, can help keep them hydrated while they’re trying to root.
- Patience is Key with Leaf Nodes: Sometimes the magic happens underground, and you won’t see much happening above the soil for weeks. Trust the process.
Aftercare and What to Watch For
Once your cuttings are planted and nestled in their humid homes, place them in a spot with bright, indirect light. Avoid direct sun, which can scorch young cuttings.
You’ll know your cutting has rooted when you see new leaf growth or feel a slight resistance when you gently tug on the stem. This typically takes anywhere from 3 to 6 weeks, but don’t be discouraged if it takes a bit longer.
Troubleshooting:
- Rotting: The most common issue is rot, usually caused by overwatering or poor drainage. If you see a cutting turning black and mushy, it’s best to discard it to prevent it from affecting other cuttings. Ensure good air circulation and that the soil is only ever lightly moist.
- Wilting: If your cuttings are wilting despite being in a humid environment, the soil might be too dry, or they haven’t developed enough roots yet to support themselves. Mist the leaves more frequently and check the soil moisture.
Happy Propagating!
Propagating Biophytum aeschynomenifolia is a rewarding journey, and each new plant you successfully nurture is a little victory. Be patient, enjoy the process, and soon you’ll have a whole bunch of these wonderful plants to share or simply admire. Happy growing!
Resource: