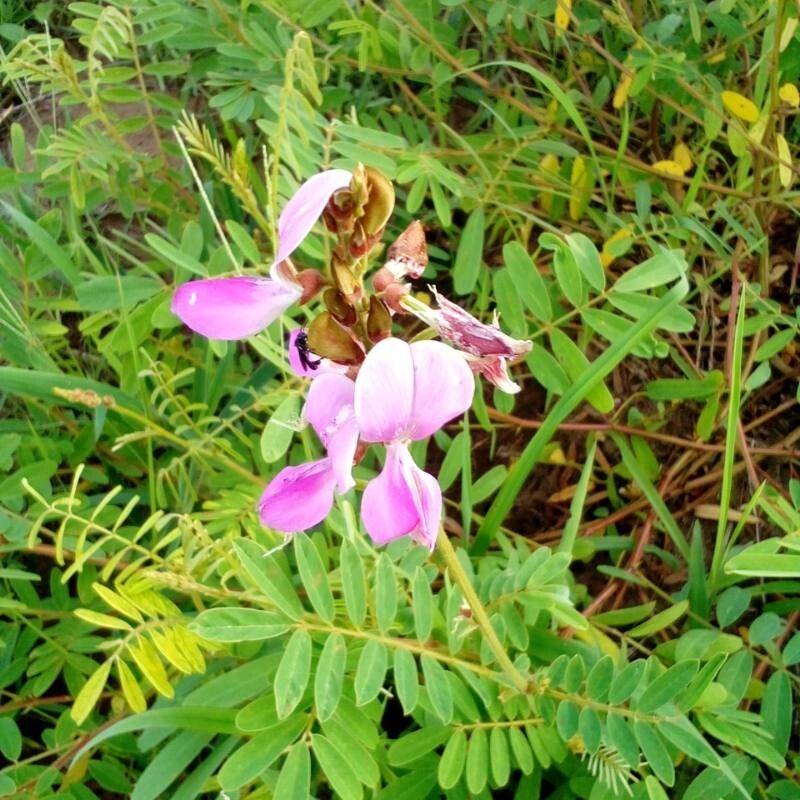
Hello fellow plant lovers! Today, we’re diving into the wonderful world of Tephrosia reptans, often called creeping tephrosia or wild pea. I’ve been growing and propagating this beauty for years, and I can tell you, it’s a real joy. Its lovely pea-like flowers and neat, spreading habit make it a fantastic addition to any garden, whether you’re looking for ground cover or something to spill over a low wall.
What I really love about Tephrosia reptans is how satisfying it is to create new plants from your existing ones. It’s like a little bit of magic, and honestly, it’s not as tricky as you might think! For beginners, I’d say it’s a pretty straightforward plant to propagate, which is always a plus when you’re just starting out.
The Best Time to Start
When it comes to getting the best results, spring and early summer are your best friends for propagating Tephrosia reptans. This is when the plant is actively growing and has plenty of energy to put into developing new roots. You’ll find that cuttings taken during this period are far more likely to strike than those taken when the plant is dormant. Look for healthy, new growth – it’s the most vigorous and successful.
Supplies You’ll Need
To get your propagation station set up, gather these essentials:
- Sharp pruning shears or scissors: For clean cuts.
- Rooting hormone (optional, but recommended): Encourages faster root development.
- Well-draining potting mix: A good blend is often equal parts perlite, peat moss, and coarse sand. Or, a good quality seed starting mix works like a charm.
- Small pots or trays: With drainage holes, of course!
- Plastic bags or a propagation dome: To maintain humidity.
- Watering can with a fine rose or spray bottle: For gentle watering.
Propagation Methods
Tephrosia reptans is wonderfully adaptable, and I’ve had great success with a couple of methods. For this plant, stem cuttings are usually my go-to.
Stem Cuttings
This is where the magic really happens!
- Select your cuttings: Find healthy stems that are partially mature, meaning they’re not brand new and floppy, but not old and woody either. They should be about 4-6 inches long.
- Make the cut: Using your sharp pruning shears, take a clean cut just below a leaf node (where a leaf meets the stem). This is a prime spot for roots to emerge.
- Prepare the cutting: Gently remove the lower leaves from the bottom half of the stem. This prevents them from rotting once planted. If the remaining leaves are very large, you can cut them in half – this reduces water loss through transpiration.
- Apply rooting hormone (optional): Dip the cut end of the stem into rooting hormone powder or gel. Tap off any excess.
- Plant your cuttings: Insert the prepared cuttings into your well-draining potting mix. Make sure at least one leaf node is buried under the soil surface. Gently firm the soil around the base of the cutting.
- Water gently: Water the soil thoroughly but gently.
- Create a humid environment: Place your pots or trays into a plastic bag or cover with a propagation dome. This traps moisture and creates that vital humid atmosphere.
- Place in bright, indirect light: Find a spot that receives plenty of bright, indirect light, but no direct sun, which can scorch your cuttings.
The “Secret Sauce” (Pro Tips)
Here are a few things I’ve learned that can make a big difference:
- Don’t crowd your cuttings: Give each cutting a little bit of space. Overcrowding can lead to fungal issues, and we don’t want that!
- Bottom heat is your best friend: If you have a heated propagator mat, using it will significantly speed up root formation. The warmth encourages root development from below, giving your cuttings a real boost.
- Be patient with your cuts: Sometimes, it takes a little longer than you expect for Tephrosia reptans to root. Resist the urge to pull them up too early to check for roots.
Aftercare & Troubleshooting
Once your cuttings have been planted, keep the soil consistently moist but not waterlogged. That humid environment we created early on is still important – check that the plastic bag or dome isn’t forming condensation that’s dripping onto the leaves. If it is, you can briefly open it up to allow some air circulation.
You’ll know your cuttings have rooted when you see new leaf growth or feel a gentle resistance when you tug on the stem. This usually takes 4-8 weeks.
The main thing to watch out for is rot. If your cuttings start to look slimy, black, or fall apart, it’s a sign they’ve rotted. This is usually due to too much moisture and not enough air circulation, or using a potting mix that doesn’t drain well. If you see it happening, try to remove the affected cuttings immediately to prevent it from spreading. Don’t be discouraged if a few don’t make it; it’s all part of the learning process!
A Encouraging Closing
Propagating Tephrosia reptans is a wonderfully rewarding experience. It takes a bit of patience, but seeing those tiny roots emerge and knowing you’ve created a new plant is truly special. So, get your supplies ready, pick a sunny spring day, and give it a go. Enjoy the process, and happy growing!
Resource:
https://identify.plantnet.org/k-world-flora/species/Tephrosia%20reptans%20Baker/data