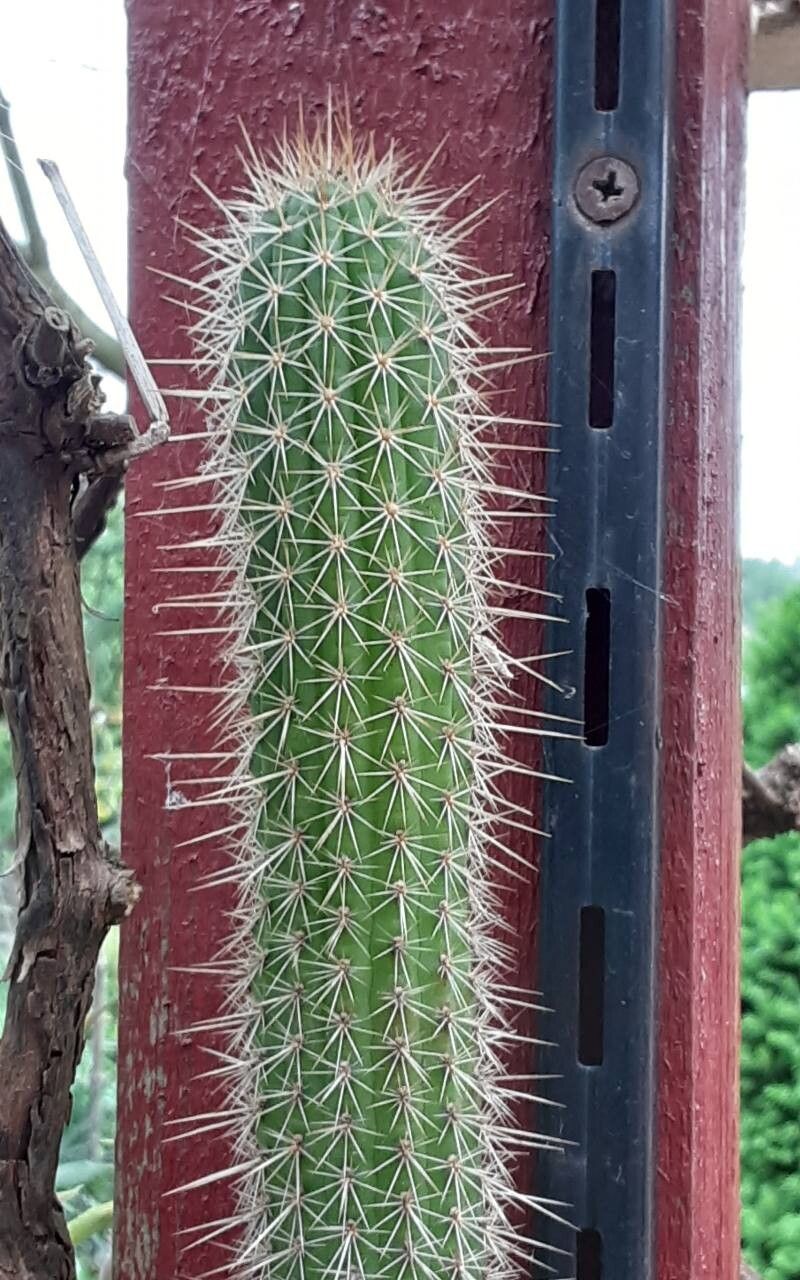
Hey there, fellow plant lovers! I’m so excited to dive into one of my favorite cacti today: Cleistocactus tominensis. You know, the one with those gorgeous, fuzzy golden spines that look like they’ve been dusted with fairy dust? They’re just so striking and add a wonderful texture to any collection. And the best part? Propagating them is totally doable! It’s incredibly rewarding to watch a tiny cutting transform into a thriving new plant. I’d say Cleistocactus tominensis is a pretty beginner-friendly plant in terms of propagation, which is fantastic news for those of you just starting out.
The Best Time to Start
For most cacti, and our Cleistocactus tominensis is no exception, spring and early summer are your golden windows. This is when the plant is actively growing and has the most energy to dedicate to rooting. You’ll want to propagate from stems that are firm and healthy, not weak or etiolated (that’s when they stretch out looking pale and flimsy). Think of it as harvesting fresh ingredients – the fresher, the better the results!
Supplies You’ll Need
Here’s a quick rundown of what you’ll want to have on hand:
- Sharp, clean pruning shears or a sharp knife: For making clean cuts. Sterilize them with rubbing alcohol before and after use.
- Cactus/succulent potting mix: A well-draining blend is crucial. You can even make your own by mixing equal parts potting soil, perlite, and coarse sand.
- Rooting hormone (optional but recommended): This little packet can really give your cuttings a boost.
- Small pots or nursery trays: Whatever you have that can hold your soil and cuttings. Make sure they have drainage holes!
- Watering can with a fine rose or a spray bottle: For gentle watering.
- Labels and a marker: To keep track of what you’ve planted and when.
- A warm spot: Ideally, some place with bright, indirect light and maybe a little extra warmth if you can provide it.
Propagation Methods
Cleistocactus tominensis is fantastic for stem cuttings. It’s straightforward and usually yields great results.
- Take Your Cuttings: Using your sterilized shears or knife, select a healthy stem. Make a clean cut, a few inches long is usually a good size. You can take multiple cuttings from a mature plant.
- Let Them Callus: This is a super important step for cacti. Place your cuttings in a dry, well-ventilated spot, out of direct sunlight, for at least 3-7 days. You’re looking for the cut end to dry out and form a firm callus. This prevents rot when you plant them. Think of it like a tiny scab forming.
- Prepare Your Pots: Fill your small pots with your well-draining cactus mix. Moisten the soil slightly before planting.
- Dip and Plant: If you’re using rooting hormone, lightly dip the callused end of the cutting into the powder. Then, gently insert the cutting about an inch or two into the prepared soil. You want it to be stable enough to stand on its own.
- Watering (Initially): Wait a few days after planting before you water. This gives the cut end a chance to settle and further reduce rot risk. When you do water, do it gently, aiming the water at the soil around the base of the cutting, not directly onto the plant itself.
The “Secret Sauce” (Pro Tips)
Here are a couple of my little tricks that often make a big difference:
- Bottom Heat is Your Friend: Cacti absolutely love a bit of warmth from below to encourage root development. If you have a seedling heat mat, pop your pots on that for a few hours a day. If not, a slightly warmer windowsill can often do the trick, but avoid direct, scorching sun.
- Don’t Overcrowd: When I first started, I was guilty of stuffing too many cuttings into one pot. Resist the urge! Give each cutting its own space. This improves air circulation and reduces the chances of soil-borne diseases spreading from one to another.
Aftercare & Troubleshooting
Once your cuttings are planted and have been chilling out for a week or two, you can start watering them sparingly, whenever the soil has completely dried out. You’re not looking to keep them soggy; think thriving desert plant, not swamp dweller.
You’ll know your cutting is rooting when you gently tug on it and feel resistance. It won’t wiggle! You might also see new growth beginning to appear at the tip or sides. This can take anywhere from a few weeks to a couple of months.
The most common issue you’ll run into is rot. If your cutting starts to look mushy, discolored, or just collapses, it’s probably rotted. If you catch it early, you might be able to salvage a healthy section by cutting off the rot and letting the remaining piece callus again, but often, it’s best to start fresh with a new cutting. Overwatering is the main culprit here, so err on the side of too dry than too wet.
A Encouraging Closing
Watching a new Cleistocactus tominensis sprout roots and begin its independent life is such a joy. Don’t get discouraged if your first attempt isn’t perfect. Gardening is a journey of learning and patience. Keep experimenting, stay observant, and most importantly, enjoy the process of nurturing these spiky little wonders! Happy propagating!
Resource: