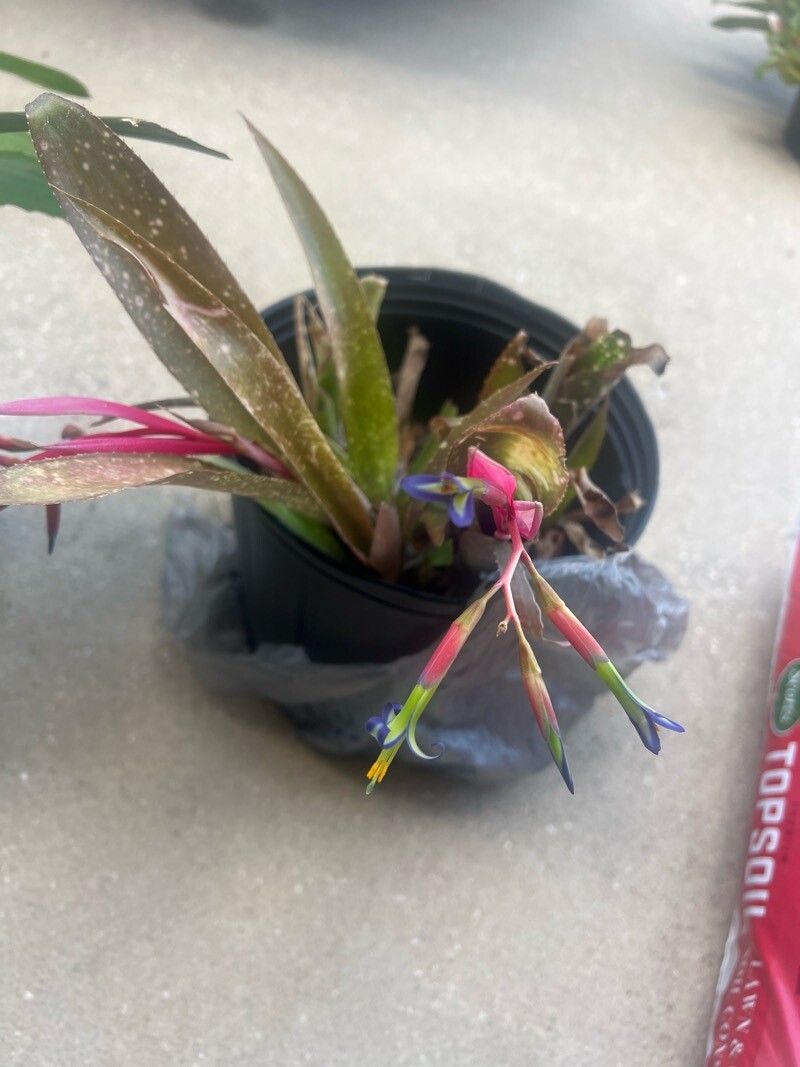
Oh, Billbergia buchholtzii! If you’re looking for a bromeliad that brings a bit of playful pizzazz to your home, then you’ve found a winner. With its striking, often spiky foliage and the promise of beautiful blooms, it’s a plant that keeps on giving. And the best part? You can easily multiply this beauty to share with friends or simply fill up your growing space. Trust me, once you get the hang of it, propagating these plantlets is incredibly satisfying. For beginners, I’d say Billbergia buchholtzii is moderately easy. It’s not quite as forgiving as a spider plant, but with a little attention, you’ll be a pro in no time.
The Best Time to Start
When it comes to maximizing your chances of success, spring and early summer are your best friends. This is when the plant is actively growing and has plenty of energy to put into producing new life. You’ll find the most robust offsets are usually developing then, making them ready for separation.
Supplies You’ll Need
Gathering your tools beforehand makes the whole process so much smoother. Here’s what I usually have on hand:
- Sharp, clean pruning shears or a sharp knife: Essential for making clean cuts. Sterilize them with rubbing alcohol before you start.
- Well-draining potting mix: I like a chunky orchid bark mix with a bit of perlite added. Anything that allows for good air circulation and prevents waterlogging is key.
- Small pots or containers: Terra cotta pots are my go-to as they allow the soil to dry out more quickly. Make sure they have drainage holes!
- Rooting hormone (optional but recommended): A little sprinkle can give your new cuttings a real boost.
- Watering can with a fine rose or a spray bottle: For gentle watering.
- Labels and a permanent marker: So you don’t forget what’s what!
Propagation Methods
Billbergia buchholtzii primarily propagates through what we call offsets, which are baby plants that grow from the base of the mother plant. This is really the easiest and most successful way to go.
1. Identifying and Separating Offsets:
Look between the leaves at the base of your mature Billbergia buchholtzii. You’ll start to see small, compact baby plants forming. They usually have a few leaves already.
2. The Gentle Extraction:
Once an offset is at least a quarter to a third of the size of the mother plant, it’s ready. Gently pull the mother plant away from the offset. You might need to use your clean knife or pruning shears to carefully sever the connection if it’s very strong. Try to get at least a little bit of root attached to the offset if possible.
3. Preparing for Planting:
If your offset has a substantial amount of stem, you can even treat it like a small cutting. You can let the cut end callous over for a day or two in a dry, airy spot. This helps prevent rot when you put it in soil. Any damaged leaves can be trimmed off.
4. Potting Up:
Fill your small pot with your prepared, free-draining mix. Make a small hole in the center and firmly plant the offset into the soil, ensuring the base is covered.
5. Initial Watering:
Water gently after potting. You want the soil to be moist but not soggy.
The “Secret Sauce” (Pro Tips)
After years of coaxing new plants to life, I’ve picked up a few tricks that really make a difference:
- Don’t Overwater, Ever! This is the cardinal sin of bromeliad propagation. They hate sitting in wet soil. Err on the side of letting the soil dry out between waterings, especially when they’re just starting out.
- Embrace the “Cup” (Sometimes): For established offsets with a slight cup-like formation at their base, you can add a tiny splash of water into that center cup. But make sure it’s just a small amount, and that it dries out quickly. This mimics their natural growing environment without creating a rot hazard.
- Patience with Roots: It can take weeks, even months, for offsets to establish a robust root system. Don’t be tempted to tug on them to check for roots. Look for new leaf growth as the best indicator that things are going well.
Aftercare & Troubleshooting
Once your offset is potted up, keep it in a bright, indirect light location. Avoid direct sunlight, which can scorch those tender new leaves. Water sparingly – just enough to keep the soil lightly moist. Misting the air around the plant can also help create a nice humid environment without over-saturating the soil.
The most common problem you’ll face is rot. If you see the base of your plant turning mushy and brown, or if leaves start to yellow and fall off rapidly, it’s likely due to too much moisture. If you catch it early, you might be able to save it by letting it dry out completely and removing any rotted parts. If it’s too far gone, unfortunately, it’s best to discard it and start fresh.
A Encouraging Closing
Growing new plants is a journey, and sometimes it takes a few tries. Don’t get discouraged if your first attempt isn’t perfect. Each experience teaches you something new. Just keep observing your plants, trust your instincts, and enjoy the process of watching these little green wonders unfurl. Happy propagating!
Resource:
https://identify.plantnet.org/k-world-flora/species/Billbergia%20buchholtzii%20Mez/data