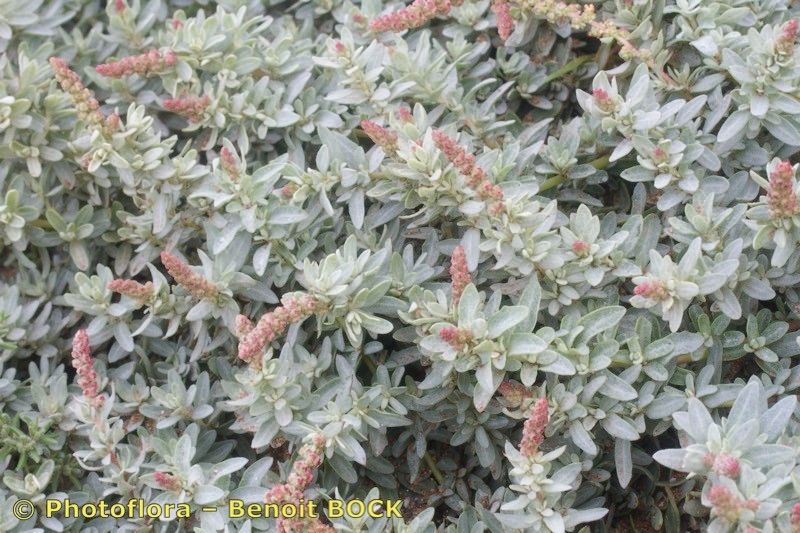
Oh, hello there! Come on in, grab a mug. Today, we’re diving into one of my favorite little treasures: Atriplex muricata, often called thorny saltbush. If you’ve ever seen this beauty in a coastal garden, you know its silvery-grey foliage and intriguing texture are quite something. Plus, its ability to thrive in tough, salty conditions makes it a real winner. And the best part? You can easily bring more of this charm into your own garden by propagating it. Whether you’re new to the gardening game or have a few seasons under your belt, I think you’ll find propagating Atriplex muricata to be a wonderfully rewarding experience. It’s not overly fussy, which is always a good sign for us impatient types!
The Best Time to Start
For the highest chance of success with Atriplex muricata, I find that late spring to early summer is absolutely the sweet spot. This is when the plant is actively growing after the cooler months. You’re looking for stems that are firm and have that lovely new growth, but aren’t so young they’re still soft and floppy. Sturdy, semi-hardwood cuttings taken during this period tend to root the most reliably for me.
Supplies You’ll Need
Gathering your tools beforehand makes the whole process smoother. Here’s what I usually have on hand:
- Sharp pruning shears or a clean, sharp knife: Essential for making clean cuts that heal well.
- Rooting hormone (optional but helpful): A powder or gel can give your cuttings a little boost.
- Potting mix: A well-draining mix is crucial. I often use a blend of perlite, coarse sand, and a little bit of peat moss, or a good quality commercial cactus and succulent mix.
- Small pots or trays: Clean pots or seed trays with good drainage holes.
- Plastic bags or a propagator: To create a humid environment for your cuttings.
- Watering can or spray bottle: For gentle watering.
- Labels and a pen: To keep track of what you’ve planted!
Propagation Methods
We’ll focus on the most reliable method for Atriplex muricata: stem cuttings.
-
Taking the Cuttings: Head out to your established Atriplex muricata. Choose healthy stems that are about 4-6 inches long. Using your sharp pruning shears or knife, make a clean cut just below a leaf node. A leaf node is where a leaf grows from the stem – this is where the magic of root formation often happens. Try to take several cuttings; not every one will make it, and that’s perfectly normal.
-
Preparing the Cuttings: Gently remove the lower leaves from your cuttings, leaving just a few at the top. This prevents them from rotting once they’re in the soil and directs the plant’s energy towards root development.
-
Applying Rooting Hormone (If Using): Dip the cut end of each stem into your rooting hormone. Tap off any excess. This isn’t strictly necessary for Atriplex muricata, as it’s quite vigorous, but it can certainly speed things up.
-
Planting the Cuttings: Fill your clean pots or trays with your well-draining potting mix. You can make small holes in the soil with a pencil or your finger. Insert the prepared cuttings into these holes, ensuring the leaf nodes that were buried are below the soil surface. Gently firm the soil around the stem.
-
Creating Humidity: Water the soil gently but thoroughly. Now, here’s a key step for rooting success: create a mini-greenhouse effect. You can do this by placing the pots inside clear plastic bags, loosely tied, or by using a propagator lid. This traps moisture and keeps the humidity high, which is vital for cuttings while they develop roots.
-
Placement: Place your pots in a bright spot out of direct sunlight. A windowsill in a lightly shaded room or a greenhouse works perfectly.
The “Secret Sauce” (Pro Tips)
After years of tinkering, I’ve learned a few tricks that really help these little guys take off.
- Don’t Overwater! This is probably the biggest culprit for failure. The soil should be consistently moist but not soggy. I like to check the soil by gently pressing it with my finger. If it feels damp deep down, it’s probably still happy. Overwatering leads to rot, and no one wants that.
- Bottom Heat is Your Friend: If you have the space and the inclination, placing your cuttings on a heated propagator mat can make a world of difference. This gentle warmth encourages root formation from below, giving your cuttings a much-needed nudge. It’s like giving them a warm hug!
- Air Circulation is Key: While you want humidity, you also need some airflow to prevent fungal issues. If your cuttings are in a plastic bag, try to open it for a few minutes each day to let fresh air in. This helps prevent mold and encourages stronger growth.
Aftercare & Troubleshooting
Once you start to see tiny roots peeking out of the drainage holes, or if you gently tug on a cutting and feel resistance, congratulations! Your new Atriplex muricata is on its way.
Gradually introduce your new plants to drier air by opening the plastic bags more each day over a week or so. Once they’re fully weaned off the high humidity, you can water them as you would a mature plant, again, always ensuring good drainage. Keep them in their bright, indirectly lit spot for a few more weeks until they look strong and healthy before considering potting them up into slightly larger individual containers.
What if things go wrong? The most common issue is rot. If your cuttings turn mushy, black, or have a foul smell, they’ve likely succumbed to rot. This is usually due to overwatering or poor air circulation. Don’t despair! Just discard the rotted cuttings and try again, remembering those tips about watering and airflow. Sometimes, cuttings just don’t root, and that’s okay too. It’s all part of the learning process.
A Little Encouragement
So there you have it! Propagating Atriplex muricata is a straightforward and incredibly satisfying way to fill your garden with that lovely silvery shimmer. Be patient with your cuttings; they’ll take their time to establish themselves. Enjoy the process, learn from each attempt, and before you know it, you’ll have a little Atriplex army ready to grace your garden, or even to share with fellow plant lovers. Happy propagating!
Resource: