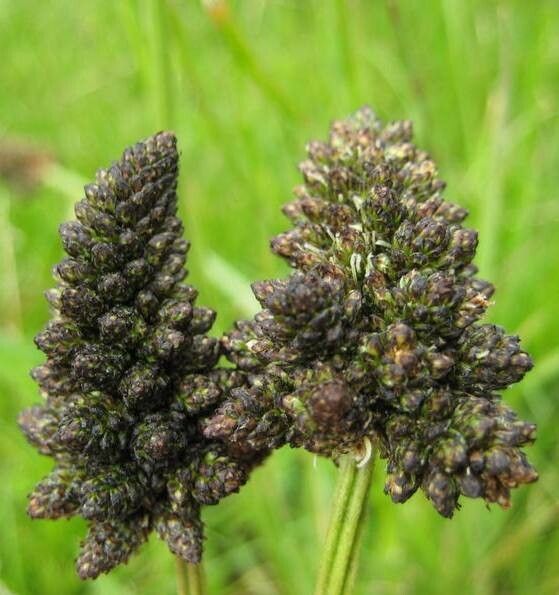
Hello fellow garden lovers! Today, we’re diving into the wonderful world of Plantago atrata, or as some of you might know it, black plantain. This hardy beauty, with its dusky foliage and charming flower spikes, absolutely adds a touch of understated elegance to any garden. It’s not overly fussy, and the reward of seeing those new little plants sprout from your own efforts? Pure gardening joy. If you’re new to plant propagation, I think you’ll be pleasantly surprised. Plantago atrata is quite accommodating, making it a lovely introduction to multiplying your greenery.
The Best Time to Start
The sweet spot for propagating Plantago atrata is generally in late spring to early summer. This is when the plant is actively growing, full of vigor, and has plenty of energy for developing new roots. Aim to take your cuttings or divide your plants when they are looking robust and healthy, not stressed from drought or extreme heat.
Supplies You’ll Need
Ready to get your hands dirty? Here’s what I usually have on hand:
- Sharp pruning shears or a clean knife: For making clean cuts.
- Potting mix: A well-draining mix is key. I often use a blend of peat moss, perlite, and a little compost.
- Small pots or trays: Clean ones, of course!
- Rooting hormone (optional but helpful): A sprinkle can really boost success.
- Watering can or spray bottle: For gentle watering.
- Labels: To remember what you planted and when!
Propagation Methods
There are a couple of straightforward ways to get more Plantago atrata from your existing plants.
Division
This is perhaps the easiest method for Plantago atrata, especially for more established clumps.
- Gently unearth the plant: Carefully dig around the base of your Plantago, loosening the soil.
- Inspect the root ball: You’ll often see distinct sections or crowns.
- Separate the divisions: Using your hands or a clean trowel, carefully pull apart the clumps. You want each division to have a good amount of roots and at least one healthy shoot or crown.
- Replant immediately: Pot up your new divisions in fresh, well-draining soil. Water them gently.
Stem Cuttings
This method is great if you have a healthy, non-flowering stem.
- Take a cutting: Look for a healthy stem that’s about 4-6 inches long. Using your clean shears, make a clean cut just below a leaf node (where a leaf attaches to the stem).
- Prepare the cutting: Remove the lower leaves from the cutting, leaving just a couple of leaves at the tip. If the leaves are very large, you can even cut them in half to reduce water loss.
- Apply rooting hormone (optional): Dip the cut end into rooting hormone, tapping off any excess.
- Plant the cutting: Make a small hole in your potting mix with a pencil or your finger and insert the cut end of the stem. Gently firm the soil around it.
- Water and cover: Water the soil lightly. You can then cover the pot with a loosely fitting plastic bag or a propagation dome to maintain humidity.
The “Secret Sauce” (Pro Tips)
Here are a few little tricks that have helped me over the years:
- When propagating by water, ensure no leaves are submerged. Any submerged foliage will rot and can take your cutting down with it.
- If you’re using stem cuttings and want to speed things up, consider using a propagation mat for gentle bottom heat. It mimics the warmth of spring soil and encourages root development.
- Don’t be afraid to experiment with different potting mixes. Sometimes, adding a bit more perlite to your standard mix can make a world of difference in preventing waterlogged conditions, which is a common culprit for rot.
Aftercare & Troubleshooting
Once your Plantago atrata cuttings have rooted or your divisions are planted, keep them in a bright spot but out of direct, harsh sunlight. Water them consistently, but avoid letting them sit in soggy soil. You’ll know rooting has occurred when you see new growth or feel a gentle resistance when you tug lightly on the cutting.
The most common issue you might encounter is rot. If you see mushy, blackened stems or leaves, it’s usually a sign of too much moisture.
- For cuttings: Pull out the affected cutting immediately. Aerate the soil of the remaining cuttings by gently poking a few holes with a toothpick.
- For divisions: Gently unpot them. If the rot is extensive, you might need to trim away affected roots. Repot in fresh, dry soil.
A Little Encouragement
Growing new plants from your own stock is such a rewarding part of gardening. Be patient with your little Plantago atrata. Some cuttings take their sweet time, and that’s perfectly okay. Just enjoy the process, learn from each attempt, and soon you’ll have a whole new collection of these lovely plants to share or enjoy yourself! Happy propagating!
Resource:
https://identify.plantnet.org/k-world-flora/species/Plantago%20atrata%20Hoppe/data