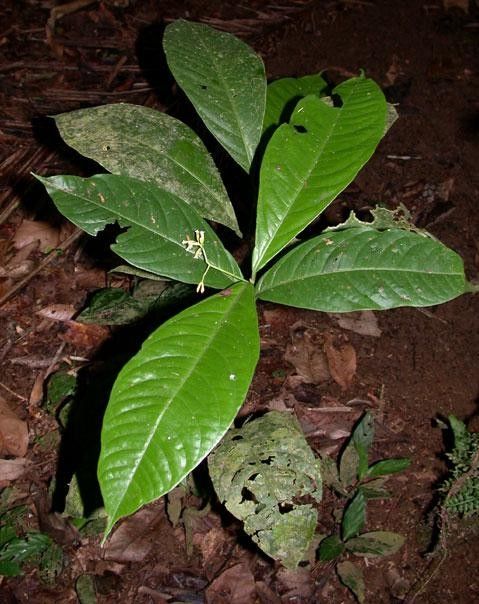
Oh, Neea amplifolia! What a fantastic plant to get your hands on. Those broad, glossy leaves are just stunning, aren’t they? And let’s be honest, there’s a special kind of joy that comes with coaxing a new life from a piece of an existing one. While Neea amplifolia isn’t the absolute easiest plant for a complete beginner to propagate – it can be a little fussy – with a little patience and the right approach, you’ll be rewarded with plenty of new treasures.
The Best Time to Start
For Neea amplifolia, your best bet is usually late spring through early summer. This is when the plant is actively growing and has ample energy to put into developing roots. Look for new, somewhat softened growth – what we call “semi-hardwood” cuttings. Avoid woody, mature stems or brand-new, floppy shoots; that sweet spot in between is what we’re after.
Supplies You’ll Need
- Sharp, clean pruning shears or a knife: For making clean cuts.
- Rooting hormone: A good quality powder or gel will give you a significant edge.
- A well-draining potting mix: I like a blend of equal parts perlite and peat moss or coco coir. Some growers add a bit of horticultural charcoal to help keep things fresh.
- Small pots or trays: Clean and with drainage holes, of course!
- A clear plastic bag or propagation dome: To create a mini greenhouse effect.
- Watering can or spray bottle: For gentle watering.
- Optional: Bottom heat mat: This can be a game-changer, especially if your home is on the cooler side.
Propagation Methods: Taking Stem Cuttings
This is where we’ll focus our energy for Neea amplifolia.
-
Select Your Cutting: Choose a healthy stem with several leaves. Aim for a piece that’s about 4-6 inches long. Using your clean shears or knife, make a clean cut just below a leaf node (where a leaf attaches to the stem). Remove the lower leaves, leaving only two or three at the very top. This minimizes water loss and prevents leaves from rotting in the soil.
-
Prepare the Cutting: Dip the cut end of the stem into your rooting hormone, ensuring it’s evenly coated. Tap off any excess.
-
Plant Your Cutting: Make a small hole in your prepared potting mix with a pencil or your finger. Gently insert the cutting into the hole, ensuring the leaf nodes are below the soil surface. Firm the soil gently around the stem.
-
Create a Humid Environment: Water the potting mix thoroughly but gently. Then, place your pot inside a clear plastic bag, securing it with a rubber band around the rim of the pot. Alternatively, use a propagation dome. This traps humidity, which is crucial for cuttings to root.
-
Placement: Position the pot in a spot with bright, indirect light. Avoid direct sun, which can scorch the leaves and overheat the plastic enclosure.
The “Secret Sauce” (Pro Tips)
- Don’t Overdo the Leaves: Seriously, those top two to three leaves are plenty. Any more, and they’ll draw too much moisture from the stem before it can develop roots and might start to rot, attracting fungus.
- Bottom Heat is Your Friend: If you can swing it, a gentle bottom heat mat can dramatically speed up rooting. It encourages root development from the soil surface upwards – it’s like a warm invitation to get growing! Just make sure the temperature stays consistently warm, not hot.
- Watch for Those Tiny Root Nubs: Before you even see new leaves popping out, you might be able to gently tug on the cutting. If you feel the slightest resistance, that’s a good sign roots are forming! I like to give mine a very gentle pull, just enough to feel if there’s something holding on.
Aftercare & Troubleshooting
Once roots have developed (this can take anywhere from a few weeks to a couple of months!), you’ll want to gradually acclimate your new plant to normal conditions. Start by opening the plastic bag for a few hours each day, increasing the time gradually. Eventually, you can remove the bag altogether. Keep the soil consistently moist but not waterlogged.
The most common issue you’ll face is rot. If your cutting turns black and mushy, it’s usually a sign that it was too wet, the air was too still, or it got too cold. If you notice any leaves yellowing and dropping without any signs of pests, it’s often shedding them because it doesn’t have enough roots to support them. Don’t despair! Just remove the affected leaves and keep the soil appropriately moist.
A Gentle Wrap
Propagating plants is a journey, and sometimes it feels like a waiting game. Remember to be patient with your Neea amplifolia cuttings. Not every single one will make it, and that’s perfectly okay. Each attempt is a learning experience. Enjoy the process, celebrate the successes, and soon you’ll have a whole collection of these beautiful specimens to admire! Happy growing!
Resource:
https://identify.plantnet.org/k-world-flora/species/Neea%20amplifolia%20Donn.Sm./data