Hello, fellow plant lovers!
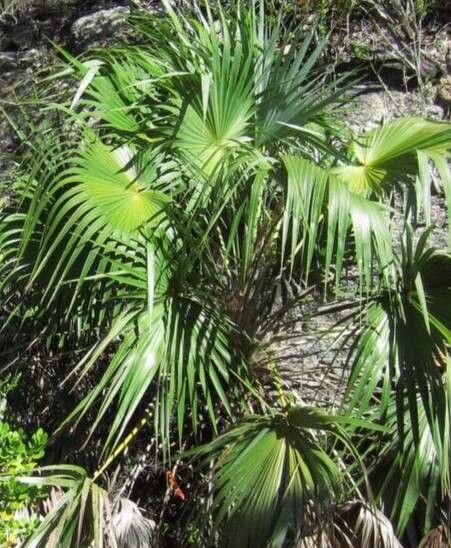
Isn’t it a joy when your favorite plants start looking a little crowded? For me, that feeling is the perfect invitation to get hands-on with propagation. Today, I want to chat about a beautiful palm that brings a touch of the tropics to any setting: the Leucothrinax morrisii. With its graceful, fan-shaped leaves and slender trunk, it’s a real stunner. Propagating these palms can be incredibly rewarding, giving you more of that gorgeous greenery to share or simply enjoy yourself. Now, I’ll be honest, Leucothrinax morrisii isn’t the absolute easiest plant to propagate for a complete beginner, but with a little patience and the right guidance, it’s definitely achievable and well worth the effort.
The Best Time to Start
For the highest success rates with Leucothrinax morrisii, spring or early summer is your golden window. This is when the plant is naturally in a phase of active growth, meaning it has more energy to put into developing new roots. Waiting until after the risk of frost has passed and temperatures are consistently warm will give your cuttings the best chance to thrive.
Supplies You’ll Need
Here’s what you’ll want to have ready:
- Sharp, sterilized pruning shears or a clean knife
- A well-draining potting mix – something like a cactus/succulent mix amended with perlite or coarse sand works wonderfully.
- Rooting hormone (optional, but can give you an extra boost!)
- Small pots or seedling trays with drainage holes
- A clear plastic bag or propagation dome
- A spray bottle filled with clean water
- A heat mat (optional, but highly beneficial)
Propagation Methods
While Leucothrinax morrisii is primarily grown from seed, we can explore a method that can sometimes yield success from cuttings, though it’s trickier than with many other plants. I find stem cuttings to be the most practical approach for home growers looking to get a head start.
Stem Cuttings:
- Select Your Cutting: Look for a healthy, mature stem that has at least one leaf node. Ideally, choose a stem that feels firm but not woody, and has at least two or three healthy leaves.
- Make the Cut: Using your sterilized shears, make a clean cut just below a leaf node. Aim for a cutting that’s about 4-6 inches long.
- Prepare the Cutting: Carefully remove any lower leaves, leaving just the top few intact. If the leaves are very large, you can cut them in half to reduce water loss through transpiration.
- Apply Rooting Hormone (Optional): Dip the cut end of the stem into rooting hormone, ensuring it’s coated. Tap off any excess.
- Planting: Fill your small pots with your prepared, moist potting mix. Make a small hole in the center with your finger or a pencil. Insert the cut end of the stem into the hole, making sure the leaf node is buried. Gently firm the soil around the base of the cutting.
- Create a Humid Environment: Water the soil lightly. Then, place the pot inside a clear plastic bag or cover it with a propagation dome. This will trap humidity, which is crucial for cuttings that are still developing roots. Ensure the leaves don’t touch the plastic if possible.
The “Secret Sauce” (Pro Tips)
Here are a couple of things I’ve learned over the years that can really make a difference:
- Bottom Heat is Your Best Friend: Leucothrinax morrisii loves warmth at its roots. Placing your pots on a heat mat set to around 75-80°F (24-27°C) can significantly speed up root development. It’s like giving those tiny root cells an extra cozy boost.
- Patience is Paramount – And Cleanliness is Key: Palms are slow growers, and that includes root development. Don’t be tempted to pull your cuttings out too soon to check for roots. Give them at least 6-8 weeks, and often longer. Also, always use clean tools and pots. Rot is the enemy, and any lingering bacteria or fungi can spell disaster for your precious cuttings.
Aftercare & Troubleshooting
Once you start seeing signs of new growth – a tiny leaf unfurling or resistance when you gently tug the cutting – it’s a good sign that roots are forming!
Watering: Continue to keep the soil consistently moist but not waterlogged. As the new plant establishes itself, you can gradually start to acclimate it to more typical watering routines. Reduce humidity slowly by opening the plastic bag a little each day before removing it entirely.
Light: Place your newly rooted cuttings in bright, indirect light. Direct sun can scorch tender new growth.
Troubleshooting: The most common issue here is rot. If your cutting turns mushy, develops black spots, or has a foul odor, it’s likely succumbed to rot. This is usually caused by overwatering and poor drainage. If you catch it early, you might be able to salvage a healthy part of the stem, but often it’s best to discard it and start fresh. Another sign of failure is wilting that doesn’t improve even after watering – this can indicate that the cutting isn’t taking root and is drying out.
A Little Encouragement
Remember, every gardener learns by doing, and a bit of trial and error is part of the fun. Be patient with your Leucothrinax morrisii cuttings. Celebrate the small victories, and don’t be discouraged by setbacks. The joy of seeing a new palm sprout and grow under your care is a truly wonderful experience. Happy propagating!
Resource: