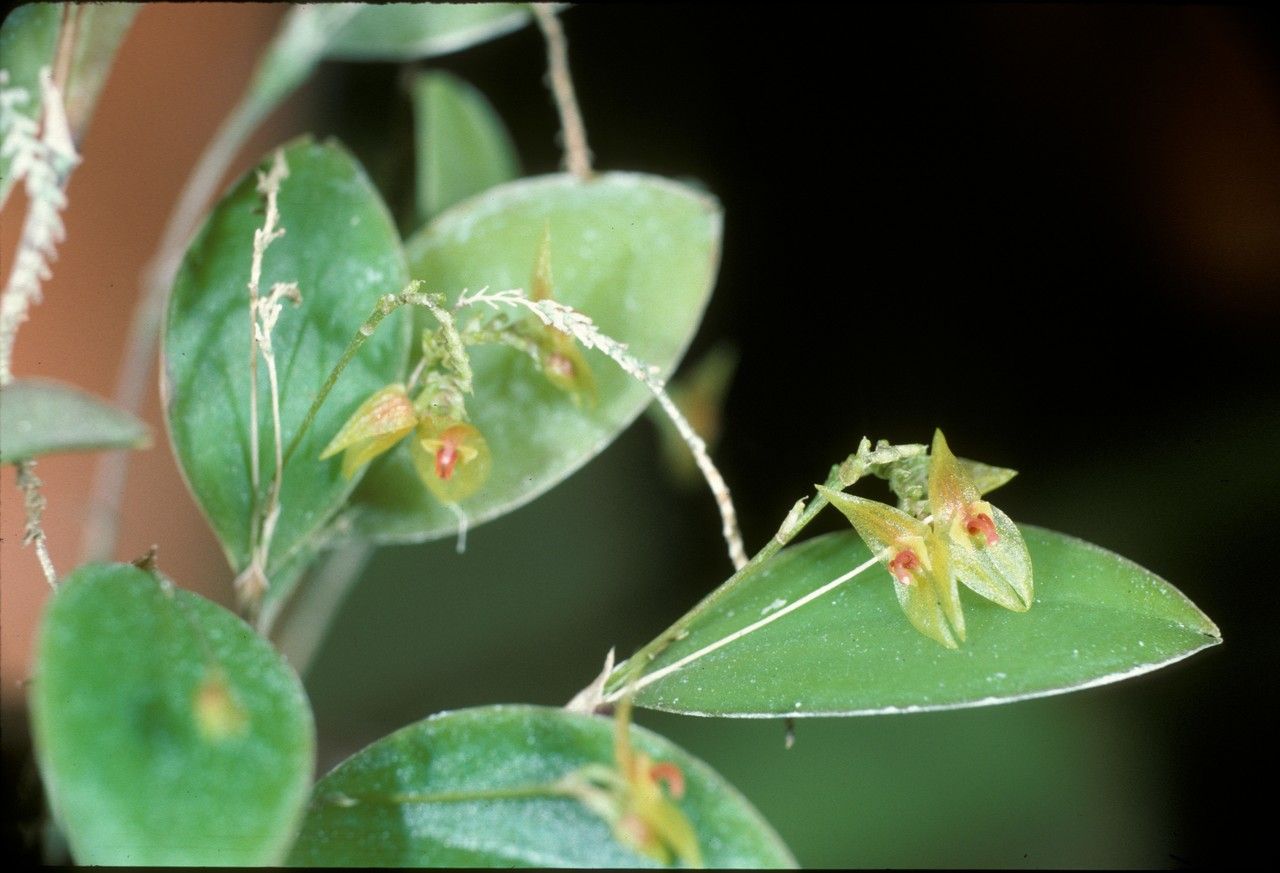
Hey there, fellow plant lovers! I’m so excited to chat with you today about a truly captivating orchid: Lepanthes tridentata. If you’re looking for a splash of the exotic in your collection, this is it. Its delicate, almost architectural blooms are simply breathtaking. Now, I won’t lie, propagating these little marvels can be a bit of a journey, but oh-so-worth-it! While not for the absolute beginner to orchids, if you’ve got a bit of patience and a curious spirit, you can definitely succeed. It’s incredibly rewarding to watch a tiny piece of this beauty grow into its own.
The Best Time to Start
For Lepanthes tridentata, the sweet spot for propagation is generally during its active growing season. This usually falls from late spring through summer. You’ll notice new growth appearing on the plant – those are your prime candidates for taking cuttings. Starting when the plant is energized and putting on new leaves means the pieces you take will have the best chance of thriving and rooting. Avoid propagating during its rest period; the plant needs that energy for itself.
Supplies You’ll Need
Gathering your supplies beforehand makes the whole process smoother. Here’s what I recommend:
- Sharp, sterile pruning shears or a razor blade: Cleanliness is key to preventing disease.
- Sphagnum moss: A staple for many orchid propagations, it holds moisture beautifully.
- Perlite or orchid bark (fine grade): For improved drainage and aeration, especially if you’re starting cuttings in a mix.
- Clear plastic containers or propagation boxes: To create a humid environment.
- Rooting hormone (optional but helpful): A mild, orchid-specific rooting hormone can give cuttings a boost.
- Distilled or rainwater: Tap water can sometimes contain minerals that aren’t ideal for sensitive orchids.
- Small pots or seedling trays: For when your new plants are ready for their own space.
- A mister or spray bottle: For keeping humidity levels up.
Propagation Methods
The most effective way to propagate Lepanthes tridentata is through division or taking keikis (which are essentially baby plantlets that grow from the nodes).
1. Division (For Mature Plants):
This is often the most successful method if your plant has grown quite large and has multiple pseudobulbs.
- Gently remove the plant from its pot. You might need to loosen the edges with a knife.
- Carefully inspect the root system. Look for distinct sections of the plant that have their own roots attached.
- Using your sterile shears or razor, carefully divide the plant. Make sure each division has at least one or two pseudobulbs and a healthy root system.
- Inspect the cut surfaces for any signs of rot. If you see any, you can dust it with a little fungicide powder.
- Pot up each division into its own small pot. Use your usual orchid potting mix. Ensure the roots are spread out and the base of the plant is at the surface of the media.
2. Keiki Propagation:
Keikis can sometimes form naturally on the flower spikes or near the base of the pseudobulbs.
- Look for tiny plantlets with small leaves and at least one tiny root.
- Wait until the keiki is a reasonable size and has developed a few healthy roots. Patience is your friend here!
- Carefully cut the keiki from the mother plant, ensuring you get a bit of the stem it’s attached to, along with its roots.
- Pot the keiki into a small container with your preferred orchid mix, just as you would a divided plant.
The “Secret Sauce”
Here are a few things I’ve learned over the years that can really make a difference with fussy orchids like Lepanthes:
- Embrace the Humidity: These little guys love a humid environment. Think greenhouse or terrarium conditions. If you’re not using a propagation box, try placing your pots on a pebble tray filled with water to create a localized humid microclimate. Just make sure the bottom of the pot isn’t sitting directly in the water.
- Don’t Overwater! This is crucial. While they like humidity, they absolutely detest soggy roots. It’s better to be slightly on the dry side than to risk root rot. Allow the potting medium to approach dryness between waterings, but mist the leaves and surrounding air regularly.
- Gentle Light is Best: New propagations are sensitive. They don’t need intense sunlight. Bright, indirect light is ideal. Think about a heavily shaded area or a north-facing window.
Aftercare & Troubleshooting
Once your Lepanthes tridentata divisions or keikis are potted, keep them in that humid, gently lit spot. You’ll want to maintain high humidity and water sparingly. Watch for signs of new growth – tiny roots emerging or a new leaf unfurling. This is your signal that things are going well!
The biggest hurdle you might face is root rot. If you see leaves turning yellow and mushy, or if the base of the plant looks dark and soft, it’s a sign of overwatering or poor drainage. If this happens, you might need to carefully remove the plant, trim away any rotten parts, and repot in fresh, dry medium. Don’t despair; it’s a learning process! Sometimes, despite our best efforts, a cutting just won’t take. That’s okay too.
A Encouraging Closing
Propagating orchids can feel like a delicate dance, but with Lepanthes tridentata, the reward of seeing those miniature wonders take hold is immense. Be patient with yourself and your plants. Enjoy the process of nurturing something new, and celebrate every little success. Happy propagating, and may your Lepanthes tridentata flourish!
Resource:
https://identify.plantnet.org/k-world-flora/species/Lepanthes%20tridentata%20(Sw.)%20Sw./data