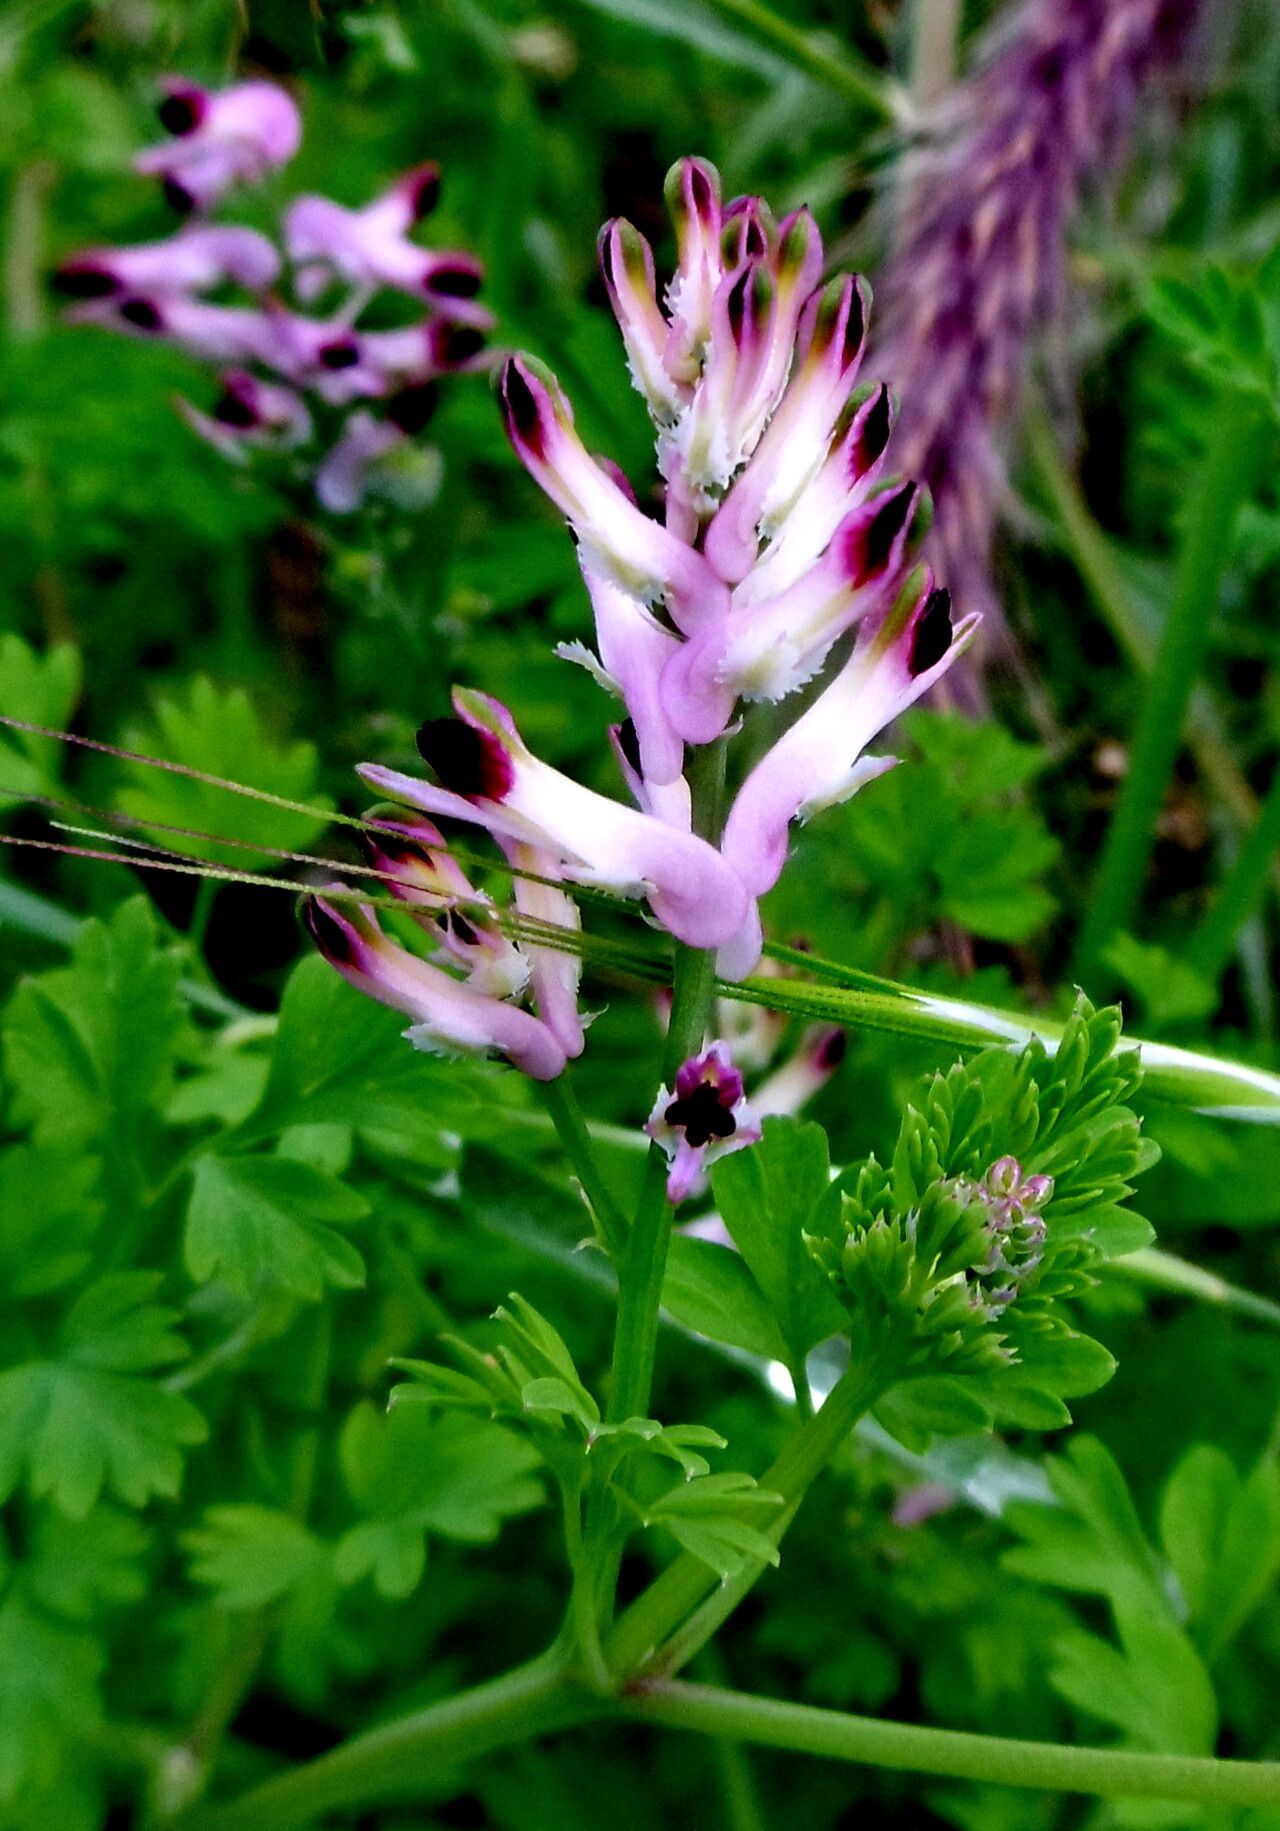
Oh, Fumaria montana! What a delightful challenge and a true joy to have in the garden. I remember the first time I saw its delicate, lobed leaves and charming, snapdragon-like flowers unfurling. It’s like a whisper of wildflowers, bringing a touch of wild beauty to even the most manicured spaces.
If you’re looking for a plant that will make you feel like you’ve accomplished something truly special, propagating Fumaria montana might just be your next rewarding project. Now, I won’t lie, it’s not the absolute easiest plant to start from scratch, but with a little patience and the right approach, I’ve found it to be quite manageable. Let’s dive in!
The Best Time to Start
For the absolute best chance of success with Fumaria montana, I always aim to take cuttings in late spring or early summer. This is when the plant is actively growing, and the stems are firm but still relatively soft. You’ll want to select stems that have just finished flowering or are just beginning to produce new growth. Avoid anything that feels woody and old; we want vigorous new life!
Supplies You’ll Need
Gathering your tools beforehand makes the whole process so much smoother. Here’s what I always have on hand:
- Sharp pruning shears or a clean, sharp knife: For making clean cuts.
- A good quality potting mix: I prefer a mix that drains exceptionally well. A blend of peat moss, perlite, and a bit of compost works wonders.
- Rooting hormone (optional but recommended): This can significantly boost your success rate. I like the powdered kind.
- Small pots or trays with drainage holes: About 3-4 inches is perfect.
- A mister or small watering can: For gentle watering.
- A clear plastic bag or propagation dome: To create a humid environment.
- Perlite or small pebbles: For the water propagation method.
Propagation Methods
Fumaria montana can be propagated in a couple of ways, but I find stem cuttings to be the most reliable.
Stem Cuttings
This is my go-to method for Fumaria montana.
- Select your cuttings: Look for healthy, new stems that are about 4-6 inches long. You want a stem with at least two sets of leaves.
- Make the cut: Using your clean shears or knife, make a diagonal cut just below a leaf node. This is where roots are most likely to form.
- Prepare the cutting: Gently remove the lower leaves, leaving only the top set. This prevents them from rotting in the soil or water.
- Dip in rooting hormone (optional): If you’re using rooting hormone, dip the cut end of the stem into the powder, tapping off any excess.
- Plant your cuttings: Fill your small pots with the well-draining potting mix. Make a small hole in the center with your finger or a pencil.
- Insert the cuttings: Gently place the cut end of the stem into the hole and firm the soil around it.
- Water gently: Lightly water the soil to settle it.
- Create humidity: Place the potted cuttings inside a clear plastic bag or under a propagation dome. Seal it loosely to allow for some air circulation.
Water Propagation
This method can be a little trickier for Fumaria montana due to potential rot, but it’s worth a try if you’re feeling adventurous.
- Prepare your cuttings: Follow steps 1-3 above.
- Place in water: Fill a small glass or jar with clean room-temperature water. Submerge the cut end of the stem, ensuring no leaves are touching the water. You can add a few perlite pebbles to help keep the stem upright.
- Find a good spot: Place the container in a bright spot with indirect light. Avoid direct sun, which can scorch the delicate cuttings.
- Change the water regularly: Change the water every 2-3 days to keep it fresh and prevent bacterial growth.
The “Secret Sauce” (Pro Tips)
Here are a few things I’ve learned over the years that really make a difference:
- Don’t overcrowd: When you’re creating humidity with a plastic bag, make sure the leaves of your cuttings aren’t touching each other. This helps prevent fungal diseases.
- Bottom heat is your friend: If you have a heating mat designed for seedlings, placing your pots on it can dramatically speed up root development. Fumaria montana loves a little warmth from below.
- Patience is key with water: If you’re water propagating, you might see roots form quite quickly. However, don’t be tempted to move them to soil too soon. Wait until the roots are at least an inch long before attempting to transplant.
Aftercare & Troubleshooting
Once you see those precious roots!
- For cuttings in soil: Once you start to see new growth after a few weeks, it’s a good sign that roots have formed. You can gently remove the plastic bag or dome for a few hours each day to acclimate them to drier air. Eventually, you can remove it completely. Keep the soil consistently moist but not waterlogged.
- For cuttings in water: When the roots are a good length, carefully pot them up into your well-draining potting mix, just as you would with the stem cuttings. Water them in gently.
If things aren’t going as planned, don’t despair! The most common issue is rot. If your cuttings turn mushy and brown, or develop black spots, it’s usually a sign of too much moisture or a lack of air circulation. If you see this, try fresh cuttings, ensure your soil drains well, and increase air flow. Yellowing leaves can sometimes mean they need a bit more light, but avoid direct sun.
A Little Encouragement
Propagating plants is a journey, and Fumaria montana can be a wonderfully rewarding part of that journey. Be patient with yourself and with your little hopefuls. Celebrate every tiny new leaf and every emerging root. The process itself is as beautiful as the blooms. Happy propagating!
Resource:
https://identify.plantnet.org/k-world-flora/species/Fumaria%20montana%20J.A.Schmidt/data