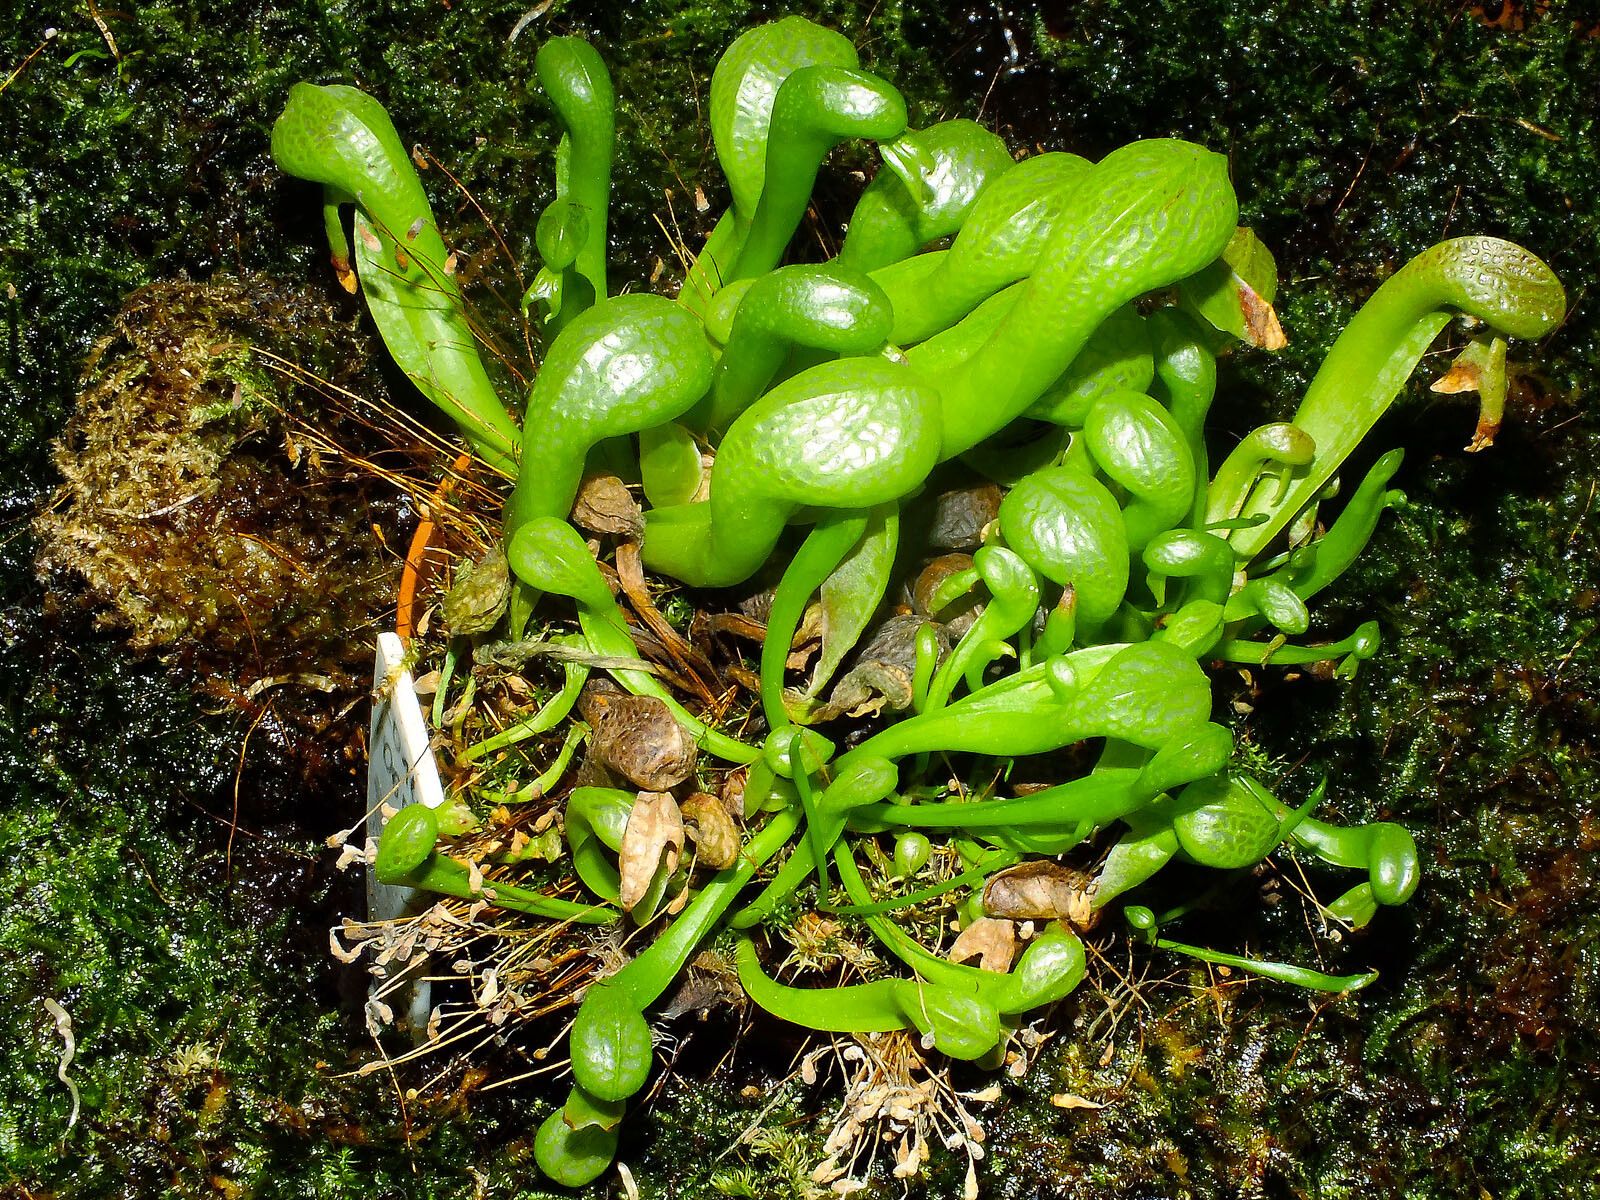
Oh, hello there! Come on in, grab a cup of tea. Today, we’re diving into something truly special: coaxing new life from the magnificent Darlingtonia californica, the California pitcher plant. You know, those incredible, cobra-like beauties that capture everyone’s imagination. There’s such a thrill in seeing a tiny sprout emerge from something you nurtured yourself. It’s a bit of a challenge, I won’t lie, but that’s part of what makes it so rewarding. Definitely one for the more adventurous beginner, or a seasoned grower looking for a rewarding project.
When to Get Your Hands Dirty
The sweet spot for propagating Darlingtonia is usually late spring through early summer. This is when the plant is actively growing and has the most energy to dedicate to new development. You’re looking for a plant that’s healthy and showing vigorous growth. Avoid trying to propagate when the plant is stressed or dormant.
Your Propagation Toolkit
Here’s what you’ll want to gather before we begin:
- Well-draining soil mix: I like a blend of 50% peat moss or coco coir and 50% perlite or coarse sand. This is crucial for preventing root rot.
- Sharp pruning shears or a clean razor blade: For making clean cuts. Sterilize them with rubbing alcohol before use.
- Small pots or trays: With drainage holes, of course!
- Rooting hormone (optional but helpful): A liquid or powdered form will do.
- Clear plastic bags or a propagation dome: To maintain high humidity.
- Distilled or rainwater: Darlingtonia are sensitive to mineral buildup, so tap water is a no-go.
- A small trowel or dibber: For gently handling the soil.
Growing New Cobras: Propagation Methods
While Darlingtonia can be a bit tricky, division is generally the most successful method for home growers. Seed germination is notoriously difficult and requires very specific conditions.
Method: Division
This is best done when you’re repotting your Darlingtonia.
- Gently unpot: Carefully remove your mature plant from its pot. Try not to disturb the roots too much.
- Inspect the rhizomes: Look for offset plants that are attached to the main rhizome. These are baby plants! They’ll have their own tiny pitchers or at least the beginnings of them.
- Make the cut: Using your sterilized shears or razor, carefully slice away an offset from the parent plant. Aim to get a good portion of roots attached to the offset. If the offset doesn’t have many roots, don’t worry too much, but it will take a little longer to establish.
- Prepare the new pot: Fill a small pot with your prepared, moist soil mix.
- Plant the offset: Make a small hole in the soil with your trowel and gently place the offset in. Ensure the rhizome is just at or slightly below the soil surface. Firm the soil gently around it.
- Water lightly: Use your distilled or rainwater to lightly water the new planting.
- Create a humid environment: Place the potted offset inside a clear plastic bag or under a propagation dome. This keeps the humidity high, which is vital for new cuttings. Make sure the bag doesn’t directly touch the plant.
- Provide bright, indirect light: Avoid direct sun, which can scorch the new plant. A bright windowsill is usually perfect.
The “Secret Sauce” from My Greenhouse
Now, here are a few little tricks I’ve learned over the years that really make a difference:
- Don’t let the soil dry out completely, but never let it get waterlogged. This is a constant balancing act. Think “damp,” not “swampy.” It’s the quickest way to lose a division to rot.
- Bottom heat is a game-changer. Placing your pots on a seed starting mat set to a low temperature (around 70-75°F or 21-24°C) can really encourage root development, especially if your room is a bit cooler.
- Patience is key! Darlingtonia aren’t the fastest growers, even when divided. Don’t expect miracles overnight. It can take weeks to see new growth emerge.
Nurturing Your New Arrival & What to Watch For
Once you see signs of new growth – a tiny new pitcher or leaf unfurling – you can gradually acclimate your new plant to slightly lower humidity. Remove the plastic bag for a few hours each day, slowly increasing that time.
Keep watering with distilled or rainwater, and continue to keep the soil consistently moist but not soggy.
The biggest challenge you’ll face is root rot. If you notice your division wilting, turning mushy, or developing dark spots, it’s often a sign of too much moisture and poor air circulation. In this case, you might need to pull it out, try to remove any rotted parts with a clean knife, and repot in fresh, slightly drier but still moist soil. Sometimes, sadly, it’s a battle you can’t win, but learning from it is part of the fun.
So there you have it! Propagating Darlingtonia californica is a wonderful journey. It requires a bit of care and attention, but seeing those stunning new pitcher plants emerge from your efforts is incredibly satisfying. Be patient, observe your plants, and enjoy the process. Happy growing!
Resource:
https://identify.plantnet.org/k-world-flora/species/Darlingtonia%20californica%20Torr./data