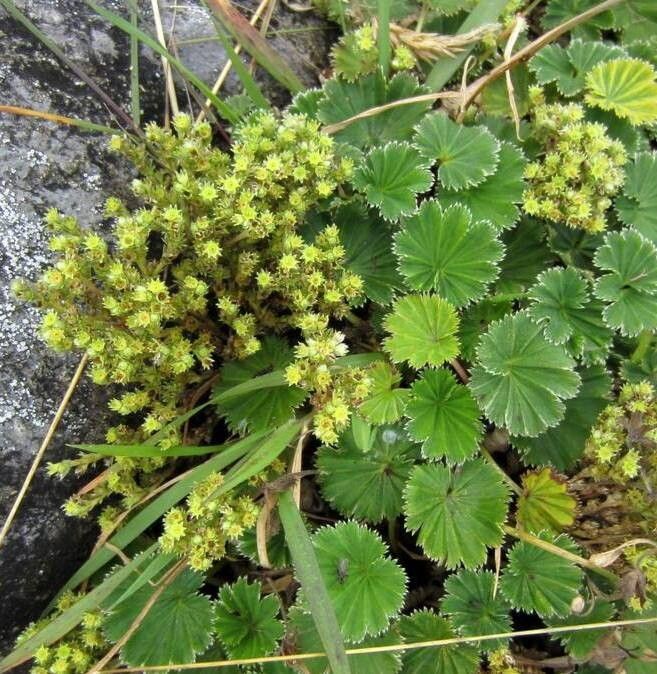
Oh, hello there! Pull up a chair and let’s chat about one of my favorite garden companions: Alchemilla orbiculata, or as I affectionately call her, Lady’s Mantle. You know, the one with those gorgeous, velvety, almost scalloped leaves that just seem to capture dewdrops like tiny jewels? She’s a real charmer in any garden bed, with her delicate sprays of chartreuse flowers in early summer.
Propagating Alchemilla orbiculata is such a wonderful way to expand your collection or share this beauty with friends. And I’m happy to tell you, it’s quite forgiving! Even if you’ve just dipped your toes into the world of plant propagation, you’ll likely find success with this resilient beauty.
The Best Time to Start
For the most bang for your buck, late spring to early summer is your sweet spot. This is when the plant is actively growing and has plenty of energy to put into developing new roots. You’re looking for stems that are firm and new, not woody or overly mature. Think of it as trying to catch Lady’s Mantle at the peak of her youthful vigor!
Supplies You’ll Need
Gathering your supplies before you begin will make the whole process smoother. Here’s what I usually have on hand:
- Sharp, clean pruning shears or a sharp knife: Essential for making clean cuts.
- Rooting hormone (optional but recommended): A little boost can significantly speed things up.
- Well-draining potting mix: A mix specially formulated for cuttings or a blend of peat moss, perlite, and a little compost works beautifully.
- Small pots or seed trays: Clean ones, of course!
- Watering can or spray bottle: For gentle hydration.
- Plastic bags or a propagation dome: To create a humid environment.
- Labels and a marker: To keep track of your precious new plants.
Propagation Methods
Lady’s Mantle is wonderfully adaptable, and here are my go-to methods for coaxing new plants into being:
Stem Cuttings
This is my favorite, hands-down. It’s reliable and yields lovely new specimens.
- Take Your Cuttings: In late spring or early summer, select healthy, non-flowering stems. Using your sharp shears, take cuttings that are about 4-6 inches long. Make a clean cut just below a leaf node (where a leaf attaches to the stem).
- Prepare the Cuttings: Gently remove the lower leaves, leaving only the top couple of leaves. This prevents them from rotting when buried in the soil. You can then dip the cut end into rooting hormone, tapping off any excess.
- Plant Them: Fill your pots or trays with your well-draining potting mix. Make a small hole with a pencil or your finger and gently insert the cut end of the stem. Firm the soil around it.
- Create a Humid Environment: Lightly water the soil, then cover the pots with a plastic bag or a propagation dome. This keeps the humidity high, which is crucial for cuttings to form roots without drying out. Place them in a bright spot, but out of direct sunlight.
Division
This is the simplest method, especially if you already have a mature plant.
- Dig Up the Plant: In early spring, or even in the fall after flowering has finished, carefully dig up a mature Alchemilla clump. You want to loosen the soil around it with a trowel.
- Separate the Sections: Gently shake off excess soil. You’ll notice that the plant naturally grows in clumps. Using your hands or a trowel, carefully pull or cut the clump apart into smaller sections. Each section should have some healthy roots and at least a few stems.
- Replant: Immediately replant the divisions into their new locations in your garden or into pots filled with good soil. Water them in well.
The “Secret Sauce” (Pro Tips)
Here are a few little tricks I’ve learned over the years that can really boost your success rates:
- Cleanliness is Key: Always use sterilized tools and pots. This prevents the introduction of any nasty pathogens that could kill your cuttings before they even have a chance. A quick wipe with rubbing alcohol works wonders.
- Don’t Overwater the Soil: While humidity is important, soggy soil is the enemy. Your cuttings need to be kept moist, not waterlogged. If you can squeeze water out of the soil and it forms a solid ball, it’s too wet.
- Gentle Bottom Heat Works Wonders: If you have a heat mat designed for propagation, placing your pots on it can significantly speed up root development, especially if you’re propagating early in the season. It mimics the warmth of spring soil.
Aftercare & Troubleshooting
Once you see signs of new growth – tiny leaves unfurling or a gentle tug resistance when you lightly pull on a cutting – congratulations! You’ve got roots!
- Gradually Acclimate: Once your cuttings have developed a good root system, you’ll need to start acclimating them to open air. Gradually remove the plastic bag or dome for longer periods each day over a week.
- Potting Up: Once they’re used to being exposed, you can carefully pot them into their own individual pots with a good quality potting mix. Keep them watered and in a bright, but not direct, sunny spot.
- Watch for Rot: The most common issue you’ll face is rot. If your cuttings turn black and mushy, or if the soil stays waterlogged, that’s usually the culprit. This is why good drainage and careful watering are so important! If you catch something rotting, remove it immediately to prevent it from spreading to other cuttings.
A Encouraging Closing
Propagating plants is such a rewarding experience. It’s a testament to nature’s resilience and your own growing green thumb. Don’t be discouraged if you have a few failures along the way – I certainly have! Every gardener has them. Just keep trying, learn from each experience, and most importantly, enjoy the process of nurturing these little pieces of Alchemilla orbiculata into beautiful new plants. Happy propagating!
Resource:
https://identify.plantnet.org/k-world-flora/species/Alchemilla%20orbiculata%20Ruiz%20&%20Pav./data