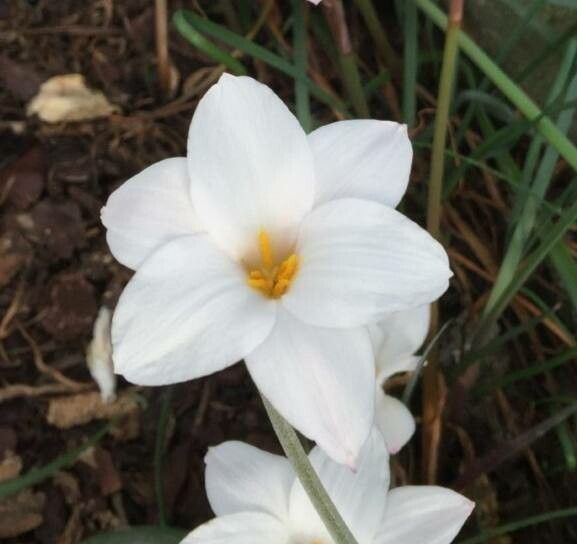
Oh, Zephyranthes drummondii! Also known as Autumn Zephyr Lily or Rain Lily. What a joy! These little bulbs pop up with such a cheerful burst of pink, often after a good rain, truly earning their name. They’re like nature’s surprise party in the garden! If you’ve ever admired these beauties and wished for more, you’re in luck. Propagating them is incredibly rewarding, and I’d say they’re quite beginner-friendly, which is always a bonus in my book.
The Best Time to Start
The absolute sweetest spot for propagating Zephyranthes drummondii is when they’re actively growing, typically in the late spring or early summer. This is when they’ve gathered plenty of energy from the sun and are ready to put it to good use, whether it’s flowering or, in our case, making more of themselves. You can also do it in early fall right before they go dormant, but spring giving them a whole growing season to establish is usually your best bet.
Supplies You’ll Need
Gathering your tools beforehand makes the whole process so much smoother. Here’s what I always have on hand:
- Sharp pruning shears or a clean knife: For clean cuts, no crushing!
- Well-draining potting mix: A mix of perlite, peat moss, and a bit of compost works wonders. You want it to feel light and airy.
- Small pots or seed trays: Something that fits your little divisions or bulbs comfortably. Make sure they have drainage holes!
- Optional: Rooting hormone: While not strictly necessary for Zephyranthes, it can give them an extra pep in their step.
- Optional: A pebble tray or shallow dish: For maintaining humidity.
- Labels and a marker: To keep track of what you planted and when.
Propagation Methods
Zephyranthes drummondii are quite agreeable and lend themselves well to a few simple techniques.
1. Division – My Go-To Method
This is the most straightforward and successful way to multiply your Zephyranthes.
- Gently unearth your established bulb. Do this during the growing season. Carefully dig around the base, and once you’ve loosened the soil, you should be able to lift the entire clump.
- Separate the offsets. You’ll often find little “baby” bulbs clustered around the main one. Gently tease these apart. Sometimes they come away easily; if they feel really attached, a clean knife or your shears can help you make a neat cut. Make sure each offset has at least a tiny bit of root attached if possible.
- Plant your new divisions. Place each offset in its own small pot filled with your well-draining mix. The top of the bulb should be just at or slightly below the soil surface.
- Water lightly. Don’t drench them; just moisten the soil to help settle it.
- Place in a bright spot. They’ll appreciate indirect sunlight while they recover.
2. Growing from Seed (More of a Project!)
This is a slower route, but it’s fascinating to watch the whole process unfold.
- Collect seeds. If your bulbs have flowered and gone to seed, wait until the seed pods mature and start to dry. Collect the tiny black seeds.
- Sow immediately. Zephyranthes seeds often have a better germination rate when sown fresh.
- Plant themshallowly. Sow the seeds in a seed tray filled with your potting mix. Just press them into the surface and lightly cover with a thin layer of soil.
- Keep moist and warm. They like consistent moisture and room temperature. A plastic dome or a piece of plastic wrap over the tray can help maintain humidity.
- Patience is key! It can take weeks or even months for these little guys to sprout. Once they do, treat them like tiny seedlings, providing bright, indirect light and water as needed. It will be a few years before they mature into flowering bulbs.
The “Secret Sauce” (Pro Tips)
Here are a few little tricks I’ve learned over the years that can really give your propagation efforts a boost.
- Don’t overwater the divisions initially. They don’t have a huge root system yet and can be prone to rot if kept too soggy. Think “moist” not “drenched.”
- Give them a bit of encouragement with a diluted feed. Once you see new leaf growth emerging from your divisions, a weak solution of liquid fertilizer (about half strength) can help them get established more quickly.
- Consider a warm spot for seeds. If you’re trying seeds and they seem sluggish, placing the seed tray in a slightly warmer location, perhaps on a heat mat set to a gentle warmth (around 70-75°F or 21-24°C), can sometimes speed up germination.
Aftercare & Troubleshooting
Once your divisions have started to show new growth, they’re well on their way! Continue to water them when the top inch of soil feels dry. They’ll appreciate bright, but indirect light. As they grow stronger, you can gradually introduce them to more direct sun.
The most common issue you might encounter is rot. This is usually due to overwatering, especially in the early stages. If you notice a bulb going soft, mushy, or turning black, it’s likely succumbed to rot. Remove it immediately to prevent it from spreading. Good drainage is your best defense against this. If you’re growing from seed and see a fuzzy white or grey growth on the soil surface, that’s also a sign of too much moisture and potential fungal issues.
A Encouraging Closing
Propagating Zephyranthes drummondii is a lovely way to fill your garden with more of their charming blooms. Be patient with the process, especially if you’re trying from seed. Nature has her own rhythm, and watching those tiny bulbs or seeds transform into new life is an incredibly satisfying journey. Now, go on and get your hands dirty – happy propagating!
Resource:
https://identify.plantnet.org/k-world-flora/species/Zephyranthes%20drummondii%20D.Don/data