Oh, hello there! Come on in, pull up a chair. I’ve got a fresh pot of coffee brewing, and today, we’re going to talk about a truly special plant: Yeatesia viridiflora.
Falling for Yeatesia viridiflora
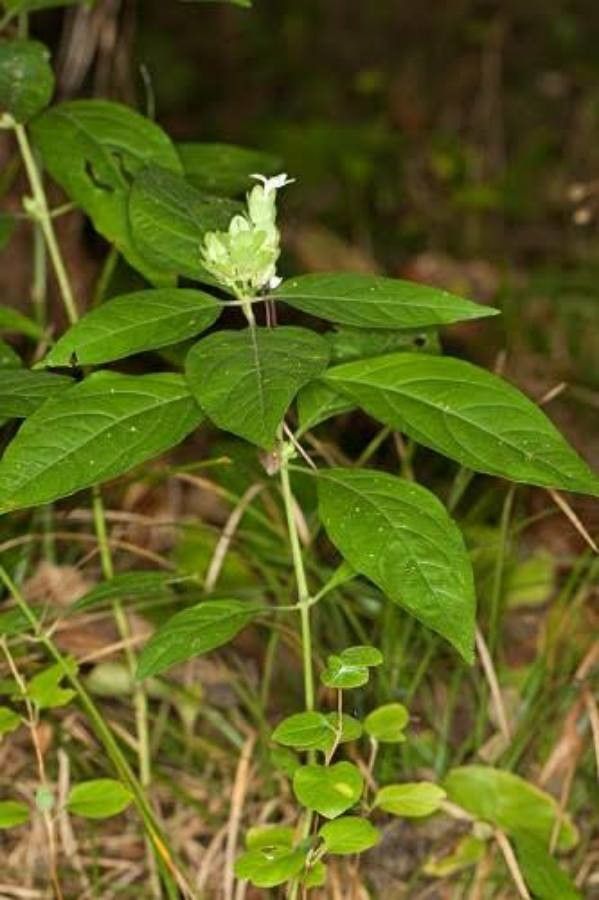
If you’ve ever seen Yeatesia viridiflora gracing a garden or a friend’s windowsill, you know exactly what I mean. Its lush, green foliage and charming, often delicate, little flowers are just so captivating. It brings a touch of almost jungle-like elegance without being fussy. And the best part? You can have more of these beauties without having to break the bank. Propagating plants is one of my greatest joys, and Yeatesia is a wonderful candidate to try your hand at. Now, is it a cinch for absolute beginners? Honestly, it can be a little tricky, but with a few pointers, you’ll be well on your way to success.
The Best Time to Start
When it comes to getting new plant babies from Yeatesia viridiflora, spring is your golden season. As the days get longer and warmer, and your plant starts putting out that vigorous new growth, it’s the perfect time to take cuttings. This is when the plant is actively producing energy and hormones that will help those cuttings root successfully. You can sometimes have luck in late summer, but spring is definitely the prime time for me.
Supplies You’ll Need
Before we get our hands dirty, let’s gather our tools. Having everything ready makes the process so much smoother.
- Sharp Pruning Shears or a Clean Knife: For making clean cuts.
- Small Pots or Seed Trays: Clean ones are a must!
- Propagation Potting Mix: I like a blend of perlite and seed-starting mix (about a 50/50 ratio). It drains wonderfully and offers good aeration. Avoid heavy garden soil.
- Rooting Hormone (Optional but Recommended): A powder or gel can give your cuttings a significant boost.
- Clear Plastic Bags or a Propagator Lid: To create a humid environment.
- Watering Can with a Fine Rose: For gentle watering.
- Small Labels: To keep track of what you’ve propagated and when!
Propagation Methods: Stem Cuttings
For Yeatesia viridiflora, I find stem cuttings to be the most reliable and straightforward method.
- Find Healthy Growth: Look for a healthy, non-flowering stem on your established plant. You want a piece that’s about 4-6 inches long.
- Make the Cut: Using your clean shears or knife, make a clean cut just below a leaf node. A leaf node is where a leaf emerges from the stem. This is where rooting hormones are most concentrated.
- Prepare the Cutting: Gently remove the lower leaves, leaving just a couple of leaves at the very top. If the leaves are quite large, you can even cut them in half horizontally to reduce water loss. This is important!
- Apply Rooting Hormone: If you’re using it, dip the cut end of the stem into the rooting hormone powder or gel, tapping off any excess.
- Plant Your Cutting: Fill your small pots with your propagation mix. Make a small hole with your finger or a pencil, and then gently insert the cut end of the stem into the soil. Firm the soil gently around it.
- Water Gently: Water the potting mix thoroughly but gently, until water drains from the bottom.
- Create Humidity: Place a clear plastic bag loosely over the pot (making sure the leaves don’t touch the plastic if possible) or put the pot inside a propagator with the lid on. This keeps the humidity high, which is crucial for cuttings.
- Provide Light and Warmth: Place the pot in a bright spot, but out of direct sunlight. A warm location is also beneficial.
The “Secret Sauce” (Pro Tips)
After years of playing with plants, I’ve picked up a few tricks that often make all the difference.
- Bottom Heat is Your Friend: For truly stubborn cuttings, a propagation mat placed underneath the pots can work wonders. It keeps the soil consistently warm, which signals the plant to start rooting more enthusiastically. You don’t need it to be piping hot, just comfortably warm.
- The “Air Layering” Trick: If you have a mature stem that’s just too precious to cut off completely, try air layering. Make a small incision on a healthy stem, just below a node, and pack a bit of moist sphagnum moss around the wound. Wrap this tightly with plastic wrap and secure it. Roots will form within the moss, and then you can cut the stem below the roots and pot it up. It’s a bit more involved, but incredibly effective for woody plants.
- Don’t Overwater! This is probably the biggest mistake I see. While humidity is key, soggy soil is an invitation for rot. Let the surface of the soil dry out slightly between waterings. You can often tell by the weight of the pot.
Aftercare & Troubleshooting
Once your cuttings have been planted, patience is key. It can take anywhere from a few weeks to a couple of months for roots to develop. You can gently tug on a cutting; if you feel resistance, you likely have roots!
- Acclimatize: Once you see new leaf growth, it’s a good sign roots have formed. Gradually acclimate your new plant to normal room humidity by opening the plastic bag or propagator lid a little more each day over a week.
- Potting Up: When the roots are well-established and the plant is growing actively, you can move it to a slightly larger pot with regular potting mix.
- Troubleshooting: The most common problem is rot. If a cutting turns black and mushy, it’s usually due to too much moisture in the soil and insufficient drainage. If you see signs of wilting and there’s no new growth, it might just need more time or a bit more warmth. Sometimes, a cutting just doesn’t make it, and that’s okay! Just try again.
Keep Growing!
Propagating Yeatesia viridiflora is a rewarding journey. It allows you to share your love for these beautiful plants and expand your own green collection. Don’t get discouraged if your first attempt isn’t perfect. Gardening is all about learning, experimenting, and enjoying the process. Happy propagating!
Resource:
https://identify.plantnet.org/k-world-flora/species/Yeatesia%20viridiflora%20(Nees)%20Small/data