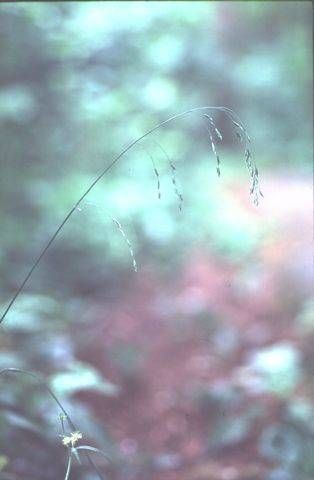
Oh, hello there! Pull up a chair, let’s chat about something truly delightful in the garden: Poa marcida. This lovely grass, with its delicate, arching habit and soft, verdant foliage, brings such a gentle grace to any planting. It’s the kind of plant that whispers tranquility, perfect for softening edges, spilling over a pot, or creating a misty, naturalistic feel amongst more structured plants.
And the best part? It’s wonderfully rewarding to propagate! If you’ve ever admired its charm and wished you had more, you’re in luck. For those of you just dipping your toes into the world of plant propagation, I’d say Poa marcida is a pretty forgiving friend. It’s not going to throw too many curveballs, making it a great plant to practice your newly acquired skills on.
The Best Time to Start
When it comes to getting the most bang for your buck with propagation, spring and early summer are your golden ticket. This is when the plant is actively growing, brimming with energy, and bursting to create new life. Aim for a time when the weather is mild, not too hot or too cold, and where you’ve got consistent, gentle warmth. Trying to propagate when the plant is dormant or stressed just makes it harder on everyone involved, including you!
Supplies You’ll Need
Before we get our hands dirty, let’s gather our tools. Having everything ready makes the process so much smoother.
- Sharp Pruning Shears or a Craft Knife: Cleanliness is key!
- Well-draining Potting Mix: I like a blend of seed-starting mix and perlite – roughly 50/50. It’s light and airy, which is exactly what those little roots crave.
- Small Pots or Propagation Trays: Whatever you have, just make sure they have drainage holes.
- Watering Can with a Fine Rose: For gentle watering.
- Rooting Hormone (Optional but Recommended): A simple powder or gel can give your cuttings an extra boost.
- Plastic Bags or a propagator: To create a humid environment.
Propagation Methods
Now for the fun part! Poa marcida is wonderfully adaptable, and I find division to be my go-to method, especially for established clumps.
1. Division: The Gardener’s Delight
This is my absolute favorite because it’s so straightforward and you get a decent-sized plant straight away.
- Step 1: Gently Uproot. Carefully dig up an established clump of your Poa marcida. Try to disturb the roots as little as possible, but be prepared to get your hands in the soil!
- Step 2: Clean the Roots. Gently shake off excess soil from the root ball. You want to be able to see where the main clump divides.
- Step 3: The Gentle Pull. With clean hands, or using a trowel or knife if the clump is particularly dense, carefully separate the clump into smaller sections. Each section should have a good amount of roots and some healthy green shoots. Don’t be afraid to be a little firm, but avoid tearing roots unnecessarily.
- Step 4: Replant! Immediately pot up these new divisions into your well-draining potting mix. Water them in gently.
2. Stem Cuttings: For the Patient Propagator
This method takes a bit more time, but it’s a great way to get lots of little plants from a single specimen.
- Step 1: Make the Cut. Using your sharp shears or knife, take a healthy stem cutting about 3-4 inches long. Make the cut just below a leaf node (where a leaf attaches to the stem).
- Step 2: Prepare the Cutting. Gently remove the lower leaves from the cutting, leaving just a few at the top. This reduces moisture loss.
- Step 3: Dip and Plant. If you’re using rooting hormone, moisten the cut end of the stem and dip it into the powder or gel. Then, carefully insert the cut end into your prepared potting mix. Make a little hole with your finger or a pencil first to avoid rubbing off the hormone.
- Step 4: Create Humidity. Water the soil lightly. Then, cover the pot with a plastic bag or place it in a propagator. This creates a mini greenhouse, keeping the humidity high, which is crucial for forming roots.
The “Secret Sauce” (Pro Tips)
Here are a couple of little tricks I’ve picked up over the years that can really make a difference:
- Don’t drown your cuttings! When watering your potted cuttings, aim to keep the soil consistently moist, but not soggy. Overwatering is a fast track to rot, and nobody wants that. If a plastic bag is trapping too much moisture, just lift it for an hour or so to let things air out.
- Consider a little warmth. If your propagation area tends to be on the cooler side, placing your pots on a heat mat can significantly speed up root formation, especially for cuttings. It mimics the gentle warmth of spring.
Aftercare & Troubleshooting
Once your Poa marcida starts to show signs of new growth – tiny shoots emerging or the leaves looking perkier – you know you’re on the right track.
- Gradual Acclimation. If you’ve used a plastic bag or propagator, gradually remove it over a few days. This helps the new plant adjust to the drier air of your home or greenhouse.
- Light and Water. Keep the new plants in bright, indirect light. Continue to water gently, allowing the top inch of soil to dry out between waterings.
- Watch for Rot. The biggest culprit for failure is rot. If your cuttings start to look mushy, turn black, or fall over, it’s usually a sign of too much moisture and poor air circulation. Don’t despair; just learn from it and try again! Sometimes, a stem cutting might just fail to root – it’s part of the process.
A Encouraging Closing
See? It’s really not as daunting as it might seem! Propagating Poa marcida is a wonderful way to multiply your greenery and share the beauty of this plant with friends. Be patient with yourself and the plants. Enjoy the gentle unfurling of new life, and don’t be afraid to experiment a little. Happy propagating!
Resource:
https://identify.plantnet.org/k-world-flora/species/Poa%20marcida%20Hitchc./data