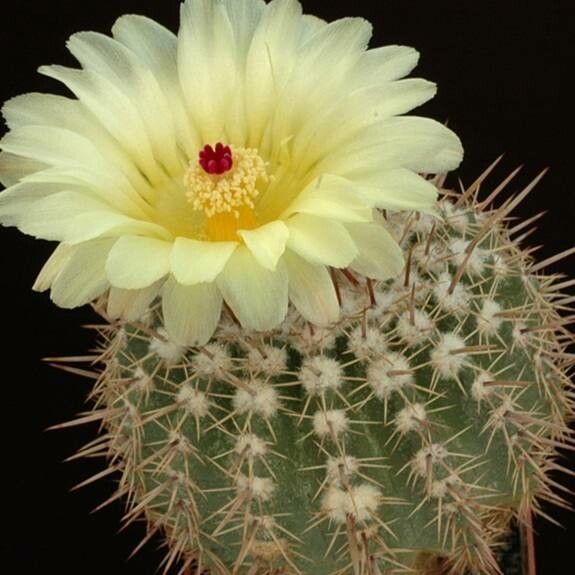
Hello there, fellow plant enthusiasts! I’m thrilled to share my passion for the captivating world of cacti with you today. If you’ve ever admired the stunning globes of Parodia allosiphon, with their intricate spines and vibrant flowers, you’re in for a treat. Propagating these beauties isn’t just about creating more plants; it’s about witnessing a little bit of botanical magic unfold in your own home. And guess what? While they might seem a touch exotic, Parodia allosiphon is actually quite forgiving, making it a wonderful project for beginners and seasoned growers alike.
The Best Time to Start
When it comes to coaxing new life from your cactus, timing is everything. For Parodia allosiphon, the absolute best time to begin propagation is during its active growing season. Think late spring through summer. This is when the plant has the most energy reserves to invest in root development. You’ll notice new growth, and this is your cue that it’s ready to share its bounty.
Supplies You’ll Need
Before we dive in, let’s gather our tools. Having everything ready makes the process much smoother:
- Sharps and sterile pruning shears or a sharp knife: Cleanliness is paramount to prevent disease.
- Well-draining cactus or succulent potting mix: A blend of potting soil, perlite, and coarse sand works wonders. Look for mixes specifically formulated for cacti.
- Rooting hormone (optional but recommended): This can give your cuttings a helpful boost.
- Small pots or seed trays: Ensure they have adequate drainage holes.
- Gravel or small pebbles: For covering the soil surface and providing extra drainage.
- A watering can with a fine spout or a spray bottle: Gentle watering is key.
- Gloves (optional): Those spines can be prickly!
Propagation Methods
Parodia allosiphon is wonderfully amenable to propagation, primarily through offsets or pups. These are the little baby cacti that grow from the base of the parent plant.
Propagating Offsets (Pups): This is the easiest and most successful method for Parodia allosiphon.
- Gently examine your mature Parodia allosiphon. Look for small, offshoot plants that have emerged from the base. These are your pups!
- Wait for the pup to be a decent size, ideally at least an inch in diameter and showing some signs of its own root development.
- Carefully detach the pup from the parent plant. Use your sterile pruning shears or knife to make a clean cut as close to the base of the parent as possible. Wiggling it gently can sometimes help loosen it.
- Allow the cut end to callus over. This is a critical step to prevent rot. Place the separated pup in a dry, well-ventilated spot away from direct sunlight for several days to a week, or until the cut surface is completely dry and hardened. You’ll see a dry, whitish layer form.
- Prepare your pot. Fill a small pot with your well-draining cactus mix.
- Plant the pup. You can lightly press the callused end into the surface of the soil. Some growers like to insert a toothpick or two for gentle support if the pup is a bit wobbly, but it’s usually not necessary.
- Do NOT water immediately. Wait for about another week after planting before giving it its first light watering. This gives any tiny nicks from planting time a chance to heal.
The “Secret Sauce” (Pro Tips)
Here are a couple of insider tricks I’ve learned over the years that really make a difference:
- Don’t rush the callusing. I know it’s tempting to plant those pups right away, but that dry, callused surface is your best defense against rot. Seriously, give it time! It’s like the plant’s own natural bandage.
- Bottom heat is your friend. If you’re propagating in a cooler environment, consider using a seedling heat mat placed underneath the pots. This gentle warmth encourages root growth and significantly improves your success rate, especially for those stubborn propagations.
Aftercare & Troubleshooting
Once your Parodia allosiphon pup has started to develop roots – you’ll know this because it will feel more stable and you might even see a tiny bit of soil clinging to it if you gently tug – you can gradually introduce it to more regular care.
- Watering: Water sparingly at first. Let the soil dry out completely between waterings. For young plants, this might mean watering every 2-3 weeks during the growing season, and much less in winter.
- Light: Place the new plant in bright, indirect light. Avoid harsh, direct sun for the first month or so while it establishes.
- Signs of Trouble: The most common issue you’ll encounter is rot. If your pup starts to look mushy, discolored (often black or dark brown), or starts to collapse, it’s likely rot. This is usually due to overwatering or insufficient callusing. Unfortunately, if rot sets in, it can be very difficult to save. If you catch it very early, you might be able to cut away the rotted parts and try to re-root the healthy section, but it’s a race against time.
A Little Patience Goes a Long Way
Propagating plants is a journey, and like any good journey, it requires a bit of patience. Don’t get discouraged if your first attempt isn’t a roaring success. Observe your plant, learn from each step, and enjoy the process of nurturing these little green wonders. Happy propagating!
Resource: