Oh, hello there! I’m so delighted you’re curious about Orcuttia tenuis. It’s one of those gems that makes my heart sing, and I can’t wait to share how you can bring more of this beauty into your own garden.
An Introduction to Orcuttia tenuis and the Joy of Propagation
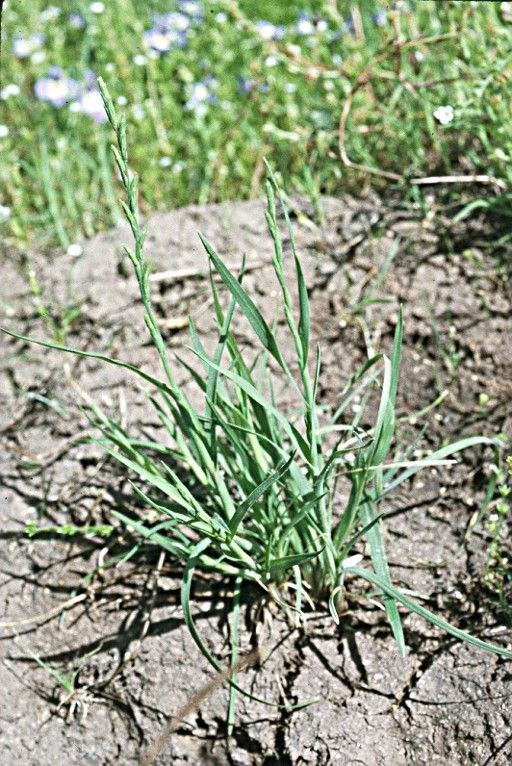
Isn’t Orcuttia tenuis just stunning? Its delicate, almost ethereal foliage and unique charm make it a real standout. For me, propagating it is like unlocking a little bit of plant magic. It’s incredibly satisfying to nurture a tiny slip of a plant into a robust new specimen. Now, I won’t sugarcoat it – Orcuttia tenuis can be a tad finicky for absolute beginners, but with a little patience and the right approach, you’ll be well on your way. Don’t let that deter you; the rewards are absolutely worth the effort!
When to Get Your Hands Dirty: The Best Time to Start
Timing is everything in gardening, and for Orcuttia tenuis, the late spring to early summer is your golden window. This is when the plant is actively growing and has the energy reserves to push out new roots. You’ll want to start when the parent plant is healthy and vibrant, not stressed from extreme heat or cold. Look for new growth that’s firm but not yet woody.
Gathering Your Garden Arsenal: Supplies You’ll Need
Before we dive in, let’s ensure you have everything ready. It’s always best to be prepared!
- Sharp, Clean Pruning Shears or a Craft Knife: Sterilize them with rubbing alcohol to prevent disease.
- Well-Draining Potting Mix: A good blend of perlite, peat moss, and a bit of horticultural sand works wonders. You want aeration!
- Small Pots or Seedling Trays: Ensure they have drainage holes.
- Rooting Hormone Powder (Optional but Recommended): This gives your cuttings a little boost.
- A Spray Bottle: For gentle misting.
- Clear Plastic Bags or a Propagation Dome: To create a humid environment.
- A Small Trowel or Dibber: For making holes in the soil.
Unlocking New Life: Propagation Methods
Orcuttia tenuis is best propagated through stem cuttings. It’s the most reliable method I’ve found for this particular plant.
-
Take Your Cuttings: On a bright, clear morning, select healthy stems from your mature Orcuttia tenuis. Look for stems that are about 4-6 inches long and have at least a couple of sets of leaves. Using your sterilized shears, make a clean cut just below a leaf node. A leaf node is that little bump where a leaf meets the stem – it’s where the magic happens for root formation! Gently remove the lower leaves, leaving one or two sets at the top. If the leaves are large, you can even cut them in half to reduce water loss.
-
Prepare for Rooting: If you’re using rooting hormone, dip the cut end of the stem into the powder, tapping off any excess. This helps stimulate root development.
-
Planting the Cuttings: Fill your chosen pots or trays with your well-draining potting mix. Make a small hole with your trowel or finger, large enough for the stem. Gently insert the cutting into the hole, ensuring the leaf nodes that were below the soil line are covered. Firm the soil gently around the base of the cutting to ensure good contact.
-
Creating the Humid Environment: This is crucial! Lightly mist the cuttings and the soil with your spray bottle. Then, cover the pots with a clear plastic bag or place them under a propagation dome. This cocoons your cuttings in a humid microclimate, preventing them from drying out while they focus on growing roots.
The Gardener’s Little Secrets: “Secret Sauce” Pro Tips
Now for a couple of tricks I’ve picked up over the years that often make a big difference.
- Don’t Let the Leaves Touch the Water: When you mist, be gentle. If any leaves are sitting in standing water inside the pot, they’re highly prone to rot. Always try to keep the leaves above the soil surface.
- Bottom Heat is Your Friend: If you have a heating mat designed for seedlings, placing your pots on it can significantly speed up root formation. That gentle warmth mimics spring soil and encourages those roots to push out with gusto. It’s a game-changer for many plants, and Orcuttia tenuis is no exception!
Nurturing New Growth & Navigating Hiccups: Aftercare & Troubleshooting
Once your cuttings are planted, place them in a bright spot with indirect sunlight. Avoid direct sun, which can scorch those delicate new shoots. Keep the soil consistently moist but not waterlogged. Think of it like a wrung-out sponge – damp, but not dripping. You’ll want to open the plastic bag or dome for a few minutes each day to allow for air circulation and prevent mold.
Signs of success are new leaf growth or a gentle tug resistance when you (very carefully!) try to wiggle the cutting. It usually takes several weeks, sometimes a couple of months, for roots to establish.
The most common issue you might encounter is rot. If you notice mushy, brown stems or leaves, it’s usually a sign of too much moisture. In such cases, try to increase airflow slightly, and if it’s severe, you may need to discard the affected cutting. Don’t be discouraged; it happens even to the most seasoned gardeners!
Keep Planting, Keep Growing!
Propagating Orcuttia tenuis is a journey, and like any good journey, it requires a little patience. Celebrate the small milestones – the first tiny leaf unfurling, the subtle resistance when you test for roots. Enjoy the process, connect with your plants, and soon you’ll be surrounded by even more of this delightful greenery. Happy gardening!
Resource:
https://identify.plantnet.org/k-world-flora/species/Orcuttia%20tenuis%20Hitchc./data