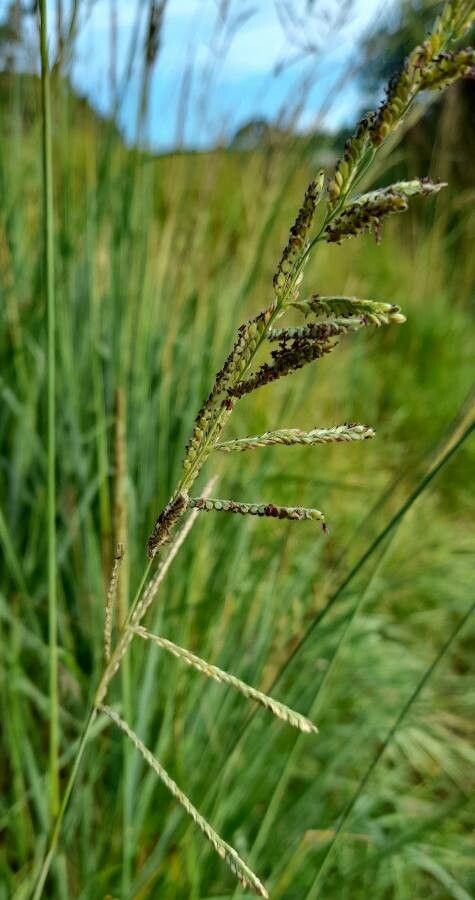
Hello fellow plant lovers! I’m so glad you stopped by today. We’re going to talk about a grass that’s captured my heart over the years: Paspalum urvillei, often called Vasey’s grass or, more affectionately, our lovely upright Paspalum. It’s got this graceful, architectural presence that can really elevate a garden design. Plus, the way it dances in the breeze is just pure magic.
Now, you might be wondering about propagating it. Is it a fussy affair? Honestly, I find Paspalum urvillei to be quite a forgiving plant, making it a wonderful candidate for beginner gardeners looking to expand their collection without a lot of stress. There’s a special kind of satisfaction that comes from nurturing a new life from a piece of an existing one. It’s like a little gardening superpower!
The Best Time to Start
For the highest success rates, I’ve found that the late spring to early summer is your sweet spot. The days are getting longer, the soil is warming up, and the plant is actively growing. This vigorous growth phase gives your new cuttings or divisions the best kickstart. Trying to propagate when the plant is dormant or during the heat of high summer can be a bit more challenging.
Supplies You’ll Need
Gathering your tools beforehand makes the whole process smoother. Here’s what I typically have on hand:
- Sharp pruning shears or a clean knife: For making neat cuts.
- Rooting hormone (optional but helpful): Especially if you’re doing stem cuttings.
- Well-draining potting mix: I like to use a blend of peat moss, perlite, and a bit of compost. A standard houseplant mix with added perlite works well too.
- Small pots or seed trays: With drainage holes, of course!
- Watering can with a fine rose: For gentle watering.
- Plastic bags or a propagation dome: To maintain humidity.
- Labels: So you don’t forget what you’ve planted!
Propagation Methods
Paspalum urvillei is delightfully versatile. The easiest and most common ways to propagate it are through division and stem cuttings.
Division (My Go-To!)
This is incredibly straightforward for Paspalum urvillei.
- Dig it up: In late spring or early summer, carefully dig up the entire plant. You might need a garden fork to gently loosen the soil around the root ball.
- Clean the roots: Gently brush away excess soil so you can see the root structure and rhizomes clearly.
- Separate the clumps: Look for natural divisions. You can often pull apart sections of the plant with your hands. If it’s a bit stubborn, use your clean knife or pruning shears to cut between the clumps. Make sure each division has plenty of healthy roots and at least a few shoots.
- Replant: Immediately replant your divisions directly into their new homes. Whether that’s back into the garden or into pots, ensure they have good drainage. Water them well.
Stem Cuttings
This method can be a bit slower, but it’s very rewarding.
- Take cuttings: Select healthy, non-flowering stems that are about 4-6 inches long. Make a clean cut just below a leaf node (where a leaf attaches to the stem).
- Prepare the cuttings: Gently remove the lower leaves, leaving just a couple at the top. If you’re using rooting hormone, dip the cut end into it.
- Plant the cuttings: Fill your pots with your well-draining potting mix. Make a small hole with a pencil or your finger and insert the cut end of the stem. Gently firm the soil around it.
- Create a humid environment: Water the soil lightly. Then, cover the pots with a plastic bag or a propagation dome. You want to create a mini-greenhouse effect.
The “Secret Sauce” (Pro Tips)
Here are a few little tricks I’ve picked up over the years that can make a big difference:
- For stem cuttings, avoid letting the leaves touch the water if you were to try water propagation (though I don’t recommend it for Paspalum). This can lead to rot. When using soil, this means making sure the soil surface is clear of lower leaves.
- Bottom heat can be a game-changer for stem cuttings. If you have a heated propagation mat, placing your pots on it can significantly speed up root development. The warmth encourages root growth from below.
- Don’t be afraid to be a little ruthless with established plants during division. Sometimes a good tug or a sharp cut is all it takes to separate healthy sections. The plant is robust and will bounce back.
Aftercare & Troubleshooting
Once your divisions are planted, keep them consistently moist but not waterlogged. For stem cuttings, check the soil moisture regularly. You want it to feel like a wrung-out sponge. Keep the humidity high by misting gently or ensuring your covers are still effective.
The first sign of success is usually new leaf growth. This tells you that roots have formed and the plant is getting established.
Troubleshooting: The most common issue you might run into is rot, especially with stem cuttings if they’re kept too wet or lack airflow. Look for stems that turn mushy and dark. If you see this, sadly, that cutting is likely lost. Discard it and ensure the remaining ones have better air circulation. For divisions, if the plant wilts dramatically and doesn’t perk up after watering, it might not have established enough roots, or it could be planted too deep.
A Little Encouragement
Watch your new Paspalum urvillei grow! Propagation is a journey, and like any good journey, it requires a bit of patience. Don’t get discouraged if not every single cutting or division thrives. Sometimes plants just have their own way of doing things! Celebrate the successes, learn from any stumbles, and most importantly, enjoy the magic of growing more of this beautiful grass. Happy gardening!
Resource:
https://identify.plantnet.org/k-world-flora/species/Paspalum%20urvillei%20Steud./data