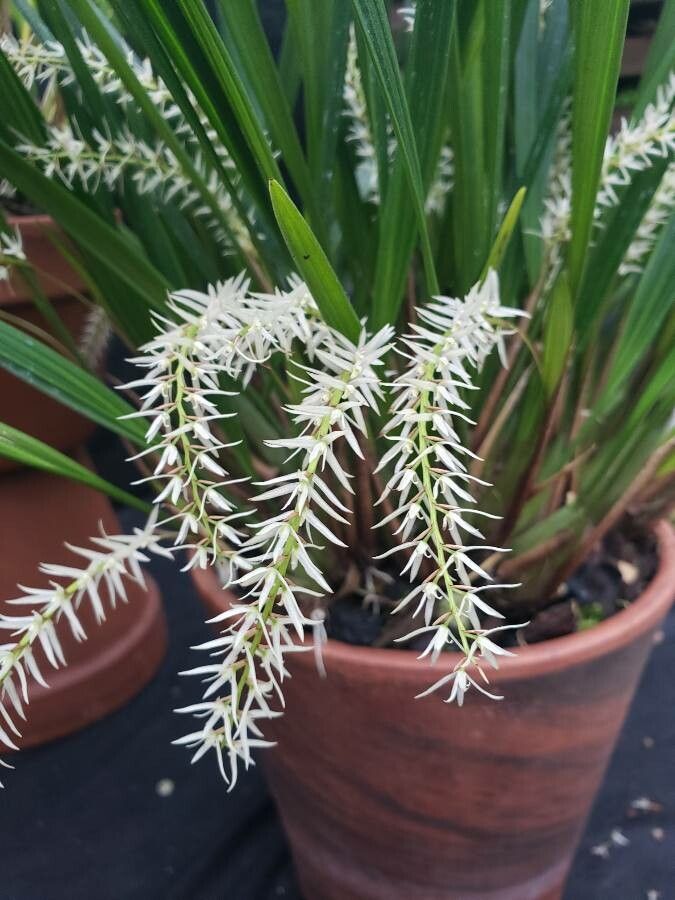
Oh, hello there! Pull up a chair and let’s talk orchids. If you’ve ever admired the delicate beauty of a Coelogyne species, you know how special they are. Today, we’re diving into propagating Coelogyne uncatta. Now, if you’re new to the orchid world, I’ll be honest, Coelogyne uncatta might present a slight learning curve. But don’t let that deter you! The reward of nurturing a new life from an existing plant is simply immense. Think of it as graduating to a new level of orchid care – it’s incredibly fulfilling.
The Best Time to Start
For Coelogyne uncatta, the absolute sweet spot for propagation is when the plant is actively growing, typically after it has finished flowering. This usually falls in the spring or early summer. You’ll see new pseudobulbs starting to swell, and potentially new roots emerging. This is when the plant has plenty of energy to invest in establishing new growth. Trying to propagate when it’s dormant is like asking a sleepy person to run a marathon – not ideal for anyone!
Supplies You’ll Need
Here’s what you’ll want to have on hand to make this process smooth sailing:
- Sharp, sterilized pruning shears or a sterile knife: Cleanliness is paramount in orchid propagation.
- A good quality orchid potting mix: This should be airy and well-draining. I like a mix of bark, perlite, and a little bit of sphagnum moss.
- New pots or containers: Small ones, just big enough for your new divisions.
- Sphagnum moss: Great for retaining a bit of moisture for new roots.
- Watering can or mister: Gentle watering is key.
- Optional: Rooting hormone: While not always strictly necessary for Coelogyne uncatta, it can give an extra boost.
- Optional: Clear plastic bags or a propagation tent: To help maintain humidity.
Propagation Methods
The most reliable and straightforward way to propagate Coelogyne uncatta is through division. These orchids grow in clusters, and that’s exactly what we’ll be working with.
- Gently remove the orchid from its pot. You might need to coax it a bit if it’s tightly rooted. If the old potting mix is really dense, you can gently wash away some of it under running water to get a clearer view of the root structure and pseudobulbs.
- Examine your orchid. Look for sections that have at least two or three healthy pseudobulbs and a good set of roots. You’ll want to identify where the rhizome (the creeping stem that connects the pseudobulbs) can be cleanly separated.
- Using your sterilized shears or knife, carefully cut through the rhizome. Make a clean cut. Don’t be afraid to get in there, but be deliberate and avoid tearing. Try to get a section with at least two good pseudobulbs and some healthy-looking roots. The more roots, the better the chances, but healthy pseudobulbs are crucial.
- If using rooting hormone, you can dip the cut end of the rhizome. This step is more for reassurance than necessity here.
- Pot up your new divisions. Place each division into its own small pot. I like to use a pot that’s just slightly larger than the root ball of the division.
- Backfill with your orchid potting mix. You want the pseudobulbs to be sitting just at the surface of the mix, not buried. This helps prevent rot.
- Water gently. A light misting or a gentle watering to settle the mix is usually enough initially. You don’t want to drench it.
The “Secret Sauce” (Pro Tips)
Here’s a little something extra from my experience that often makes a difference:
- Don’t be too eager to repot that division. Resist the urge to poke around the roots too much in the first few weeks. Let it settle in. Disturbing tiny new roots can set it back significantly.
- Consider bottom heat. If you have a heating mat for seedlings, placing your newly potted divisions on it can really encourage root development. Just make sure the temperature stays around 70-75°F (21-24°C). It’s like giving them a warm hug to get them started.
- Humidity is your friend. Coelogyne uncatta loves humidity, especially when it’s trying to establish. If you’re in a dry climate, covering the pot with a clear plastic bag (with a few air holes poked in it) or placing it in a propagation tent can create a lovely humid microclimate.
Aftercare & Troubleshooting
Once your new Coelogyne uncatta is potted, the real nurturing begins.
- Watering: Water only when the potting mix is starting to dry out. Stick your finger in an inch or so. It’s better to underwater a bit than to overwater and risk rot.
- Light: Place it in bright, indirect light but avoid direct, scorching sun.
- Air Circulation: Good air movement is essential to prevent fungal issues. Don’t keep it sealed up too tightly for too long.
Now, what if things don’t look quite right? The most common issue you’ll see is rot. This usually shows up as a mushy, dark brown or black rot at the base of the pseudobulbs or on the rhizome. If you spot it, you’ll need to act fast. Remove the affected parts with your sterilized tool, and consider repotting into fresh, drier mix. Sometimes, you might notice the pseudobulbs starting to shrivel. This can be a sign that the plant isn’t getting enough water or isn’t establishing roots. Try increasing humidity a tiny bit and ensure the mix isn’t bone dry.
Keep Nurturing
Propagating orchids is a journey, not a race. Be patient with your new Coelogyne uncatta. Watch for new leaf growth and signs of root activity. Don’t get discouraged if it takes a little while. The satisfaction of seeing your efforts bloom into a thriving new plant is truly one of the greatest joys in gardening. Happy propagating!
Resource: